Best Foam Rolling Techniques for IT Band Syndrome (With Pictures)

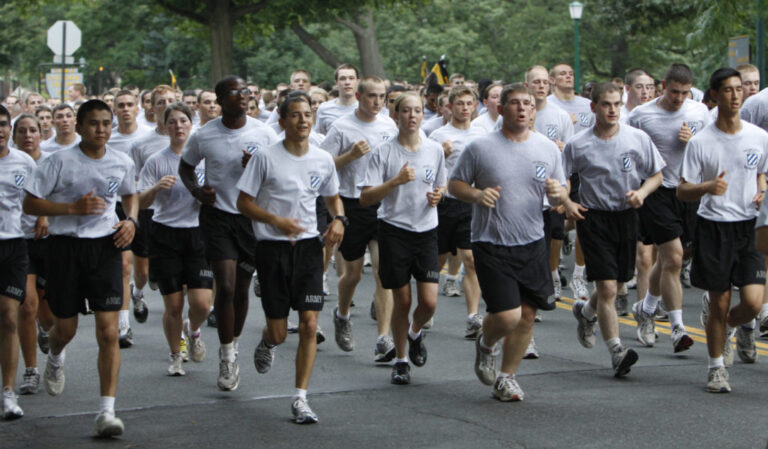
IT band syndrome affects countless runners, cyclists, and active people every day. The sharp pain on the outside of your knee can stop you in your tracks. Many folks reach for a foam roller hoping for quick relief.
But here’s the thing. Rolling directly on your IT band might not give you the results you want. This thick connective tissue running down the outside of your thigh doesn’t respond well to direct pressure.
The good news? Proper foam rolling techniques targeting the right muscles can bring real relief. This guide shows you exactly how to use foam rolling for IT band syndrome recovery. You’ll learn which areas to focus on, how to roll safely, and what mistakes to avoid.
Get Your Free IT Band Recovery Guide: Want a complete recovery plan? Download our comprehensive guide with daily routines, stretches, and progressive exercises designed specifically for IT band syndrome relief.
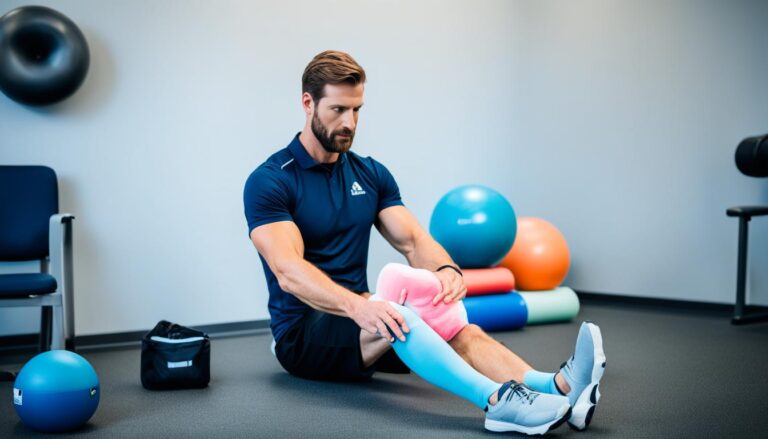
IT band syndrome happens when this tissue becomes tight or inflamed. The friction against your knee bone causes pain. Most people feel this pain on the outside of the knee, especially during running or walking.
What Causes IT Band Pain and Tightness
Several muscles contribute to IT band tightness. Your tensor fascia latae connects directly to the band at your hip. Tight hip flexors pull on surrounding tissues. Weak glutes fail to stabilize your pelvis properly.
When these muscles get tight, they create tension in the band. This tension leads to pain, especially at the knee. The tightness band connection means treating surrounding muscles matters more than rolling the band itself.
Common Risk Factors
- Running on sloped surfaces or tracks
- Sudden increases in training intensity
- Weak hip abductor muscles
- Poor running form or biomechanics
- Inadequate warm-up routines
Typical Symptoms
- Sharp pain outside the knee
- Tightness along outer thigh
- Pain that worsens with activity
- Tenderness when pressing the area
- Reduced range of motion in hip
Why Direct IT Band Rolling May Not Help
Many people roll directly on their IT band seeking relief. This approach often disappoints. The band itself is extremely dense connective tissue, not muscle tissue.
Applying pressure to this tough fascia rarely changes its length. In fact, aggressive rolling can increase inflammation. The pain you feel during direct band rolling doesn’t equal effective treatment.
A physical therapist will tell you to focus elsewhere. Target the muscles that attach to and influence the band instead. This strategy brings better results with less discomfort.
Choosing the Right Foam Roller for IT Band Recovery

The right foam roller makes a significant difference in your recovery. Different roller types serve different purposes. Your choice depends on pain sensitivity, experience level, and specific needs.
Foam Roller Density and Texture Options
Foam rollers come in several density levels. Soft rollers work well for beginners or people with high pain sensitivity. Medium-density rollers offer the best balance for most users. Firm rollers provide deeper tissue work for experienced individuals.
Surface texture matters too. Smooth rollers give even pressure across the muscle. Textured or grid-pattern rollers target specific trigger points. Some people prefer vibrating rollers for enhanced muscle relaxation.

Standard Smooth Roller
Best for beginners and general muscle recovery. Medium density provides comfortable pressure without excessive pain. Works well for larger muscle groups like quads and hamstrings.
- Gentle on sensitive areas
- Even pressure distribution
- Affordable option
- Ideal for daily use

Textured Grid Roller
Designed for targeted muscle work and trigger point therapy. The grid pattern mimics massage therapist hands. Excellent for experienced users seeking deeper tissue work.
- Targets specific tight spots
- Deeper muscle penetration
- Durable construction
- Professional-grade quality

Vibrating Roller
Combines traditional rolling with vibration therapy. The vibrations help muscles relax faster and may reduce rolling discomfort. Battery-powered convenience for home or gym use.
- Enhanced muscle relaxation
- Variable intensity settings
- Reduces rolling time needed
- Great for recovery days
Additional Recovery Tools to Consider
Foam rollers work great, but other tools complement your routine. A massage ball targets smaller areas around the hip. A massage stick offers more control for self-treatment. These tools help you address tight spots that rollers might miss.
Resistance bands strengthen weak hip muscles. A yoga strap assists with stretching tight areas. Building a complete toolkit supports comprehensive IT band syndrome treatment.
Preparation and Safety Guidelines for Foam Rolling
Proper preparation prevents injury and maximizes foam rolling benefits. Taking a few minutes to prepare your body makes each session more effective. Safety should always come first in your recovery routine.

Pre-Rolling Warm-Up Activities
Never foam roll cold muscles. A brief warm-up increases blood flow to the area. This prepares your muscles and connective tissue for pressure.
Walk briskly for five minutes before rolling. Do some light leg swings front to back and side to side. Gentle movement warms up muscles without fatiguing them.
- Five minutes of light cardio or walking
- Dynamic leg swings in multiple directions
- Hip circles to mobilize the joint
- Gentle bodyweight squats for lower body activation
When to Avoid Foam Rolling
Certain situations call for skipping your foam rolling session. Listen to your body and know when to rest instead.
Do Not Foam Roll If You Have:
- Acute injury or recent trauma to the area
- Severe inflammation with visible swelling
- Open wounds or skin infections
- Diagnosed blood clotting disorders
- Unexplained severe pain that worsens with pressure
- Fever or signs of systemic infection
Pregnant women should consult healthcare providers before foam rolling. People with osteoporosis need professional guidance. When in doubt, ask a physical therapist or doctor first.
Setting Realistic Expectations
Foam rolling helps IT band syndrome, but it’s not an instant fix. Recovery takes time and consistent effort. You might not feel better after just one session.
Most people notice improvement within two to three weeks of regular rolling. Combine foam rolling with proper rest and other treatment methods. This comprehensive approach delivers the best results.
Foam Rolling Techniques for Hip and Glute Muscles
Your hip muscles and glutes directly affect IT band tension. These powerful muscles attach near the band and influence its tightness. Targeting them reduces strain on the iliotibial band itself.

Glute and Piriformis Rolling Technique
The glutes and piriformis muscle often harbor hidden tension. This tightness contributes to IT band problems. Rolling these areas provides significant relief for many people.
Starting Position: Sit on the foam roller with it positioned under your right glute. Cross your right ankle over your left knee. Place your hands flat on the floor behind you for support.
Movement: Lean slightly toward your right hip to increase pressure on the glute. Roll slowly from your lower glute toward your hip. Spend 30 to 45 seconds on tender spots. Keep breathing steadily throughout the movement.
Key Points: Control your body weight with your hands and supporting leg. Avoid rolling directly on your tailbone or hip bone. The pressure should feel intense but not unbearable.
Pro Tip: If you find an especially tender spot, pause and hold pressure for 20 to 30 seconds. This sustained pressure helps release muscle tension more effectively than constant rolling.
Tensor Fascia Latae (TFL) Rolling Method

The tensor fascia latae is a small but mighty muscle. It sits on the front outside of your hip and connects directly to the IT band. Tightness here pulls on the entire band.
Starting Position: Lie on your side with the roller positioned just below your hip bone. Your bottom arm supports your upper body. Keep your top leg straight or slightly bent for stability.
Movement: Roll from just below the hip bone down about three to four inches. This covers the TFL muscle belly. Move very slowly, taking 10 to 15 seconds per pass. Focus on this small area rather than covering lots of distance.
Common Mistakes: Many people roll too far down the thigh, missing the TFL entirely. Stay close to the hip. The muscle sits in the front pocket area of your pants.
Hip Flexor Foam Rolling Approach
Tight hip flexors affect your entire lower body mechanics. They alter your gait and increase IT band stress. Regular hip flexor work supports overall recovery.
Starting Position: Lie face down with the foam roller positioned under the front of your hip. One leg stays extended while you slightly bend the knee of the leg you’re rolling.
Movement: Shift your weight gently onto the roller. Move your body slightly up and down to roll the hip flexor area. Hold pressure on tender points for 20 to 30 seconds. Keep your core engaged to protect your lower back.
Breathing: Exhale as you apply pressure. Deep breathing helps your muscles relax into the roller. Never hold your breath during any foam rolling exercise.
Effective Quadriceps Foam Rolling Methods
Your quadriceps muscles run down the front of your thigh. These powerful muscles influence knee alignment and IT band stress. Keeping them loose supports healthy movement patterns.

General Quadriceps Rolling Technique
Rolling your quads helps reduce overall leg tightness. This foundational technique benefits most people with IT band syndrome. The quads have four muscle parts that all need attention.
Starting Position: Lie face down in a plank position. Position the roller under your thighs, just above your knees. Rest your forearms on the ground for support.
Movement: Use your forearms to pull your body forward and push back. Roll from just above the knee to just below the hip. Complete eight to ten slow passes. Each pass should take about five seconds.
Pressure Control: Keep one leg on the ground to reduce pressure if needed. Place more weight on the roller by lifting the supporting leg. Adjust based on your comfort level and pain tolerance.
Inner and Outer Quad Targeting
The inner and outer portions of your quads need individual attention. These areas often develop different tension patterns. Addressing each section thoroughly improves results.
Outer Quad Focus: Rotate your body slightly outward, angling toward the outside of your thigh. This position emphasizes the vastus lateralis muscle. Roll this area for 30 to 45 seconds on each leg.
Inner Quad Focus: Rotate inward, turning your body so the roller contacts the inside portion of your thigh. This targets the vastus medialis. Spend equal time on both inner and outer sections.
Benefits for IT Band Recovery
Loose quadriceps improve knee tracking. Better knee alignment reduces IT band friction. This connection explains why quad rolling helps IT band pain even though they’re separate structures.
Regular quad rolling also improves blood flow to the entire thigh. Better circulation supports tissue healing. Many people notice reduced knee pain within days of starting quad work.

Smart Approaches to Lateral Thigh and IT Band Area
The outside of your thigh deserves special attention, but direct IT band rolling isn’t always the answer. A smarter approach targets surrounding tissues while respecting the band’s unique structure.

Modified Lateral Thigh Rolling
This technique addresses the lateral thigh area without excessive direct band pressure. It targets muscles adjacent to the band while applying gentle pressure to the tissue.
Starting Position: Lie on your side with the roller under your outer thigh. Position yourself between the hip and knee, avoiding the hip and knee joints themselves. Bend your top leg and place that foot flat on the floor in front of you.
Movement: Use your top leg to control the amount of pressure. Roll very slowly, moving just a few inches at a time. Pause on tender areas for 15 to 20 seconds. Keep the movement gentle and controlled.
Pressure Guidelines: This area should rate about 5 or 6 out of 10 on a pain scale. More pressure doesn’t mean better results. Excessive pressure can increase inflammation and slow your recovery.
Important Caution About Direct IT Band Rolling
Many sources recommend aggressive IT band rolling. Recent research and clinical experience suggest a gentler approach works better. The IT band is connective tissue, not muscle. It doesn’t respond to pressure the same way muscles do.
If direct rolling causes sharp pain or bruising, stop immediately. Focus on the surrounding muscles instead. You’ll likely see better results with less discomfort.
Alternative Techniques for the Outer Thigh
Sometimes traditional rolling isn’t the best option for the lateral thigh. These alternative approaches can provide relief without excessive pressure on the IT band.
Ball Rolling Method: Use a massage ball instead of a foam roller for more precise work. Place the ball on tender spots along the outer thigh. Apply gentle, sustained pressure for 30 to 60 seconds per location.
Massage Stick Technique: A massage stick gives you more control over pressure and location. Work the outer thigh with short strokes. This tool lets you adjust pressure instantly based on sensitivity.
Cross-Friction Massage: Move the roller perpendicular to the IT band rather than along its length. This cross-friction approach may help without the pain of traditional rolling. Use short, gentle back-and-forth movements across the band.
Hamstring Foam Rolling for Complete Lower Body Balance
Your hamstrings work with your quads to control knee movement. Tight hamstrings alter your gait and can increase IT band stress. Including hamstring work in your routine creates better overall leg function.

Basic Hamstring Rolling Method
Hamstring rolling complements your IT band recovery program. These muscles at the back of your thigh need regular attention for balanced leg health.
Starting Position: Sit on the floor with the roller under your hamstrings. Place your hands flat on the floor behind you. Keep your legs straight and together on the roller.
Movement: Push through your hands to lift your hips slightly off the floor. Roll from just above the back of your knee to just below your glutes. Complete six to eight slow passes. Point your toes forward, then try pointing them outward and inward to hit different muscle fibers.
Single Leg Variation: Cross one ankle over the other to increase pressure on the bottom leg. This single-leg approach lets you focus more attention on each hamstring individually. Spend 45 to 60 seconds per leg.
Targeting Inner and Outer Hamstring Areas
Your hamstrings have three separate muscles. Each can develop different tension patterns. Addressing all three sections ensures complete coverage.
Inner Hamstring: Rotate your leg slightly inward, turning your toes toward each other. This position emphasizes the inner hamstring muscles. Roll this area for 30 seconds per leg.
Outer Hamstring: Rotate outward with toes pointing away from each other. This targets the outer hamstring portion. Balance your time between inner and outer positions for best results.
Building Your Complete IT Band Foam Rolling Routine
Individual techniques matter, but putting them together into a routine creates lasting results. A well-structured program addresses all contributing factors to IT band syndrome.

Sample 15-Minute Daily Routine
This routine targets all major muscle groups affecting IT band health. Perform it daily during active recovery. Reduce frequency to three to four times per week once symptoms improve.
- Warm-up (2 minutes): Light walking or gentle leg swings to increase blood flow and prepare tissues for pressure
- Glutes and Piriformis (3 minutes): 90 seconds per side, focusing on tender spots with sustained pressure
- TFL and Hip Flexors (3 minutes): 90 seconds per side, staying close to the hip bone for TFL work
- Quadriceps (3 minutes): Front, inner, and outer quad sections, adjusting body angle to reach all areas
- Lateral Thigh (2 minutes): Gentle modified rolling or alternative techniques, 60 seconds per side
- Hamstrings (2 minutes): Full hamstring rolling with toe position variations to address all three muscles
Progression Guidelines and Frequency
Start conservatively and build intensity gradually. Your first week should focus on learning proper form. Comfort and technique matter more than aggressive pressure.
| Week | Frequency | Duration Per Session | Intensity Level | Focus Areas |
| 1-2 | Daily | 10-15 minutes | Light to moderate (4-6/10 pain) | All muscle groups, learning form |
| 3-4 | 5-6 times weekly | 15-20 minutes | Moderate (5-7/10 pain) | Emphasis on tightest areas |
| 5-6 | 4-5 times weekly | 15-20 minutes | Moderate to firm (6-7/10 pain) | Maintenance of improvements |
| 7+ | 3-4 times weekly | 10-15 minutes | Moderate (5-6/10 pain) | Prevention and maintenance |
Combining Foam Rolling with Other Treatments
Foam rolling works best as part of a comprehensive treatment plan. Combine it with these complementary approaches for optimal recovery.
Strengthening Exercises
Weak hip abductors and glutes contribute to IT band problems. Add clamshells, side-lying leg raises, and single-leg bridges to your routine. Perform two to three sets of 12 to 15 repetitions.
Static Stretching
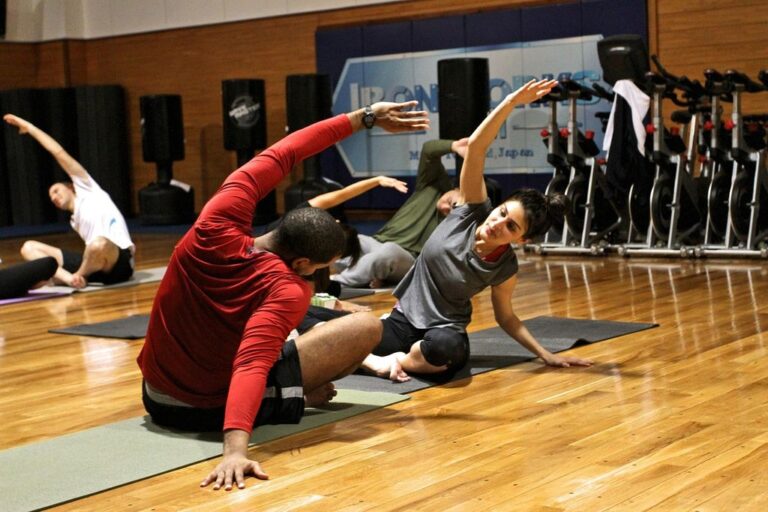
Hold stretches for 30 to 60 seconds after foam rolling. Target hip flexors, quadriceps, hamstrings, and glutes. Stretching after rolling takes advantage of increased tissue pliability.
Activity Modification
Reduce mileage or intensity during acute phases. Avoid hills and cambered surfaces. Cross-train with swimming or cycling to maintain fitness while reducing IT band stress.
Common Foam Rolling Mistakes and How to Avoid Them
Even well-intentioned foam rolling can backfire if done incorrectly. Understanding common mistakes helps you avoid setbacks. Smart rolling brings results faster and more safely.

Rolling Too Aggressively or Too Fast
More pressure and faster rolling don’t equal better results. Aggressive rolling can increase inflammation and muscle tension. Your body responds better to gradual, controlled pressure.
Roll slowly, taking about one inch per second. Pause on tender areas rather than rushing past them. Think of foam rolling as massage, not a race. The slower you go, the more effectively your muscles can release tension.
Effective Rolling Approach
- Slow, controlled movements
- Moderate pressure (5-7/10 intensity)
- Pausing on tender spots
- Deep, steady breathing
- Gradual progression over weeks
Ineffective Rolling Mistakes
- Rapid back-and-forth rolling
- Excessive pressure causing sharp pain
- Skipping over tender areas
- Holding breath during rolling
- Trying to fix everything in one session
Ignoring Pain Signals and Body Feedback
Some discomfort during foam rolling is normal. Sharp, shooting pain is not. Learn to distinguish between productive discomfort and warning signals that indicate you should stop.
Pain should feel like deep pressure or a “good hurt.” If you feel sharp, stabbing, or burning sensations, reduce pressure immediately. Numbness or tingling means you’re compressing nerves. Stop and adjust your position.
Neglecting Muscle Groups Beyond the IT Band
Focusing only on the IT band area misses the bigger picture. Your entire lower body works as a connected system. Addressing only one area limits your results.
Include hip work, quad rolling, and hamstring attention in every session. These muscles all influence IT band tension. Comprehensive treatment delivers better outcomes than spot treatment.
Monitoring Your Progress and Adjusting Your Approach
Tracking your recovery helps you understand what works. Objective measurements show real progress even when day-to-day changes feel small. Regular assessment guides smart adjustments to your routine.
Key Metrics to Track
Monitor these specific indicators to gauge your improvement. Write down your observations every few days for best results.
- Pain levels during activity (rate 0-10 before and after runs or workouts)
- Distance or time you can exercise before pain starts
- Areas of tenderness during foam rolling (which spots hurt most)
- Morning stiffness or tightness levels
- Ability to perform specific movements (stairs, hills, squats)
- Overall leg mobility and range of motion
When to Seek Professional Help
Foam rolling supports IT band recovery, but it’s not a cure-all. Some situations require professional evaluation and treatment. Don’t hesitate to get expert help when needed.
Persistent IT Band Pain? Get Expert Guidance
If foam rolling and self-care haven’t improved your symptoms after 3-4 weeks, professional evaluation may be necessary. A physical therapist can identify biomechanical issues, prescribe specific exercises, and develop a personalized treatment plan for your unique situation.
Signs You Need Professional Evaluation
Watch for these warning signs that indicate you should consult a physical therapist or sports medicine doctor.
- Pain persists beyond four to six weeks despite consistent foam rolling and rest
- Symptoms worsen instead of improving with self-treatment
- You experience significant swelling or visible inflammation
- Pain occurs during normal daily activities, not just exercise
- You have sharp, stabbing pain rather than dull aching
- Weakness develops in your leg or you notice a limp
Long-Term Prevention and Maintenance Strategies
Recovery from IT band syndrome is just the first step. Preventing recurrence requires ongoing attention to movement patterns, training habits, and body maintenance. Smart prevention keeps you active and pain-free.

Training Modifications to Prevent Recurrence
Certain training habits increase IT band syndrome risk. Making strategic changes to your routine protects against future problems.
Smart Training Practices
- Increase weekly mileage by no more than 10 percent
- Vary your running surfaces and routes
- Avoid excessive cambered or sloped surfaces
- Include rest days in your training schedule
- Cross-train to reduce repetitive stress
- Replace running shoes every 300-500 miles
Biomechanical Considerations
- Get professional gait analysis if pain returns
- Consider orthotics for significant overpronation
- Work on running form and cadence
- Maintain strong, balanced hip muscles
- Address leg length discrepancies
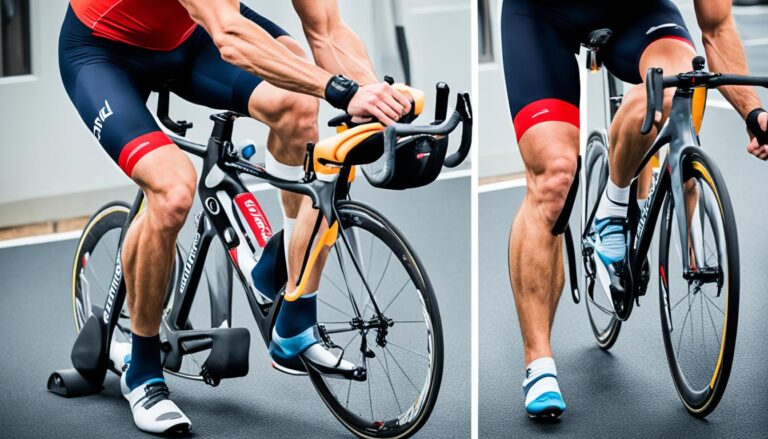
- Ensure proper bike fit for cyclists
Ongoing Mobility and Strength Work
Continue foam rolling even after pain resolves. Maintenance rolling prevents tightness from building up again. Aim for three sessions per week as a minimum.
Pair rolling with consistent strength training. Hip abductor and glute strength prevents biomechanical issues that stress the IT band. Include these exercises two to three times weekly.
Maintenance Routine: Spend 10 minutes three times weekly on foam rolling your hips, glutes, quads, and hamstrings. Add 15 minutes of hip strengthening exercises on those same days. This minimal time investment provides significant protection against IT band syndrome recurrence.
Moving Forward with Your IT Band Recovery
IT band syndrome responds well to proper foam rolling when you target the right muscles. Direct aggressive rolling on the band itself rarely helps. Instead, focus on the hip muscles, glutes, quads, and surrounding tissue that influence band tension.
Start slowly with moderate pressure. Build your routine gradually over several weeks. Combine foam rolling with strengthening exercises, stretching, and smart training modifications. This comprehensive approach addresses root causes rather than just symptoms.
Track your progress objectively. Most people see significant improvement within three to four weeks of consistent work. If pain persists despite dedicated self-treatment, seek professional guidance from a physical therapist.
Remember that recovery takes patience and consistency. Your IT band syndrome didn’t develop overnight, and it won’t disappear overnight either. Stick with your foam rolling routine, make necessary training adjustments, and trust the process. With proper technique and persistence, you can overcome IT band pain and return to the activities you love.