Tag: Joint mobility

  • Stretches for kneeling on soft surfaces

    Stretches for kneeling on soft surfaces

    What if the secret to lasting knee health isn’t about pushing harder—but cushioning smarter? For athletes, fitness enthusiasts, and anyone battling joint discomfort, targeted movements on forgiving surfaces can unlock surprising benefits. We’ll explore how this approach reduces strain while building strength where it matters most.

    Gentle routines on padded floors or mats protect joints better than hard surfaces. Focused exercises strengthen the hips, thighs, and calves—key areas supporting knee stability. Whether you’re recovering from injury or preventing one, these low-impact techniques adapt to all fitness levels.

    Starting with basic stretches like calf raises and leg lifts builds foundational strength. Over time, this prepares your body for squats and dynamic motions without overwhelming delicate joints. The result? Improved flexibility, reduced pain, and confidence in every movement.

    Key Takeaways

    • Soft surfaces minimize joint pressure during kneeling exercises
    • Targeted movements strengthen hip and leg muscles for better knee support
    • Beginner-friendly stretches reduce injury risk while improving flexibility
    • Progress gradually from basic stretches to advanced strength-building moves
    • Ideal for athletes, active individuals, and those managing joint discomfort

    Understanding the Importance of Proper Stretching

    Movement serves as medicine for joints when approached strategically. Targeted routines prepare your body to handle daily stresses while protecting vulnerable areas. This foundation becomes especially crucial for maintaining knee health and preventing long-term mobility limitations.

    Proper stretching techniques for knee health

    Benefits for Knee Health and Mobility

    Consistent stretching boosts blood flow to leg muscles and connective tissues. This delivers essential nutrients while flushing out inflammation-causing waste products. Improved circulation reduces morning stiffness and helps joints move smoothly.

    Gentle stretching exercises maintain the knee’s natural range of motion, counteracting the tightening effects of aging. They also stimulate synovial fluid production – your joint’s natural lubricant. For those managing arthritis or past injuries, controlled movement prevents scar tissue buildup.

    How Soft Surfaces Enhance Exercise Safety

    Cushioned flooring absorbs up to 30% more impact than hard surfaces during movements. A quality mat distributes weight evenly across knees and hips, reducing pressure points. This support allows deeper stretches without compromising joint integrity.

    Padded surfaces enable proper alignment during hip-focused exercises. They let muscles engage fully rather than tensing against discomfort. For rehabilitation cases, this cushioning provides psychological reassurance to move through safe ranges.

    Remember: Effective recovery begins with respecting your body’s signals. Gradual progression on forgiving surfaces builds confidence alongside physical resilience.

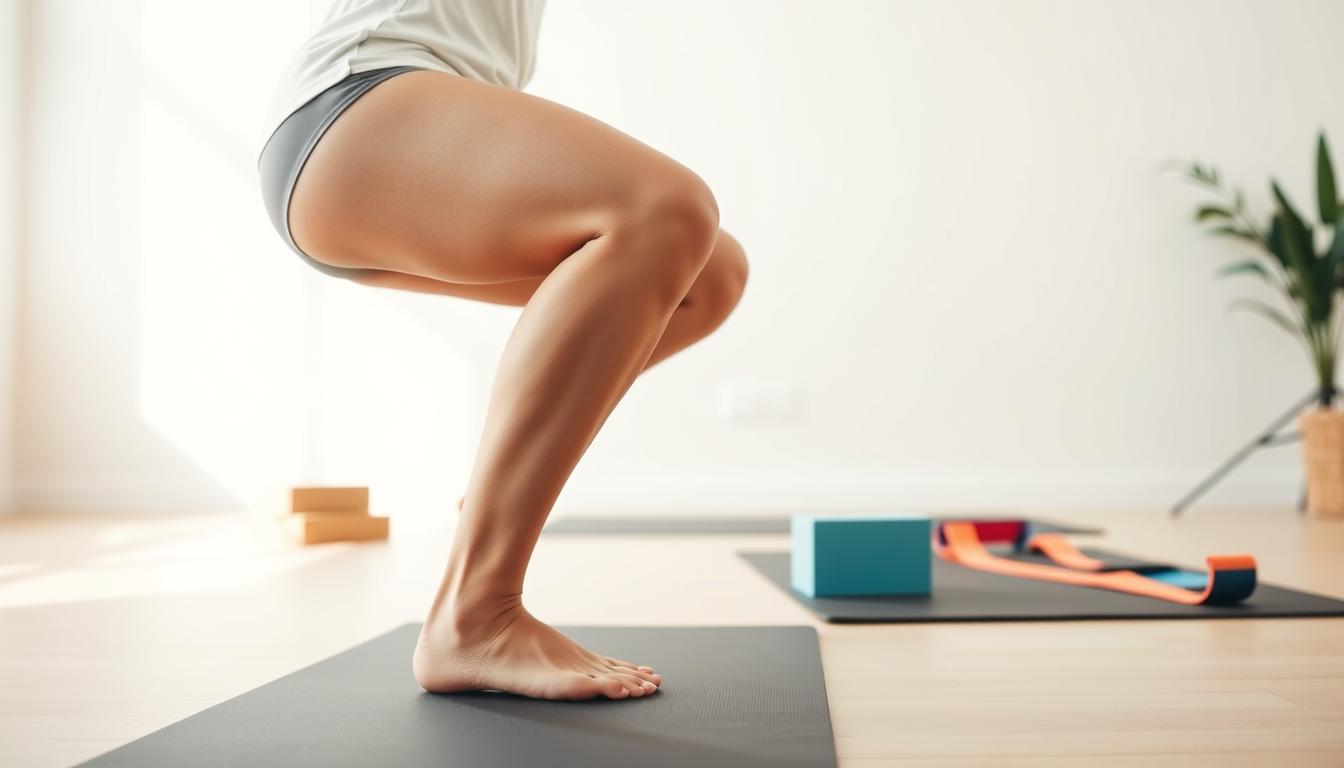
    Getting Started: Setting Up Your Soft Surface Routine

    Creating a foundation for effective movement begins with intentional preparation. Your exercise environment directly impacts joint safety and exercise quality—especially when working on padded surfaces.

    Proper mat setup for knee exercises

    Preparing Your Mat and Space

    Choose a mat with ¼-½ inch thickness for balanced cushioning and stability. Dense foam or rubber materials provide better hip and knee support than thin yoga mats. Clear a 6×6 foot area to allow full leg extensions and lateral movements.

    Check flooring surfaces for hidden objects that could shift during exercises. Use non-slip mats on hardwood floors to prevent sliding. Proper lighting reduces eye strain while maintaining spinal alignment awareness.

    Establishing the Starting Position

    Kneel with your working knee directly below your hip, foot flat ahead. Place folded towels or gel pads under sensitive joints if needed. Keep your chest lifted and shoulders relaxed to avoid back strain.

    Test your setup by shifting weight slightly forward. You should feel pressure evenly distributed across your thigh and shin—not concentrated on the kneecap. Adjust padding thickness until discomfort disappears during static holds.

    For those managing previous injury, position a sturdy chair nearby for balance support. This modification maintains flexibility training while reducing fall risks during transitions.

    Optimized Techniques: Stretches for kneeling on soft surfaces

    Mastering joint-friendly techniques requires precision in both movement and setup. Proper alignment transforms simple motions into powerful tools for improving hip flexor elasticity and knee stability. Let’s break down the mechanics of effective cushion-supported routines.

    hip flexor stretch on cushioned surface

    Correct Form and Alignment

    Begin in a starting position with one leg forward, foot flat. Your rear knee stays grounded beneath the hip. Tuck your pelvis slightly to engage core muscles before leaning forward. Maintain this alignment to protect your lower back while targeting the front thigh area.

    Proper TechniqueCommon ErrorsImpact
    Neutral spine alignmentArched lower backReduces lumbar strain
    Even weight distributionLeaning sidewaysPrevents joint overload
    Controlled breathingHolding breathEnhances oxygen flow

    Modifying Movements for Greater Comfort

    New practitioners should reduce their range motion by 30-40%. Place folded towels under sensitive joints if you feel stretch intensity too quickly. For advanced users, adding arm reaches upward increases hip engagement without compromising form.

    Listen to your body’s signals – mild tension indicates effective stretching, while sharp pain demands immediate adjustment. Transition smoothly between positions using a 3-count rhythm: 2 seconds forward, 1 second hold, 2 seconds return.

    Expert Insights from Physical Therapists

    Physical therapists agree: Smart movement starts with understanding your body’s limits. Over 80% of knee injuries occur when pushing through discomfort rather than adapting routines. We spoke with rehabilitation specialists to bring you science-backed strategies for sustainable progress.

    physical therapist consultation for knee health

    Guidance on Injury Prevention

    Always begin with dynamic warm-ups like leg swings or gentle hip circles. These prepare muscles and joints for deeper stretches. Certified specialists recommend the 10% rule: Never increase your exercise intensity by more than 10% weekly.

    StrategyImplementationBenefit
    Controlled BreathingInhale during preparation, exhale during movementReduces joint compression
    Alignment ChecksUse mirrors or video recordingsPrevents asymmetrical strain
    Recovery DaysAlternate activity with rest daysEnhances tissue repair

    When to Consult a Healthcare Professional

    Sharp pain lasting more than 48 hours signals potential injury. Those with previous knee surgeries should always consult a physical therapist before new routines. “Persistent swelling or clicking joints demand immediate evaluation,” advises Dr. Elena Torres, DPT.

    Research shows supervised exercises improve flexibility 34% faster than solo attempts. Many clinics now offer telehealth assessments for initial movement screenings. Find certified professionals through the American Physical Therapy Association’s online directory.

    Integrating Strengthening Exercises with Your Stretching Program

    True joint protection emerges when mobility meets muscular support. While flexibility training prepares your body to move freely, targeted strength exercises create the stability your knee joints crave. This powerful combination reduces strain during daily activities while enhancing athletic performance.

    Complementary Strength Moves for Knee Support

    Begin with half squats – keep your feet hip-width apart and lower halfway down. This move engages quadriceps and glutes without stressing joints. Pair it with straight leg raises: Lie on your back, lift one leg 12 inches, and hold for 5 seconds.

    ExerciseMuscles WorkedProgressions
    Half SquatsQuads, GlutesAdd arm raises
    Side-Lying Leg LiftsHip AbductorsUse ankle weights
    Bridge PressesHamstrings, CoreSingle-leg variation

    Incorporating Hip Flexor and Glute Exercises

    Strengthen your hip flexor muscles through controlled marches. From a starting position on your mat, alternate lifting knees toward your chest. For glutes, try clamshells: Lie on your side with knees bent, then open and close like a shell.

    Alternate between stretching and strengthening every other day. “Muscles need 48 hours to rebuild after resistance work,” advises physical therapist Marco Perez. Always finish sessions with gentle hip circles to maintain range motion.

    For those managing pain, begin with 2 sets of 8 reps. Gradually increase as your thigh and hip muscles adapt. Remember – consistency beats intensity when building lasting joint health.

    Conclusion

    Building resilient knees demands more than temporary fixes—it requires smart movement strategies. When paired with cushioning, targeted routines strengthen hip flexor muscles and stabilize joints. This approach reduces strain during daily activities while boosting long-term mobility.

    Proper alignment proves critical. Keep feet hip-width apart during standing moves, and maintain neutral spine positioning. These adjustments distribute weight evenly, protecting your back and knees from overload. For those managing discomfort, starting with reduced range motion prevents reinjury.

    Always consult a therapist before launching new exercise programs, especially with existing pain. They can tailor movements to your needs—like adjusting foot placement or modifying holds. Remember: Consistency with proper form beats intensity every time.

    Ready to transform your joint health? Begin with simple stretches for kneeling on soft surfaces, gradually progressing as strength improves. Your future self will thank you for the pain-free movement and renewed confidence in every step.

    FAQ

    Why do soft surfaces enhance safety during kneeling exercises?

    Soft surfaces like yoga mats reduce joint pressure by absorbing impact. This helps maintain proper alignment while minimizing strain on knees, hips, and ankles during movements like lunges or hip flexor stretches.

    How thick should my exercise mat be for knee support?

    We recommend a mat with 6-8mm thickness to cushion joints without compromising stability. Pair it with a folded towel under sensitive knees during exercises like quad stretches or glute bridges for added comfort.

    Can kneeling stretches improve hip mobility?

    Yes! Controlled kneeling motions actively engage hip flexors and glutes. For example, combining a low lunge with pelvic tilts increases range of motion while protecting knee cartilage through gradual progression.

    What’s the safest way to start kneeling stretches after an injury?

    Begin with static holds in neutral positions, like half-kneeling hip flexor stretches. Physical therapists at institutions like Mayo Clinic advise using a wall or chair for balance before progressing to dynamic movements.

    How often should I combine strength training with kneeling stretches?

    Aim for 2-3 weekly sessions pairing squats or lateral step-ups with mobility work. This builds joint-stabilizing muscles while maintaining flexibility – crucial for activities requiring knee flexion or rotational movements.

    When should I consult a professional about knee discomfort during stretches?

    Seek guidance if pain persists beyond 48 hours or limits your range of motion. Persistent front-of-knee pressure during kneeling could indicate patellar tracking issues needing specialized assessment.

    Can I modify kneeling stretches if ankle mobility is limited?

    Absolutely. Place a rolled towel under your ankles during kneeling positions to reduce dorsiflexion demands. This modification lets you focus on hip and knee alignment without compromising form.

    What’s the ideal warm-up before kneeling on soft surfaces?

    We suggest 5-10 minutes of dynamic movements like leg swings and bodyweight squats. This prepares hip flexors, glutes, and quads for loaded kneeling positions while enhancing blood flow to joints.

  • Knee crepitus without pain

    Knee crepitus without pain

    This phenomenon, known as crepitus, is common in many people, and it can be quite puzzling.

    While it’s often associated with pain or injury, many individuals experience knee crepitus without any discomfort.

    We’re here to explore this common occurrence and help you understand when these sounds are normal and when they might indicate an underlying issue.

    Key Takeaways

    • Understanding the causes of knee crepitus and its relation to joint health
    • Distinguishing between harmless and potentially problematic joint noises
    • Practical strategies for managing knee crepitus
    • The importance of maintaining optimal knee joint health
    • Evidence-based information to help you make informed decisions

    What Is Knee Crepitus?

    Knee crepitus, a common phenomenon characterized by grinding or crunching sounds in the knee, can be either normal or indicative of a problem. We will explore the definition, common symptoms, and the differentiation between normal and problematic crepitus.

    Definition and Common Symptoms

    Knee crepitus refers to the audible sounds produced by the movement of the knee joint. These sounds can range from mild cracking to pronounced grinding noises. In most cases, knee crepitus is not accompanied by pain, swelling, or instability, and is considered harmless.

    According to experts, if knee grinding is not accompanied by any pain, swelling, or instability, it is most likely harmless. Common causes include rubbing of the cartilage on the soft tissue of the knee joint during bending, or air bubbles seeped into the soft tissue around the joint that pop when the knee stretches or bends.

    Differentiating Normal vs. Problematic Crepitus

    The key to determining whether knee crepitus is normal or problematic lies in the presence of accompanying symptoms. Painless crepitus is typically benign, often related to normal physiological processes. However, when crepitus is accompanied by pain, swelling, or occurs after an injury, it may indicate an underlying issue such as osteoarthritis or patellofemoral problems.

    CharacteristicsNormal CrepitusProblematic Crepitus
    PainNo painPain present
    Swelling/InstabilityNo swelling or instabilityMay be accompanied by swelling or instability
    CauseAir bubbles or soft tissue movementPotential joint damage or osteoarthritis

    “Painful knee grinding is a sign of damage to the joint.” Thus, understanding the nature of knee crepitus is essential for determining the appropriate course of action.

    Understanding Knee Anatomy and Function

    To grasp why knee crepitus happens, it’s essential to delve into the anatomy and function of the knee joint. The knee is a complex hinge joint that consists of bones, ligaments, tendons, and cartilage, all working together to facilitate movement.

    Key Structures of the Knee Joint

    The knee joint is primarily formed by the intersection of the femur (thigh bone), tibia (shin bone), and patella (kneecap). The synovial fluid in the joint space lubricates the movement between these bones. The tendons and ligaments around the knee provide stability and support. Cartilage covers the ends of the bones, reducing friction during movement.

    Variations in these structures can affect how the knee functions and potentially lead to crepitus. Understanding these components is vital to appreciating how they contribute to the noise associated with knee crepitus.

    How These Structures Create Sound

    The noise associated with knee crepitus, such as popping or cracking sounds, often results from the formation and collapse of gas bubbles in the synovial fluid, a process known as cavitation. When tendons or ligaments move over bony prominences, they can create snapping or clicking sounds. Additionally, roughened cartilage surfaces can produce grinding or crunching noises when they rub against each other.

    MechanismDescriptionResulting Sound
    CavitationFormation and collapse of gas bubbles in synovial fluidPopping or cracking
    Tendon or ligament movementMovement over bony prominencesSnapping or clicking
    Roughened cartilage surfacesRubbing against each otherGrinding or crunching

    Common Causes of Knee Crepitus Without Pain

    Understanding the causes of knee crepitus is essential to addressing concerns about knee health. While it can be alarming to hear cracking or popping sounds coming from your knees, the good news is that in many cases, it’s not a sign of a serious underlying condition.

    Air Bubbles in Synovial Fluid

    One common cause of knee crepitus is the formation and bursting of air bubbles in the synovial fluid that surrounds the joints. This fluid helps to lubricate the joint, reducing friction between the cartilage and other tissues. When air bubbles form and then burst, they can create a popping or cracking sound. This phenomenon is generally harmless and can occur in people of all ages.

    Soft Tissue Movement

    Another factor that contributes to crepitus is the movement of soft tissues around the knee, such as tendons and ligaments. As these tissues move over bony prominences, they can create various sounds. This type of crepitus is usually painless and can be a normal occurrence, especially in individuals who are physically active.

    Normal Age-Related Changes

    As people age, natural changes occur within the knee joint that can lead to increased crepitus. These changes include alterations in the texture of the cartilage and the composition of the synovial fluid, which can result in more friction and noise during movement. For more information on how age-related changes affect knee health, you can visit this resource. Maintaining a healthy lifestyle, including regular exercise and a balanced diet, can help minimize these changes and preserve joint function.

    When Knee Crepitus Becomes Concerning

    While knee crepitus can be harmless, there are instances where it may signal a more serious underlying condition. It is essential to recognize the warning signs that distinguish harmless crepitus from a potentially severe knee issue.

    Warning Signs That Require Attention

    Certain symptoms accompanying knee crepitus warrant medical attention. These include persistent pain, swelling, and limited mobility. If knee crepitus is accompanied by pain, especially during weight-bearing activities or at night, it could indicate an underlying condition such as patellofemoral pain syndrome or osteoarthritis. Additionally, if the knee “catches” or “locks,” it may suggest a meniscus tear.

    Other warning signs include instability or a feeling of the knee “giving way.” These symptoms can be associated with various knee conditions, including ligament sprains or tears. It is crucial to consult a healthcare professional if you experience any of these symptoms.

    Conditions Associated with Painful Crepitus

    Painful knee crepitus can be a symptom of several knee conditions. Osteoarthritis, for instance, involves the deterioration of cartilage, leading to bone-on-bone contact and painful grinding sensations. Patellofemoral pain syndrome, also known as runner’s knee, occurs when the nerves around the kneecap become inflamed due to repetitive motions, causing pain and crepitus.

    A meniscus tear can also cause painful crepitus, especially during twisting movements or deep knee bends. Other conditions, such as chondromalacia patellae (softening of the cartilage under the kneecap) and inflammatory arthritis conditions like rheumatoid arthritis, can also lead to painful knee crepitus.

    A detailed, high-resolution close-up of the knee joint, showcasing the classic signs of osteoarthritis. The joint space is narrowed, with visible osteophytes (bone spurs) 
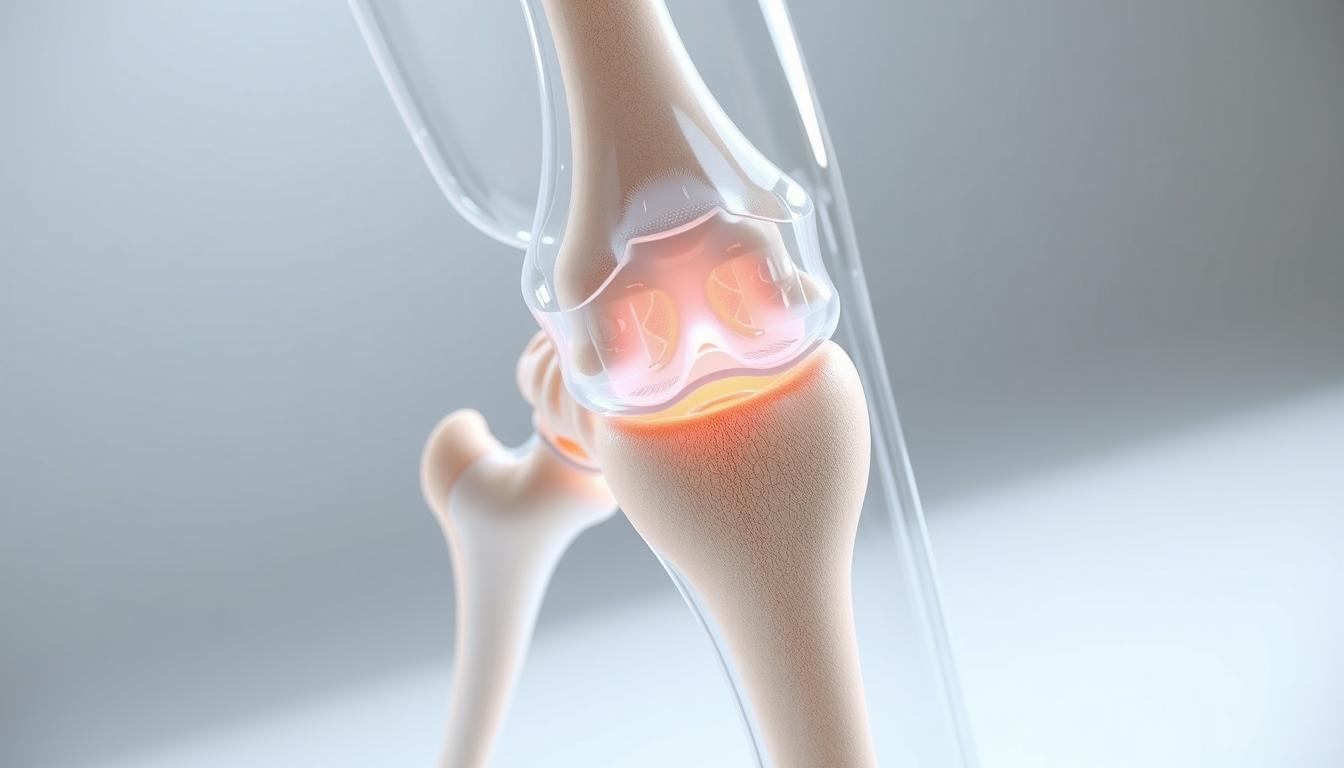
forming along the edges of the bones. The cartilage appears worn and degraded, with uneven surfaces and potential subchondral sclerosis. Illuminated from the side to accentuate the textural details, with a shallow depth of field to keep the focus on the affected joint. Rendered in a clinical, informative style, conveying the structural changes associated with this degenerative condition.

    Diagnosing Knee Crepitus Without Pain

    Knee crepitus without pain can be diagnosed through a combination of physical examination and advanced imaging techniques. This comprehensive approach allows healthcare professionals to identify the underlying causes and develop an appropriate treatment plan.

    Physical Examination Process

    A thorough physical examination is the first step in diagnosing knee crepitus. During this process, a healthcare provider assesses the knee’s range of motion, checks for any abnormalities, and evaluates the overall condition of the knee joint. The examination helps identify potential causes of crepitus, such as patellofemoral pain or knee osteoarthritis.

    Key aspects of the physical examination include: assessing knee alignment, evaluating soft tissue movement, and checking for any signs of knee arthritis.

    Imaging and Other Diagnostic Tests

    Imaging tests play a crucial role in diagnosing knee crepitus without pain. Various imaging modalities are used to evaluate the condition of the knee joint. X-rays help assess bone alignment and joint space narrowing, while MRI provides detailed images of soft tissue structures like menisci, cartilage, and ligaments.

    In some cases, ultrasound may be used to visualize dynamic soft tissue movements that could be causing the crepitus. Research studies have shown that individuals with both crepitus and patellofemoral pain are at a higher risk of developing knee osteoarthritis. A study published in the journal Osteoarthritis and Cartilage found that women aged 45 to 60 years with these symptoms had a 72 percent chance of developing OA.

    Effective Management Strategies for Painless Knee Crepitus

    Effective management of painless knee crepitus involves understanding the causes and implementing appropriate strategies to support knee health. By adopting a comprehensive approach, individuals can maintain healthy knee joints and potentially prevent future problems.

    Exercise Modifications

    Modifying exercise routines can play a significant role in managing knee crepitus. This includes avoiding high-impact activities that stress the knee joint and opting for low-impact exercises like cycling or swimming. Gentle stretching exercises can also help improve flexibility and reduce stiffness in the knees.

    For example, incorporating exercises that strengthen the muscles around the knee, such as the quadriceps and hamstrings, can provide additional support to the joint. This can be achieved through specific strengthening exercises.

    Strengthening Exercises for Knee Support

    Strengthening the muscles around the knee is crucial for providing support and stability to the joint. Exercises such as squats, lunges, and leg press can be effective when performed correctly and within a pain-free range. It’s essential to start with low-intensity exercises and gradually increase the intensity to avoid putting excessive stress on the knees.

    Lifestyle Adjustments

    Making certain lifestyle adjustments can also help manage painless knee crepitus. Maintaining a healthy body weight is crucial as it reduces the stress on the knee joints. Even a modest weight loss can significantly decrease the loading on the knees, thereby alleviating crepitus symptoms.

    Additionally, wearing suitable shoes with appropriate support and cushioning can make a difference. Simple ergonomic adjustments, such as proper lifting techniques and avoiding prolonged kneeling, can also reduce knee stress. A balanced diet that includes anti-inflammatory foods and adequate hydration can support overall joint health.

    Preventing Knee Crepitus and Maintaining Joint Health

    Preventing knee crepitus and maintaining joint health are essential for long-term knee function. By adopting a few simple habits, we can significantly reduce the risk of developing knee problems. “Taking care of our knees is crucial for maintaining an active lifestyle,” as it enables us to move freely and perform daily activities without discomfort.

    Proper Warm-up Techniques

    Engaging in proper warm-up techniques before exercise is vital for knee health. A good warm-up increases blood flow to the muscles around the knee, reducing the risk of injury and crepitus. We recommend starting with light cardio followed by dynamic stretching to prepare the knee joint for more intense activities.

    Weight Management Benefits

    Maintaining a healthy body weight is another crucial factor in preventing knee crepitus. Excess weight puts additional stress on the knee joint, increasing the risk of wear and tear. By managing our weight through a balanced diet and regular exercise, we can significantly reduce the strain on our knees.

    Appropriate Footwear and Equipment

    Wearing suitable shoes and using appropriate equipment can also help prevent knee crepitus. Proper footwear provides support, cushioning, and stability, reducing stress on the knee joint. Additionally, using specialized equipment like knee sleeves or orthotics can benefit individuals who engage in high-demand activities. Regularly evaluating and replacing athletic equipment ensures optimal support and protection for the knee joints.

    When to Consult a Healthcare Professional

    While knee crepitus is often painless, certain symptoms can indicate a need for professional medical assessment. Knee crepitus, or the grinding, crunching, or cracking sounds in the knee, is common and usually doesn’t signify a serious issue. However, if you experiencepainalongside crepitus, it may be a sign of an underlying condition that requires medical attention.

    If knee grinding is accompanied by swelling, instability, or functional limitations, it’s crucial to consult with a healthcare provider. These symptoms can indicate damage to the joint or other knee problems. Your healthcare professional may be a primary care physician, sports medicine specialist, physical therapist, or orthopedic surgeon.

    During a medical consultation for knee crepitus, you can expect a thorough examination, potential diagnostic tests, and discussion of treatment approaches. Early intervention for painful crepitus can prevent progression to more serious conditions and may help avoid more invasive treatments like surgery in the future.

    Healthcare professionals will distinguish between cases requiring conservative management and those needing more aggressive intervention, such as surgery or orthopedic surgery. Common treatments range from physical therapy and anti-inflammatory medications to injections or surgical procedures in appropriate cases.

    To prepare for your medical appointment, track your symptoms and prepare questions to ask your healthcare provider. Most cases of knee crepitus without pain can be effectively managed with conservative approaches and rarely require surgical intervention.

    FAQ

    What is the difference between normal and problematic knee crepitus?

    We differentiate between normal and problematic knee crepitus based on the presence of pain or swelling. If knee crepitus occurs without these symptoms, it’s often considered normal. However, if it’s accompanied by discomfort or inflammation, it may indicate an underlying issue.

    Can osteoarthritis cause knee crepitus without pain?

    Yes, we can experience knee crepitus due to osteoarthritis, even if we’re not feeling pain. As the joint cartilage wears down, it can lead to the characteristic grinding or crunching sensation.

    How is knee crepitus diagnosed?

    We diagnose knee crepitus through a combination of physical examination and imaging tests, such as X-rays or an MRI. These help us assess the condition of our knee joint and identify any potential underlying causes.

    What are some effective ways to manage painless knee crepitus?

    We can manage painless knee crepitus by making exercise modifications, incorporating strengthening exercises to support the knee, and adopting lifestyle adjustments to reduce stress on the joint.

    Can knee crepitus be prevented?

    Yes, we can take steps to prevent knee crepitus by using proper warm-up techniques, maintaining a healthy weight through weight management, and wearing appropriate footwear and equipment.

    When should I consult a healthcare professional about knee crepitus?

    We should consult a healthcare professional if we experience knee crepitus accompanied by pain, swelling, or other concerning symptoms, or if we’re unsure about the cause or best course of treatment.

  • Knee pain prevention stretches

    Knee pain prevention stretches

    Could your daily routine be quietly undermining your mobility? While staying active is vital, improper movement patterns often strain joints over time. Targeted routines focusing on flexibility and alignment can transform how your body absorbs stress during exercise or daily tasks.

    We’ve designed this guide to help you protect one of your most critical joints through science-backed methods. Gentle stretching paired with low-impact activities strengthens the muscles supporting your legs, reducing wear on connective tissues. When done consistently, these strategies improve stability while addressing common discomfort triggers.

    Understanding your body’s mechanics matters. Tight hamstrings or weak quadriceps, for example, alter pressure distribution across joints. Our approach emphasizes balanced development across muscle groups to maintain proper alignment—a cornerstone of joint longevity.

    Always consult a healthcare provider before beginning new fitness regimens, especially if you experience persistent discomfort. Now, let’s explore how intentional movement practices can help you stay active without compromise.

    Key Takeaways

    • Proper stretching techniques enhance joint stability and reduce strain during activities
    • Low-impact exercises strengthen supporting leg muscles for better shock absorption
    • Muscle imbalances often contribute to joint stress over time
    • Combining flexibility work with strength training creates lasting protection
    • Professional guidance ensures routines match individual needs and limitations

    Understanding Knee Pain and Its Impact

    Joint discomfort often stems from overlooked daily habits and conditions. Repetitive motions, sudden impacts, or prolonged sitting create imbalances that gradually wear down tissues. Recognizing these triggers helps address root causes rather than just symptoms.

    Common Injuries Affecting Mobility

    Osteoarthritis breaks down cartilage between bones, causing friction during movement. Tendinitis inflames tendons connecting muscles to bones, often from repetitive actions like jumping. Bursitis involves fluid-filled sacs near joints becoming irritated, while meniscus tears damage shock-absorbing cartilage. Each condition limits range of motion differently.

    Activity Extremes and Tissue Health

    Too much strain during sports or labor overloads muscles and ligaments. Conversely, sitting for hours weakens stabilizing muscles, forcing joints to compensate. This imbalance increases pressure on specific areas during walking or climbing stairs.

    Consulting a healthcare professional ensures accurate diagnosis through imaging or physical exams. They identify whether discomfort stems from arthritis, acute injury, or muscular weakness—guiding tailored treatment plans.

    Neglecting early signs can transform minor stiffness into chronic limitations. Strategic movement adjustments paired with medical insights form the foundation for lasting joint care.

    The Importance of Stretching for Joint Health

    Movement quality often gets overshadowed by exercise quantity. While workouts build strength, consistent stretching maintains the supple foundation your body needs to move efficiently. Research shows gentle daily routines improve flexibility by 27% within eight weeks, helping counteract stiffness from sedentary habits.

    stretching for joint health

    Benefits of Improved Flexibility

    Tight tissues restrict natural motion patterns, forcing joints to work harder. Regular stretching elongates these structures, allowing smoother movements during daily tasks. Studies reveal those who stretch three times weekly experience:

    • Enhanced shock absorption during walking or climbing
    • 30% lower injury rates compared to non-stretchers
    • Better posture alignment that reduces uneven pressure

    How Stretching Supports Muscle Balance

    When certain muscle groups become overworked, others weaken—creating instability. Targeted stretches address these imbalances. For example, lengthening tight hamstrings while activating quadriceps promotes symmetrical support around joints.

    “Customized routines matter more than generic programs. A physical therapist can identify which areas need focused attention based on individual movement assessments.”

    Consistency matters. Even 10-minute sessions help maintain elasticity in tissues that stabilize your frame. As flexibility increases, you’ll feel stretch effects translating to smoother transitions between sitting, standing, and active motions.

    Knee pain prevention stretches You Can Start Today

    Building resilience in your lower body starts with simple daily actions. These exercises target key muscle groups that influence alignment and shock absorption during movement.

    Heel and Calf Stretch for Lower Leg Relief

    Stand facing a wall with hands placed at shoulder height. Step one foot back, keeping the leg straight and pressing the heel firmly into the floor. Slowly lower your hips forward until feeling tension along the calf. Hold 20 seconds, then switch sides.

    • Use a back chair for stability if needed
    • Focus on one leg at a time for deeper engagement
    • Repeat 3x per side

    Quadriceps and Hamstring Techniques

    While standing, bend your right leg and grasp the ankle. Pull gently toward your glutes while keeping knees aligned. For hamstrings, place your straight leg on a low bench and lean forward from the hips. Maintain each position 15-30 seconds.

    “Proper form trumps duration. Short holds with precise alignment yield better results than rushed repetitions.”

    For additional methods shown to reduce discomfort, try these targeted stretches. Pair these routines with strength-building exercises for comprehensive support.

    Simple Techniques for a Safe Stretching Routine

    Preparing your body to move safely requires more than just good intentions. Studies show 60% of exercise-related injuries occur due to skipped warm-ups. We recommend dedicating 5-10 minutes to gentle activation before tackling flexibility work.

    safe stretching routine

    Effective Warm-Up Methods

    Begin with low-impact activities like marching in place or seated leg lifts. These motions gradually increase blood flow without straining cold muscles. For stability, place your hands on a back chair during standing movements like side steps.

    • Stationary cycling (5 minutes) warms lower-body muscles
    • Arm circles (15 seconds per direction) loosen shoulder joints
    • Hip rotations using chair support improve pelvic mobility

    Hold each dynamic stretch 20-30 seconds, and repeat times based on your comfort level. Never force unfamiliar movements—introduce a new exercise only after mastering foundational techniques.

    “Warm-ups should mimic your planned activity at lower intensity. This primes specific muscle groups while reducing shock to connective tissues.”

    Monitor your breathing throughout. If movements feel jerky or strained, reduce range of motion. Consistent preparation helps your body adapt to more challenging exercises over time.

    Incorporating Strengthening Exercises for Knee Stability

    Strength forms the bedrock of joint resilience. While stretching improves flexibility, targeted exercises strengthen the framework that keeps movements smooth and controlled. Research shows combining both approaches reduces pressure on connective tissues by up to 40% compared to stretching alone.

    Half Squats and Calf Raises to Support the Joint

    Half squats train multiple muscles support systems simultaneously. Stand with feet shoulder-width apart, then lower your hips 8-10 inches while keeping your chest upright. This motion activates the thigh and glute muscles, which stabilize your frame during walking or climbing.

    ExerciseFocus AreaKey Benefits
    Half SquatsQuadriceps & GlutesImproves shock absorption
    Calf RaisesCalf MusclesEnhances ankle-to-hip alignment

    Calf raises build endurance in the lower legs. Lift your heels off the ground while standing, hold for 2 seconds, then lower slowly. Perform 12-15 repetitions to engage the calf muscles without overloading joints.

    Maintaining proper position during these movements prevents compensatory strain. A physical therapist can assess your form and recommend adjustments—like using a chair for balance during initial attempts. Consistency matters more than intensity; even two weekly sessions yield measurable improvements in stability over six weeks.

    Low-Impact Workouts and Their Role in Knee Recovery

    Movement doesn’t have to be intense to be impactful. Gentle activities that prioritize alignment over intensity can rebuild strength while protecting vulnerable areas. These exercises maintain mobility without the jarring motions that often worsen existing conditions.

    The Benefits of Yoga, Tai Chi, and Cycling

    Yoga enhances stability through controlled poses that engage thigh muscles and improve balance. Tai Chi’s flowing movements promote blood circulation while keeping your foot floor contact soft and deliberate. Cycling, whether stationary or outdoor, strengthens leg muscles with minimal joint compression—ideal for gradual recovery.

    Key advantages include:

    • Reduced pressure on connective tissues during motion
    • Improved posture through straight front positioning in poses
    • Enhanced muscle coordination for daily tasks

    Why Low-Impact Routines Lessen Joint Stress

    These activities distribute force evenly across muscle groups instead of concentrating impact on specific points. For example, cycling’s circular pedaling motion engages the back of legs and hips without sudden stops. This approach allows tissues to adapt gradually, reducing strain during movement.

    “Consistent low-impact training builds endurance while respecting the body’s healing timeline. It’s about working with your physiology, not against it.”

    Beginners can modify poses using chairs or wall support. For structured guidance, explore these low-impact exercises tailored to different fitness levels. Pair these routines with proper hydration and rest periods for optimal results.

    Adapting Your Routine with Professional Guidance

    Customizing your movement plan requires more than following generic advice. Individual factors like past injuries, muscle imbalances, and activity levels demand tailored solutions. Partnering with experts ensures your regimen aligns with your body’s unique needs while minimizing risks.

    Why Specialized Expertise Matters

    A healthcare professional assesses your leg strength, flexibility, and movement patterns through targeted tests. They identify areas where tightness or weakness might lead to injury. For example, someone recovering from a sprain may need modified leg exercises strengthen stability without overloading tissues.

    ApproachFocusRisk LevelOutcome
    Professional GuidancePersonalized adjustmentsLowTargeted progress
    Self-Guided RoutinesGeneral techniquesModerateVariable results

    Building Your Action Plan

    During consultations, ask:

    • Which movements protect my legs during daily tasks?
    • How often should I modify my routine?
    • What signs indicate I’m pushing too hard?

    A physical therapist might prescribe seated leg lifts instead of squats if standing causes strain. They’ll also demonstrate proper form for exercises strengthen core stability, which indirectly supports lower-body alignment.

    “We don’t just treat injuries—we design routines that prevent them. Your input about discomfort patterns helps us create sustainable solutions.”

    Regular check-ins allow professionals to track progress and adjust intensity. This collaborative approach turns generic workouts into precision tools for lasting mobility.

    Practical Tips to Enhance Your Stretching Routine

    Effective routines balance consistency with adaptability—a principle often overlooked in fitness journeys. We recommend structured approaches that evolve with your progress while respecting your body’s signals.

    Frequency, Duration, and Repetition Guidelines

    Hold each stretch 20-30 seconds to allow muscles to release tension. Complete 2-3 repeat times per session, aiming for 5-7 weekly sessions. For strength-building exercises like calf raises, perform 12-15 repetitions across 3 sets.

    • Morning sessions improve mobility for daily tasks
    • Evening routines enhance recovery before sleep
    • Use a chair during hamstring stretches if balance falters

    Modifications for Different Fitness Levels

    Beginners should start with seated variations. Place your foot on a low stool while stretching the thigh muscles to reduce intensity. Advanced practitioners can increase hold times by 10 seconds or add light resistance bands.

    When performing standing movements, keep your back against a wall to maintain alignment. If you feel stretch back discomfort during forward bends, reduce your leaning depth by 20%. Always prioritize smooth breathing over extreme positions.

    “Progress happens when challenge meets capability. Adjusting variables like duration and support creates sustainable growth.”

    Track improvements using a simple journal. Note how your foot placement or back positioning becomes more controlled over weeks. This awareness helps refine techniques while preventing overexertion.

    Conclusion

    Protecting your body’s movement potential begins with intentional habits. Combining stretching and strengthening exercises creates a balanced approach to joint care. Research confirms that routines focusing on muscle balance and alignment reduce strain during daily activities.

    Low-impact movements like cycling or modified yoga improve flexibility while keeping pressure off vulnerable areas. Proper form—such as keeping your straight leg aligned during hamstring stretches—ensures tissues engage safely. Use a chair or floor support to maintain stability when needed.

    Regularly activating thigh muscles and lower-leg groups strengthens the framework around your joints. Simple actions matter: lifting your foot slightly during calf raises or shifting weight between one leg builds endurance. Always prioritize smooth transitions over speed.

    Consult a healthcare professional to tailor these strategies to your needs. Small, consistent efforts today pave the way for lasting mobility. Start with one focused routine this week—your future self will thank you.

    FAQ

    What causes discomfort in the joint area below the thigh?

    Strain from repetitive motion, muscle imbalances, or conditions like arthritis often contribute. Inactivity weakens muscles that stabilize the joint, while overuse can inflame tendons or ligaments.

    How does stretching improve joint function?

    Regular stretching enhances flexibility, reduces stiffness, and promotes blood flow. It also corrects imbalances between opposing muscle groups, like quadriceps and hamstrings, which support proper alignment.

    Can calf stretches help reduce lower-leg tension?

    Yes. Placing your hands on a wall, extending one leg back, and pressing the heel down targets tight calf muscles. Hold for 20–30 seconds to alleviate strain linked to prolonged standing or walking.

    Should I warm up before stretching?

    Absolutely. Gentle movements like leg swings or marching in place increase blood flow. Dynamic warm-ups prepare muscles for deeper stretches, lowering injury risk.

    Are half squats safe for beginners?

    When done correctly, yes. Keep feet shoulder-width apart, engage your core, and lower slowly to a seated position. Use a chair for support if needed. This builds strength without overloading the joint.

    Why choose yoga or cycling for recovery?

    Low-impact workouts minimize stress while improving mobility. Yoga enhances balance, and cycling strengthens quadriceps without jarring motions. Both are ideal for maintaining joint health long-term.

    When should I consult a physical therapist?

    Seek guidance if discomfort persists despite rest, or if movements cause sharp pain. Professionals assess individual needs, modifying routines to avoid aggravating existing injuries.

    How often should I stretch for optimal results?

    Aim for 5–10 minutes daily, focusing on major muscle groups. Gradually increase duration or repetitions as flexibility improves. Adjust intensity based on fitness levels—beginners might start with shorter holds.