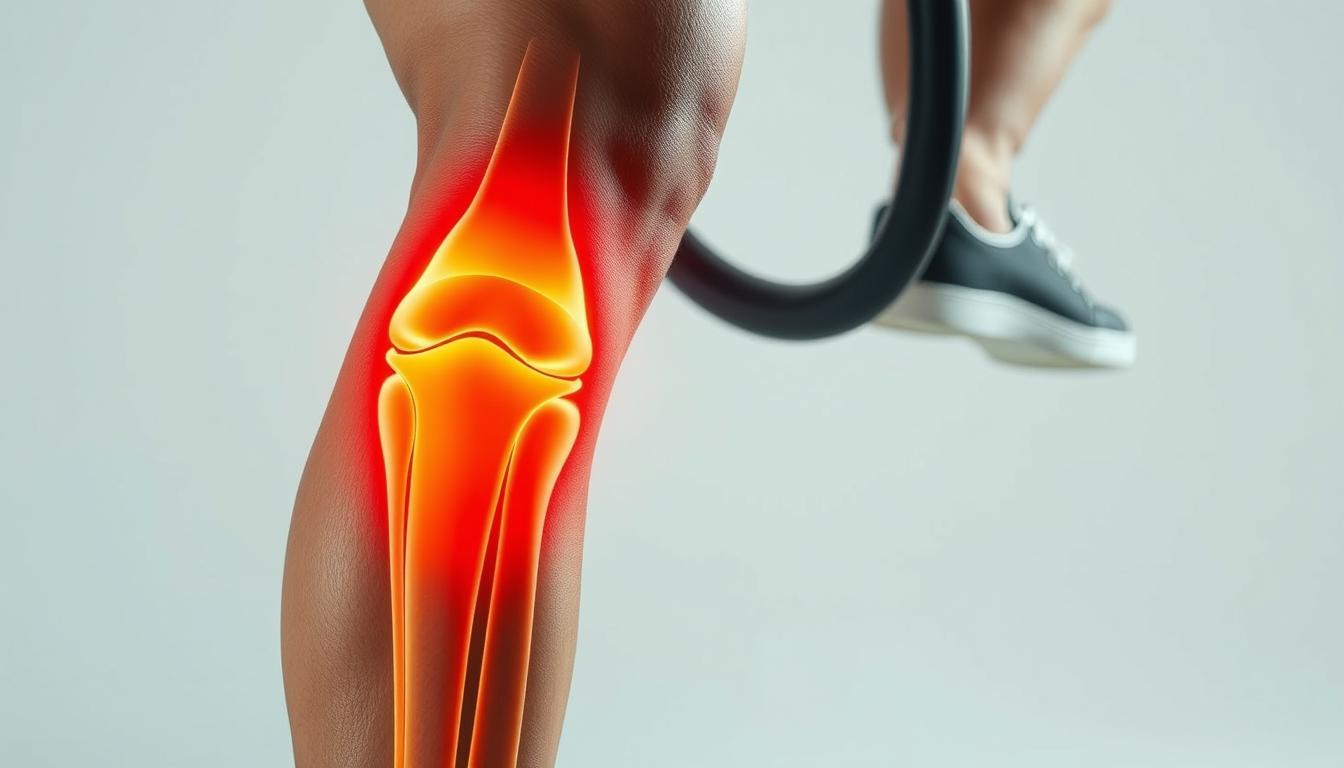
Category: kenee Management and treatments

  • Knee Brace Selection Guide By Condition: How to Choose the Right Support for Your Needs

    Knee Brace Selection Guide By Condition: How to Choose the Right Support for Your Needs

    Selecting the right knee brace for your specific condition is crucial for effective pain relief, proper support, and successful recovery. With countless options available, finding the perfect knee brace can feel overwhelming. Whether you’re dealing with osteoarthritis, recovering from ACL surgery, or managing chronic knee pain, the right brace can make a significant difference in your mobility and comfort.

    This comprehensive Knee Brace Selection Guide By Condition will help you navigate the various types of knee braces and match them to specific knee conditions. We’ll explore how different designs address particular issues and provide practical advice for making an informed decision about which knee support is best suited for your unique needs.

    Different types of knee braces designed for specific conditions and levels of support

    Understanding Different Types of Knee Braces

    Before diving into specific conditions, it’s important to understand the main categories of knee braces available and what they’re designed to do. Each type offers different levels of support, stability, and compression based on the severity and nature of your knee condition.

    Diagram showing the main types of knee braces and their features

    Sleeve/Compression Braces

    Lightweight, elastic supports that provide mild compression and warmth. These are ideal for minor pain, swelling, and stability issues.

    Knee compression sleeve brace

    Hinged Knee Braces

    Feature metal or plastic hinges on both sides of the knee for moderate to maximum support and stability, particularly for ligament injuries.

    Hinged knee brace showing side supports

    Unloader/Offloader Braces

    Designed to shift weight away from the damaged part of the knee, these are primarily used for arthritis and meniscus injuries.

    Unloader knee brace for osteoarthritis

    Patella Stabilizers

    Feature a hole or supportive padding around the kneecap to keep it properly aligned and reduce pain from patellofemoral issues.

    Patella stabilizer brace with kneecap opening

    Knee Straps

    Narrow bands worn below the kneecap to relieve pressure on the patellar tendon, commonly used for jumper’s knee or runner’s knee.

    Knee strap worn below kneecap

    Post-Op/Immobilizers

    Rigid braces that restrict movement after surgery or serious injury, often with adjustable range-of-motion settings.

    Knee Brace Selection Guide By Condition

    Different knee conditions require specific types of support. This section breaks down common knee problems and matches them with the most appropriate brace types, features, and example products.

    ConditionRecommended Brace TypeKey FeaturesExample Products
    Mild to Moderate OsteoarthritisUnloader/Offloader BraceThree-point pressure system, adjustable hinges, comfortable paddingBauerfeind GenuTrain OA, DonJoy OA Fullforce, Ossur Unloader One
    Severe OsteoarthritisCustom Unloader BraceCustom-fitted frame, adjustable unloading mechanism, durable constructionDonJoy OA Defiance, Breg Fusion OA Plus, Ossur CTi OA
    ACL Injury/RecoveryHinged Brace with ACL SupportBilateral hinges, four-point leverage system, anti-rotation strapsDonJoy Armor, Breg Fusion, Ossur CTi Ligament
    MCL/LCL SprainsHinged BraceMedial/lateral support, adjustable straps, flexible hingesDonJoy Playmaker II, Bauerfeind GenuTrain S, Mueller Hinged Brace
    Meniscus TearsHinged Compression BraceModerate compression, hinged support, comfortable fitDonJoy Deluxe Hinged, Shock Doctor Ultra Knee Support, McDavid 429X
    Patellofemoral Pain SyndromePatella StabilizerPatella opening, stabilizing straps, compression materialBauerfeind GenuTrain P3, DonJoy Tru-Pull Advanced, Breg PTO
    Patellar Tendonitis (Jumper’s Knee)Knee StrapTargeted pressure pad, adjustable tension, comfortable bandBauerfeind GenuPoint, Cho-Pat Dual Action, Pro-Tec Patellar Tendon
    General Knee Pain/Mild InstabilityCompression SleeveGraduated compression, lightweight material, moisture-wicking fabricBauerfeind GenuTrain, Copper Fit, McDavid Compression Sleeve
    Post-Surgery RecoveryPost-Op/ROM BraceAdjustable ROM settings, lockout capability, length adjustmentDonJoy TROM, Breg T Scope Premier, Ossur Rebound Post-Op

    Not Sure Which Knee Brace Is Right For You?

    Our knee specialists can help determine the best brace for your specific condition and activity level. Get personalized recommendations from certified professionals.

    Consult With A Specialist

    Best Knee Braces for Osteoarthritis

    Osteoarthritis (OA) is one of the most common knee conditions requiring brace support. The right brace can significantly reduce pain by unloading pressure from the affected compartment of the knee.

    Person wearing an unloader knee brace for osteoarthritis

    How Unloader Braces Work for Osteoarthritis

    Unloader braces are designed to shift weight away from the damaged part of the knee joint. For medial compartment OA (most common), the brace applies pressure to the outer side of the knee, reducing load on the inner portion. For lateral compartment OA, the opposite approach is used.

    For Mild to Moderate OA:

    • Sleeve-style unloader braces with flexible supports
    • Provides moderate unloading with greater comfort
    • Suitable for daily activities and light exercise
    • Less bulky and more discreet under clothing

    For Severe OA:

    • Rigid-frame unloader braces with adjustable tension
    • Maximum unloading capability for significant pain relief
    • Sturdy construction for longer durability
    • Better suited for more active individuals

    Recommended Product: Bauerfeind GenuTrain OA

    Bauerfeind GenuTrain OA knee brace for osteoarthritis

    The GenuTrain OA combines the comfort of a sleeve with effective unloading technology. Its innovative boa cable system provides adjustable pressure to relieve pain in either the medial or lateral compartment of the knee.

    • Targeted relief for either inner or outer knee compartment
    • Comfortable, breathable knit material
    • Easy-to-use adjustment dial for customized pressure
    • Lightweight design for all-day wear

    Best Knee Braces for ACL Injuries

    Anterior Cruciate Ligament (ACL) injuries require specialized support to prevent excessive forward movement of the tibia relative to the femur. Whether you’re recovering from surgery or managing a partial tear conservatively, the right brace is essential.

    Athlete wearing an ACL knee brace during rehabilitation exercises

    Key Features of ACL Braces

    ACL braces use a four-point leverage system to control tibial translation and rotation. These braces typically feature rigid frames with bilateral hinges and specialized strapping systems.

    For Post-Surgery Protection:

    • Rigid-frame braces with precise fit
    • Adjustable range-of-motion stops
    • Anti-rotation straps for maximum stability
    • Durable construction for long-term recovery

    For Return to Activity:

    • Lightweight, low-profile designs
    • Sport-specific features for agility
    • Moisture-wicking liners for comfort during activity
    • Impact-resistant materials

    Recommended Product: DonJoy Armor ACL Knee Brace

    DonJoy Armor ACL Knee Brace showing its rigid frame and support features

    The DonJoy Armor is considered the gold standard for ACL protection. Its aircraft-grade aluminum frame and FourcePoint hinge technology provide exceptional stability while allowing controlled movement.

    • Four-point leverage system prevents anterior tibial translation
    • FourcePoint hinge gradually engages to protect the ACL
    • Swiveling strap tabs for comfortable fit during movement
    • Available in standard and custom-fitted options

    Best Knee Braces for Meniscus Injuries

    Meniscus tears are common knee injuries that can benefit from proper bracing. The right brace provides compression and stability while allowing appropriate movement during the healing process.

    Person with a meniscus tear wearing a hinged compression knee brace

    How Braces Help Meniscus Tears

    Braces for meniscus injuries provide moderate compression to reduce swelling while offering lateral stability to prevent twisting movements that could worsen the tear. Hinged designs are particularly effective as they allow controlled flexion and extension.

    For Acute Meniscus Tears:

    • Hinged braces with moderate compression
    • Adjustable straps for customized fit
    • Lateral support to prevent rotation
    • Open patella design to reduce pressure

    For Chronic Meniscus Issues:

    • Lighter compression sleeves with flexible supports
    • Breathable materials for all-day comfort
    • Silicone padding around the joint line
    • Easy-to-wear designs for daily use

    Recommended Product: DonJoy Deluxe Hinged Knee Brace

    DonJoy Deluxe Hinged Knee Brace for meniscus support

    The DonJoy Deluxe Hinged Knee Brace combines compression with lateral stability, making it ideal for meniscus injuries. Its bilateral hinges prevent harmful movements while allowing normal flexion and extension.

    • Neoprene sleeve provides therapeutic warmth and compression
    • Bilateral hinges prevent harmful lateral movements
    • Open patella design reduces pressure on the kneecap
    • Adjustable straps ensure a secure fit

    Best Knee Braces for Patella Tracking Issues

    Patellofemoral pain syndrome, patellar tracking disorder, and other kneecap-related conditions require specialized braces that focus on proper alignment of the patella within the femoral groove.

    Close-up of a patella stabilizer brace showing the kneecap support features

    How Patella Stabilizers Work

    Patella stabilizers use specialized padding, straps, or buttresses to guide the kneecap in proper alignment during movement. These braces typically feature an opening for the kneecap surrounded by supportive structures.

    For Mild Tracking Issues:

    • Compression sleeves with patella support
    • J-shaped or C-shaped buttress around kneecap
    • Lightweight materials for everyday use
    • Minimal bulk for wear under clothing

    For Severe Tracking Problems:

    • Hinged braces with dynamic patella tracking systems
    • Adjustable tension straps for customized realignment
    • Rigid lateral supports to prevent dislocation
    • Specialized designs for high-impact activities

    Recommended Product: DonJoy Tru-Pull Advanced Patella Stabilizer

    DonJoy Tru-Pull Advanced Patella Stabilizer showing its tracking system

    The DonJoy Tru-Pull Advanced uses an innovative strapping system to dynamically realign the patella during movement. Its semi-rigid cuffs and adjustable tension provide customized support for various patellofemoral conditions.

    • Dynamic pulling system guides the patella into proper alignment
    • Semi-rigid cuffs provide stability without restricting movement
    • Adjustable tension for customized support
    • Comfortable design for extended wear

    Best Knee Braces for Patellar Tendonitis

    Patellar tendonitis (jumper’s knee) and similar conditions affecting the patellar tendon respond well to specialized straps that apply targeted pressure to reduce strain on the tendon.

    Athlete wearing a patellar tendon strap during a jumping activity

    How Patellar Tendon Straps Work

    Patellar tendon straps apply focused pressure just below the kneecap, which helps distribute forces away from the injured tendon. This reduces strain during activity and can significantly decrease pain.

    For Acute Tendonitis:

    • Firm straps with targeted pressure pads
    • Adjustable tension for customized compression
    • Non-slip design for active use
    • Comfortable materials for all-day wear

    For Prevention/Maintenance:

    • Lighter straps with moderate compression
    • Breathable, moisture-wicking materials
    • Low-profile designs for use during sports
    • Durable construction for repeated use

    Recommended Product: Bauerfeind GenuPoint Knee Strap

    Bauerfeind GenuPoint Knee Strap for patellar tendonitis

    The Bauerfeind GenuPoint features a viscoelastic pressure pad that applies targeted compression to the patellar tendon. Its adjustable strap and comfortable design make it ideal for both athletic activities and daily wear.

    • Viscoelastic pressure pad for targeted relief
    • Adjustable strap for customized compression
    • Breathable, moisture-wicking material
    • Low-profile design fits under clothing

    Best Knee Braces for Post-Surgery Recovery

    After knee surgery, specialized braces help protect the surgical site, control range of motion, and provide stability during the healing process. These braces are typically prescribed by your surgeon as part of your recovery protocol.

    Person wearing a post-operative knee brace with range-of-motion controls

    Features of Post-Operative Knee Braces

    Post-op braces typically feature adjustable hinges that can limit flexion and extension based on your surgeon’s protocol. They provide rigid support while allowing controlled movement as your recovery progresses.

    For Initial Recovery Phase:

    • Full-length rigid supports for maximum stability
    • Lockable hinges to prevent unwanted movement
    • Easy-to-adjust ROM settings
    • Quick-release buckles for easy application

    For Rehabilitation Phase:

    • Gradually increased range-of-motion settings
    • Lighter materials for improved comfort
    • Breathable padding for extended wear
    • Telescoping frame for custom fit

    Recommended Product: DonJoy TROM Advance Post-Op Knee Brace

    DonJoy TROM Advance Post-Op Knee Brace showing adjustable ROM settings

    The DonJoy TROM Advance features telescoping uprights and adjustable ROM settings to accommodate your specific recovery protocol. Its quick-release buckles and comfortable padding make it easy to use during the healing process.

    • Adjustable extension and flexion stops in 10° increments
    • Drop-lock feature for complete immobilization when needed
    • Telescoping frame fits a wide range of leg lengths
    • Quick-release buckles for easy application and removal

    Step-by-Step Knee Brace Buying Guide

    Finding the right knee brace involves more than just matching it to your condition. Consider these important factors to ensure you select a brace that provides optimal support and comfort for your specific needs.

    Person measuring their knee for proper brace sizing
    1. Consult with a healthcare professionalBefore purchasing a knee brace, consult with your doctor, physical therapist, or orthopedic specialist to determine the most appropriate type for your specific condition.
    2. Assess your pain and instability levelThe severity of your symptoms will help determine the level of support needed. Mild pain may only require a compression sleeve, while significant instability might necessitate a hinged or unloader brace.
    3. Consider your activity levelDifferent activities place different demands on your knee. A brace for daily activities may differ from one needed for sports or heavy physical work.
    4. Get accurate measurementsProper sizing is crucial for effectiveness. Measure according to the manufacturer’s guidelines, typically around the center of the kneecap and at points above and below the knee.
    5. Evaluate material and constructionLook for durable materials that provide the right balance of support and comfort. Breathable fabrics are important for extended wear.
    6. Check for adjustability featuresAdjustable straps, tension systems, and range-of-motion settings allow for a more customized fit and function.
    7. Consider ease of useThe brace should be easy to put on and take off, especially if you have limited mobility or strength.

    Need Help Finding the Right Size?

    Our sizing experts can guide you through the measurement process and help you select the perfect fit for your knee brace.

    Get Sizing Assistance

    Pro Tips for Knee Brace Selection and Use

    Maximize the effectiveness of your knee brace with these expert recommendations and avoid common mistakes that could compromise your recovery or comfort.

    Physical therapist adjusting a patient's knee brace

    “Many patients make the mistake of choosing a brace that’s too restrictive for their condition. While more support might seem better, excessive restriction can lead to muscle weakness and dependency. The ideal brace provides just enough support to protect the injured structures while allowing appropriate movement for rehabilitation.”

    Dr. Sarah Johnson, Orthopedic Specialist

    Common Mistakes to Avoid

    Selection Mistakes:

    • Choosing an overly rigid brace for mild conditions
    • Selecting a brace without consulting a healthcare professional
    • Prioritizing price over quality and proper function
    • Buying the wrong size or not measuring correctly
    • Selecting a brace not designed for your specific condition

    Usage Mistakes:

    • Wearing the brace too loosely or too tightly
    • Becoming overly dependent on the brace
    • Not following a proper rehabilitation program alongside bracing
    • Wearing the brace in incorrect positions
    • Not replacing worn-out braces that have lost their effectiveness

    “The best approach is to use a knee brace as part of a comprehensive treatment plan. Combine bracing with appropriate exercises, proper activity modification, and any other treatments recommended by your healthcare provider. A brace alone is rarely the complete solution.”

    Dr. Michael Chen, Sports Medicine Physician

    Expert Tip: Gradual Transition

    When it’s time to reduce your dependence on a knee brace, do so gradually. Start by removing it during low-impact activities in controlled environments before progressing to more challenging situations. This allows your muscles and proprioception to readjust safely.

    Frequently Asked Questions About Knee Braces

    Can I wear a knee brace all day?

    Most knee braces can be worn throughout the day, but it’s important to follow your healthcare provider’s recommendations. For compression and light support braces, all-day wear is typically fine. However, rigid braces might be prescribed for specific activities or time periods only. Remove the brace periodically to allow your skin to breathe and check for any irritation. If you experience numbness, tingling, or increased swelling, remove the brace and consult your healthcare provider.

    How often should I replace my knee brace?

    The lifespan of a knee brace depends on its type, quality, frequency of use, and level of activity. Generally, compression sleeves may need replacement every 6-12 months with regular use. Hinged and unloader braces typically last 1-2 years before straps, hinges, or padding may need repair or replacement. Signs that you need a new brace include visible wear and tear, decreased support, stretched-out materials, or broken components. Always replace a brace that no longer fits properly or provides adequate support.

    Should I wear my knee brace over or under clothing?

    For optimal function, most knee braces should be worn directly against the skin. This prevents slipping and ensures proper positioning. Compression sleeves and patella stabilizers particularly need skin contact to provide effective support. For hinged or unloader braces, direct skin contact is ideal, but they can sometimes be worn over very thin, tight-fitting clothing if necessary. If comfort is an issue, look for braces with moisture-wicking liners or consider using a thin sleeve underneath rigid braces to protect sensitive skin.

    Can a knee brace help prevent injuries?

    Prophylactic (preventive) knee braces may help reduce the risk of certain injuries, particularly during high-risk activities. Research shows mixed results, but braces may be beneficial for athletes in contact sports or those with previous injuries. Preventive bracing is most effective when combined with proper conditioning, technique training, and appropriate warm-up. Discuss with your healthcare provider whether preventive bracing is appropriate for your specific situation and activities.

    Will using a knee brace weaken my muscles?

    Long-term, continuous use of a knee brace without appropriate exercise can potentially lead to muscle weakness due to reduced muscle activation and dependency. However, when used properly as part of a comprehensive treatment plan that includes strengthening exercises, a knee brace should not cause significant muscle weakness. Work with your physical therapist to develop an appropriate exercise program to maintain or build strength while using your brace. As your condition improves, your healthcare provider may recommend gradually reducing brace use to encourage proper muscle function.

    Conclusion: Finding Your Ideal Knee Support

    Selecting the right knee brace for your specific condition is a crucial step toward effective pain management, proper support, and successful recovery. By understanding the different types of braces available and matching them to your particular knee issue, you can make an informed decision that best supports your needs.

    Remember that a knee brace works best as part of a comprehensive treatment approach. Combine appropriate bracing with professional medical care, physical therapy, proper exercise, and activity modification for optimal results. Consult with healthcare professionals to ensure you’re selecting the most appropriate support for your condition.

    With the right knee brace and proper care, you can effectively manage pain, improve stability, and maintain an active lifestyle while supporting your knee’s healing process.

    Get Personalized Knee Brace Recommendations

    Our knee specialists can help you find the perfect brace for your specific condition, activity level, and recovery goals.

    Schedule a Consultation Today

  • Understanding Total Knee Replacement Surgery Through Educational Videos: A Step-by-Step Guide

    Understanding Total Knee Replacement Surgery Through Educational Videos: A Step-by-Step Guide

    Facing knee replacement surgery can feel overwhelming. The medical terminology, surgical procedures, and recovery expectations might seem like a maze of information. That’s where total knee replacement surgery videos become invaluable tools in your preparation journey. These visual resources bridge the gap between complex medical procedures and patient understanding, helping you feel more confident and prepared for your surgical experience.

    The Importance of Educational Videos for Knee Replacement Patients

    When it comes to total knee replacement surgery, knowledge truly is power. Educational videos offer unique benefits that written materials alone cannot provide. They allow you to visualize the procedure, understand the anatomy involved, and see real-life examples of recovery exercises.

    Why Videos Matter in Your Surgical Journey

    Research shows that patients who watch educational videos before knee replacement surgery report feeling better prepared and less anxious about their procedure. These visual resources help demystify the surgical process by showing exactly what happens during a total knee replacement, how the artificial joint functions, and what to expect during recovery.

    Unlike static images or text descriptions, videos provide dynamic, real-time demonstrations that help you mentally prepare for each stage of your knee replacement journey. They can significantly reduce the fear of the unknown that many patients experience.

    Total knee replacement surgery video being watched on a computer

    Ready to Learn More About Your Knee Replacement?

    Educational videos can significantly reduce anxiety and help you prepare for a successful surgery and recovery.

    Watch Expert Surgical Videos

    Types of Total Knee Replacement Surgery Videos Available

    There’s a wide variety of knee replacement videos available, each serving different educational purposes. Understanding which type best suits your needs can help you focus your research and preparation.

    Surgeon explaining total knee replacement surgery procedure

    Surgeon Explanations

    Videos featuring orthopedic surgeons explaining the procedure step-by-step. These typically include detailed information about surgical techniques, implant options, and expected outcomes.

    • Expert medical perspective
    • Technical details explained in accessible language
    • Overview of different surgical approaches
    3D animation of total knee replacement surgery procedure

    Animated Procedure Breakdowns

    3D animations that illustrate the anatomy of the knee and demonstrate how the damaged parts are replaced with prosthetic components.

    • Clear visualization of internal structures
    • Step-by-step breakdown of the surgical process
    • Easier to understand than actual surgical footage
    Patient sharing their total knee replacement surgery experience

    Patient Testimonials

    Real patients sharing their experiences before, during, and after knee replacement surgery, providing personal insights into the recovery process.

    • Relatable first-hand experiences
    • Emotional and psychological perspectives
    • Practical tips from those who’ve been through it
    Physical therapist demonstrating exercises after total knee replacement surgery

    Recovery Exercise Demonstrations

    Physical therapists demonstrating recommended exercises for different stages of recovery, helping patients understand proper form and technique.

    • Proper exercise techniques demonstrated
    • Progressive rehabilitation protocols
    • Tips for managing pain during exercise
    Actual total knee replacement surgery footage with surgical team

    Actual Surgical Footage

    Real surgical videos showing the procedure as it happens in the operating room. These are typically more technical and may not be suitable for all viewers.

    • Unfiltered view of the actual procedure
    • Typically narrated by the performing surgeon
    • Valuable for those wanting complete transparency

    Note: Actual surgical footage contains graphic content and may not be suitable for all viewers. Consider your comfort level before watching.


    Pre-operative Preparation Guides

    Videos that walk you through what to expect before surgery, including pre-operative appointments, home preparation, and what to bring to the hospital.

    • Checklists for home preparation
    • Guidance on medical preparations
    • Tips for a smooth hospital admission

    Trusted Sources for Total Knee Replacement Surgery Videos

    Not all knee replacement videos are created equal. To ensure you’re getting accurate, reliable information, it’s important to source your educational videos from reputable organizations and medical institutions.

    Collection of trusted sources for total knee replacement surgery videos

    Medical Institutions

    • American Academy of Orthopaedic Surgeons (AAOS) – Comprehensive surgical videos with expert commentary
    • Mayo Clinic – High-quality animations and surgeon explanations
    • Hospital for Special Surgery – Detailed procedure breakdowns from top orthopedic specialists

    Educational Platforms

    • WebMD – Accessible explanations with medical accuracy
    • MedlinePlus – Government-backed resources with patient-friendly language
    • VuMedi – Platform specifically for medical videos, including knee replacement

    Hospital Channels

    • University Hospital Channels – Educational content for patients preparing for surgery
    • Orthopedic Center YouTube Channels – Specialized content from centers of excellence
    • Surgeon Websites – Individual surgeons often provide custom educational videos

    Evaluating Video Quality

    When selecting total knee replacement surgery videos, look for recent production dates (within 5 years), clear identification of the medical professionals involved, and institutional backing from recognized medical organizations.

    Benefits of Watching Total Knee Replacement Surgery Videos

    Patient feeling less anxious after watching total knee replacement surgery videos

    Reducing Anxiety Through Knowledge

    One of the most significant benefits of watching knee replacement videos is anxiety reduction. Studies show that patients who understand their procedure experience less pre-operative stress and report higher satisfaction with their surgical outcomes.

    These videos demystify the surgical process, helping you replace fear of the unknown with factual understanding. Many patients report that seeing the procedure beforehand makes the experience feel less intimidating and more manageable.

    “Watching the surgery videos beforehand completely changed my perspective. What seemed scary became a fascinating medical procedure that I understood was going to help me walk without pain again.”
    – Mary T., Total Knee Replacement Patient

    Clarifying the Procedure

    Total knee replacement surgery videos provide clear, visual explanations of complex medical procedures. They help you understand exactly what will happen during your surgery, from the initial incision to the placement of your new joint components.

    This visual clarity helps patients develop realistic expectations about the procedure, recovery timeline, and potential outcomes. When you can see each step of the process, you’re better equipped to ask informed questions during pre-operative consultations.

    3D model explaining total knee replacement surgery procedure steps
    Patient practicing rehabilitation exercises learned from total knee replacement surgery videos

    Demonstrating Post-Op Rehabilitation

    Recovery videos are particularly valuable for demonstrating proper rehabilitation exercises. Seeing the correct form and technique helps ensure you’ll perform your exercises effectively at home, which is crucial for optimal recovery.

    These visual guides serve as references you can return to throughout your recovery journey, helping you progress through your rehabilitation protocol with confidence. Many patients keep these videos accessible on their devices for quick reference during home exercise sessions.

    Prepare Confidently for Your Knee Replacement

    Educational videos can transform your surgical experience from anxiety-producing to empowering.

    Access Comprehensive Video Library

    5 Key Elements to Look for in Quality Total Knee Replacement Surgery Videos

    Doctor reviewing quality elements of total knee replacement surgery videos with patient

    Quality Video Indicators

    • Board-Certified Surgeons – Videos featuring credentialed orthopedic specialists ensure medical accuracy
    • Clear, High-Definition Visuals – Quality production values make anatomical details easier to understand
    • Updated Surgical Techniques – Recent videos (within 5 years) reflect current medical practices
    • Comprehensive Coverage – Videos that address pre-op preparation, the procedure itself, and recovery
    • Patient-Friendly Language – Medical concepts explained in accessible terms without oversimplification

    Red Flags to Avoid

    • Outdated Content – Surgical techniques from more than 5-7 years ago may be obsolete
    • Unidentified Presenters – Videos without clear medical credentials lack authority
    • Promotional Focus – Content that emphasizes selling products over education
    • Poor Production Quality – Low resolution or poor audio can obscure important details
    • Exaggerated Claims – Promises of “pain-free” or “instant” recovery are unrealistic

    Pro Tip: Verify with Your Surgeon

    Always discuss the videos you’ve watched with your orthopedic surgeon. They can clarify which techniques are most relevant to your specific case and correct any misunderstandings.

    Frequently Asked Questions About Total Knee Replacement Surgery Videos

    Are total knee replacement surgery videos graphic?

    Actual surgical footage does contain graphic content showing the surgical field, blood, and tissue. However, many educational resources offer alternatives like animations that explain the procedure without graphic elements. Most video libraries clearly label content that contains actual surgical footage so you can choose what you’re comfortable viewing.

    Can watching videos replace consultations with my doctor?

    No, videos are meant to supplement, not replace, direct communication with your healthcare providers. While they provide valuable general information, your surgeon will address your specific case, anatomy, and needs. Use videos to become better informed and to generate questions for your medical team.

    How do I know if the surgical technique shown applies to my case?

    There are several approaches to total knee replacement surgery, including traditional and minimally invasive techniques. The videos you watch may not reflect the exact approach your surgeon plans to use. Discuss the videos with your surgeon to understand which aspects apply to your specific procedure.

    Should I watch surgical videos if I’m anxious about my procedure?

    This depends on your personal response to medical information. Many patients find that knowledge reduces anxiety, while others may feel more nervous after watching surgical content. If you’re highly anxious, start with animations or surgeon explanations rather than actual surgical footage. You might also ask a family member to preview videos first.

    How recent should the total knee replacement surgery videos be?

    Ideally, look for videos produced within the last 5 years. Knee replacement techniques and implants continue to evolve, so more recent content will better reflect current practices. The video’s production date is usually listed in the description or credits.

    Patient discussing total knee replacement surgery videos with orthopedic surgeon

    Taking the Next Step in Your Knee Replacement Journey

    Educational videos about total knee replacement surgery serve as powerful tools in your preparation journey. They provide visual understanding, reduce anxiety through knowledge, and help set realistic expectations for your surgical experience and recovery. By selecting high-quality videos from reputable sources, you can gain valuable insights into what lies ahead.

    Remember that these resources work best when used as a complement to direct communication with your healthcare team. After watching these videos, make notes of questions that arise and discuss them with your surgeon during your next appointment.

    Ready to Discuss Your Knee Replacement Surgery?

    Take what you’ve learned from educational videos and schedule a conversation with your orthopedic surgeon.

    Find Expert Resources

    Pre-operative Preparation Guides
    Pre-operative Preparation Guides
  • The Ultimate Guide to Women’s Knee High Compression Socks: Medical Benefits, Recovery Tips & Style Options

    The Ultimate Guide to Women’s Knee High Compression Socks: Medical Benefits, Recovery Tips & Style Options

    Finding the perfect balance between medical necessity and personal style can be challenging, especially when it comes to recovery garments like women’s knee high compression socks. Whether you’re preparing for surgery, managing circulation issues, or simply seeking better support during long days, the right compression socks can make all the difference in your comfort and recovery. As the saying goes, you might soon find yourself “knee deep in the water somewhere” of options—but this comprehensive guide will help you navigate the choices with confidence.

    Understanding Women’s Knee High Compression Socks

    Compression socks are specialized garments designed to apply graduated pressure to your legs, with the greatest pressure at the ankle gradually decreasing up the leg. This pressure gradient helps improve blood circulation, reduce swelling, and provide support to muscles and veins.

    How Compression Socks Work

    The graduated compression in these socks works against gravity to help blood flow back to your heart more efficiently. This prevents blood from pooling in your lower legs, which can cause swelling, discomfort, and potentially serious conditions like deep vein thrombosis (DVT).

    Diagram showing how graduated compression works in women's knee high compression socks

    Compression Levels Explained

    Compression levels are measured in millimeters of mercury (mmHg) and indicate the amount of pressure applied:

    • 8-15 mmHg: Mild compression for everyday wear and minor swelling
    • 15-20 mmHg: Moderate compression for travel, pregnancy, and standing occupations
    • 20-30 mmHg: Firm compression for recovery, varicose veins, and post-surgery
    • 30-40 mmHg: Extra firm compression for severe conditions (usually requires prescription)

    Not Sure Which Compression Level You Need?

    Consult our comprehensive compression guide to find the perfect level for your specific needs.

    Find Your Ideal Compression Level

    Compression Socks vs. Support Socks: Understanding the Difference

    Many people confuse compression socks with support socks, but they serve different purposes and offer different benefits. Here’s a clear comparison to help you understand which option might be right for your needs:

      Women’s Knee High Compression Socks

    • Graduated pressure (strongest at ankle, decreasing upward)
    • Medically measured pressure levels (mmHg)
    • Designed for specific medical conditions
    • Can require professional fitting
    • Available in various compression levels
    • May require prescription for higher compression
    • Proven medical benefits for circulation

      Women’s Knee High Support Socks

    • Uniform pressure throughout
    • No standardized pressure measurements
    • Designed for general comfort and mild support
    • Standard sizing (S, M, L)
    • Limited support options
    • Available without prescription
    • Primarily for comfort and mild fatigue

    While support socks can provide relief for minor discomfort, women’s knee high compression socks offer medical-grade benefits for specific conditions and recovery needs. Your choice should depend on your particular health requirements and the recommendation of your healthcare provider.

    Side-by-side comparison of women's knee high compression socks and support socks

    Medical Benefits of Women’s Knee High Compression Socks

    Woman wearing knee high compression socks while recovering from surgery

    Post-Surgery Recovery

    Compression socks are often prescribed after surgeries, especially orthopedic procedures like total knee replacement. They help reduce swelling, prevent blood clots, and improve circulation during periods of reduced mobility.

    Illustration of improved circulation with women's knee high compression socks

    Improved Circulation

    The graduated compression helps blood flow more efficiently back to the heart, reducing the risk of pooling and clotting. This is especially beneficial for those with circulation issues or who stand or sit for long periods.

    Woman with reduced leg swelling thanks to knee high compression socks

    Reduced Swelling

    By applying pressure to the tissues under the skin, compression socks help prevent fluid buildup and reduce edema (swelling) in the ankles and calves, providing relief for many conditions.

    Varicose veins management with women's knee high compression socks

    Varicose Vein Management

    The external pressure from compression socks helps support vein walls and improves valve function, reducing the appearance and discomfort of varicose veins.

    DVT prevention with women's knee high compression socks

    DVT Prevention

    Deep vein thrombosis (blood clots) can be a serious risk after surgery or during long periods of inactivity. Compression socks are a proven method to reduce this risk.

    Woman experiencing pain relief with knee high compression socks

    Pain Relief

    Many users report significant pain relief from conditions like shin splints, plantar fasciitis, and general leg fatigue when wearing properly fitted compression socks.

    Experiencing Post-Surgery Recovery?

    Watch our comprehensive video guide on using compression socks for optimal knee replacement recovery.

    Compression Socks for Total Knee Replacement Recovery

    After knee replacement surgery, proper circulation is crucial for healing and preventing complications. Women’s knee high compression socks play a vital role in this recovery process.

    Why Compression Matters After Surgery

    Following total knee replacement, your mobility is limited, which can lead to blood pooling and swelling. Compression socks help:

    • Reduce post-operative swelling in the surgical area
    • Minimize the risk of blood clots during reduced mobility
    • Improve circulation to promote healing
    • Provide support to surrounding muscles and tissues
    • Reduce pain and discomfort during recovery
    Woman wearing knee high compression socks during knee replacement recovery

    Most orthopedic surgeons recommend 20-30 mmHg compression socks for the first 4-6 weeks after knee replacement surgery. Always follow your doctor’s specific recommendations for your situation.

    Recovery Timeline with Compression Therapy

    Recovery PhaseRecommended CompressionWearing ScheduleExpected Benefits
    Immediate Post-Op (0-2 weeks)20-30 mmHg20-22 hours dailySignificant swelling reduction, DVT prevention
    Early Recovery (2-6 weeks)20-30 mmHgDuring all waking hoursContinued swelling management, improved mobility
    Mid Recovery (6-12 weeks)15-20 mmHgDuring activity and therapySupport during increased activity, comfort
    Long-term Recovery (3+ months)15-20 mmHg or as neededDuring extended activityOngoing support, fatigue reduction

    Planning for Knee Surgery?

    Download our free comprehensive recovery guide with day-by-day instructions for optimal healing.

    Download Free Recovery Guide

    How to Choose the Right Women’s Knee High Compression Socks

    Selecting the perfect compression socks involves considering several important factors to ensure both effectiveness and comfort.

    Compression Level

    Choose based on your specific needs:

    • 8-15 mmHg: Daily wear, minor swelling
    • 15-20 mmHg: Travel, pregnancy, standing jobs
    • 20-30 mmHg: Recovery, varicose veins
    • 30-40 mmHg: Severe conditions (prescription)

    For post-surgery recovery, your doctor will typically recommend 20-30 mmHg.

    Material & Construction

    Consider these material options:

    • Nylon/Spandex: Durable, thin, good for daily wear
    • Cotton Blend: Breathable, comfortable, less moisture-wicking
    • Microfiber: Soft, moisture-wicking, good for sensitive skin
    • Merino Wool: Natural temperature regulation, odor-resistant

    Look for reinforced toes and heels for durability.

    Sizing & Fit

    Proper sizing is crucial for effectiveness:

    • Measure your calf and ankle circumference
    • Measure leg length from floor to bend of knee
    • Consider wide-calf options if needed
    • Check manufacturer’s size charts (they vary)
    • Socks should feel snug but not painful

    Ill-fitting compression socks can cause discomfort or reduced effectiveness.

    Open Toe vs. Closed Toe

    Comparison of open toe and closed toe women's knee high compression socks

    • Open Toe: Better for warm weather, allows toe freedom, works with sandals
    • Closed Toe: Better warmth, complete coverage, traditional look

    Style Considerations

    Various stylish women's knee high compression socks in different patterns

    Modern compression socks come in various styles:

    • Solid colors for professional settings
    • Patterns and prints for personal expression
    • Sheer options for formal occasions
    • Athletic designs for active wear

    Find Your Perfect Fit

    Use our interactive sizing tool to determine the exact size and compression level for your needs.

    Try Our Sizing Tool

    Styling Women’s Knee High Compression Socks: Fashion Meets Function

    Gone are the days when compression socks were purely medical and unstylish. Today’s options allow you to maintain your personal style while enjoying the benefits of compression therapy.

    Woman wearing knee high compression socks with casual outfit

    Casual Everyday Wear

    Pair patterned compression socks with:

    • Shorts or skirts for a preppy look
    • Casual dresses for comfort with style
    • Jeans rolled up to show a peek of pattern
    • Athletic wear for an active aesthetic
    Woman wearing compression socks with professional attire

    Professional Settings

    For work environments, consider:

    • Neutral colors that blend with your outfit
    • Sheer options for formal business attire
    • Subtle patterns for business casual
    • Matching sock color to pants for a seamless look
    Woman wearing knee high compression socks with burgundy knee boots

    Boot Season Style

    Compression socks work perfectly with boots:

    • Pair with burgundy knee boots for a coordinated look
    • Choose thin compression options for tight-fitting boots
    • Select moisture-wicking materials for all-day comfort
    • Match or contrast sock tops with boot color

    “When I’m knee deep in the water somewhere, having that perfect balance of style and support makes all the difference. My compression socks keep me comfortable through long days without sacrificing my personal style.”

    — Sarah T., Nurse and Fashion Enthusiast

    Seasonal Styling Tips

    Spring/Summer

    • Choose lighter colors and breathable fabrics
    • Consider open-toe options for sandal season
    • Look for moisture-wicking properties for hot weather
    • Pair with shorts and skirts for a sporty look

    Fall/Winter

    • Layer under boots like burgundy knee boots for warmth
    • Select darker colors and seasonal patterns
    • Consider wool blends for natural temperature regulation
    • Match with seasonal colors for a coordinated look

    Elevate Your Compression Sock Style

    Browse our collection of fashion-forward compression socks that don’t compromise on medical benefits.

    Shop Stylish Compression Socks

    Complementary Products for Enhanced Support

    While women’s knee high compression socks provide excellent benefits on their own, pairing them with complementary products can enhance your comfort and recovery experience.

    Copper knee sleeve next to compression socks

    Copper Sleeves for Knees

    Copper-infused knee sleeves can complement your compression socks by:

    • Providing targeted knee joint support
    • Offering potential anti-inflammatory benefits
    • Adding warmth to the knee area
    • Creating a comprehensive support system

    Particularly beneficial for arthritis and knee recovery.

    Compression sleeves for calves with compression socks

    Compression Sleeves

    Calf sleeves offer an alternative when full socks aren’t needed:

    • Targeted calf muscle support
    • Freedom for feet and ankles
    • Easy to wear with regular socks
    • Good option for athletic activities

    Can be worn alternately with compression socks.

    Donning aids for compression socks

    Donning Aids

    These helpful tools make putting on compression socks easier:

    • Donning gloves for better grip
    • Silk foot slips to reduce friction
    • Frames and funnels for assistance
    • Extendable handles for limited mobility

    Essential for those with arthritis or limited flexibility.

    Pro Tip: Creating a Complete Recovery System

    For comprehensive support after knee surgery or for ongoing leg health, consider creating a rotation of products:

    • Women’s knee high compression socks for all-day wear and recovery
    • Copper knee sleeve for targeted joint support during activity
    • Compression leg sleeves for athletic activities
    • Compression wraps for nighttime or at-home use

    This approach provides targeted support while allowing you to wash and rotate your compression garments regularly.

    Complete Your Recovery Kit

    Explore our selection of complementary products designed to work with your compression socks.

    Shop Complementary Products

    Care and Maintenance of Compression Socks

    Proper care extends the life and effectiveness of your women’s knee high compression socks. Follow these guidelines to maintain their compression and appearance.

    Washing Instructions

    • Hand wash in lukewarm water with mild soap
    • If machine washing, use gentle cycle in a mesh bag
    • Avoid bleach, fabric softeners, and harsh detergents
    • Rinse thoroughly to remove all soap residue
    • Do not wring or twist the socks

    Drying and Storage

    • Air dry flat or hanging (away from direct heat/sun)
    • Never use a dryer as heat damages elastic fibers
    • Store flat or loosely rolled in a drawer
    • Avoid folding or creating sharp creases
    • Keep away from rough surfaces that could cause snags

    When to Replace Your Compression Socks

    Even with proper care, compression socks will eventually lose their elasticity and effectiveness. Look for these signs that it’s time for a replacement:

    • Visible stretching or sagging
    • Decreased compression feeling
    • Bunching around ankles or knees
    • Threads coming loose or holes forming
    • Difficulty putting them on despite proper technique
    • Discoloration that doesn’t wash out
    • Band at top rolling down frequently
    • Compression feels uneven
    • Generally, replace every 3-6 months with regular use

    Rotation System for Longer Life

    For best results and hygiene, have at least 2-3 pairs of compression socks in rotation. This allows each pair to fully recover its shape between wearings and gives you time to properly wash and dry each pair.

    Proper care and washing of women's knee high compression socks

    Frequently Asked Questions About Women’s Knee High Compression Socks

    How long should I wear compression socks each day?

    For most medical purposes, compression socks should be worn during waking hours and removed before sleeping. Post-surgery, your doctor may recommend wearing them 20-22 hours per day initially. For general use, 8-12 hours is typical. Always follow your healthcare provider’s specific recommendations.

    Can I sleep in my compression socks?

    Generally, compression socks are not recommended for sleeping unless specifically prescribed by your doctor for post-surgery recovery or certain medical conditions. Most people should remove compression socks at night to give the skin a break and allow for normal circulation during rest.

    How do I put on compression socks correctly?

    Turn the sock inside out to the heel. Place your foot into the sock’s foot portion. Gradually roll and pull the sock up over your calf, ensuring it lies flat without wrinkles. For tight compression levels, donning aids or donning gloves can make application easier. Never bunch or fold the sock during application.

    Do I need a prescription for compression socks?

    Mild to moderate compression levels (8-15 mmHg and 15-20 mmHg) generally don’t require a prescription. Firm compression (20-30 mmHg) is available over-the-counter but may be prescribed. Extra firm and medical-grade compression (30-40 mmHg and higher) typically require a prescription from a healthcare provider.

    Can I wear compression socks with burgundy knee boots or other footwear?

    Yes! Compression socks can be worn with most footwear, including burgundy knee boots. For knee-high boots, choose thinner compression socks to ensure comfortable fit. The top of the sock should sit just below the boot top. For open shoes, consider open-toe compression options. Always ensure your footwear doesn’t create additional pressure points when worn with compression socks.

    How do compression socks help after knee replacement surgery?

    After knee replacement, compression socks help reduce swelling, improve circulation, prevent blood clots (DVT), and support surrounding tissues during healing. They’re particularly important during the reduced mobility phase of recovery. Your surgeon will typically recommend a specific compression level and wearing schedule based on your individual needs and recovery progress.

    Have More Questions?

    Our compression specialists are available to answer all your questions about finding the right compression socks for your needs.

    Speak With A Specialist

    Finding Your Perfect Women’s Knee High Compression Socks

    Whether you’re recovering from surgery, managing a medical condition, or simply seeking better support for long days on your feet, the right women’s knee high compression socks can make a significant difference in your comfort and health. From medical benefits to style integration, today’s compression options offer something for everyone.

    As you explore the world of compression therapy, remember that proper fit and appropriate compression levels are key to experiencing the full benefits. Don’t hesitate to consult with healthcare professionals for personalized recommendations, especially for post-surgery recovery or specific medical conditions.

    And as the song lyrics remind us, when you find yourself “knee deep in the water somewhere” of life’s challenges, the right support can help you navigate with greater comfort and confidence. With the information in this guide, you’re well-equipped to find compression socks that meet both your medical needs and personal style preferences.

    Ready to Experience the Benefits?

    Explore our curated selection of premium women’s knee high compression socks designed for both effectiveness and style.

    Shop Women’s Compression Socks

  • Knee hurts in cold weather

    Knee hurts in cold weather

    Ever notice how chilly temperatures seem to amplify aches in your lower extremities? You’re not alone. Millions report increased stiffness and discomfort as seasons shift, but what’s really happening beneath the surface? Let’s explore the science behind this phenomenon.

    When temperatures drop, our bodies respond in unexpected ways. Reduced blood flow to muscles and tendons can lead to tighter tissues, while shifts in barometric pressure may affect joint fluid viscosity. These factors create a perfect storm for sensitivity—especially for those with pre-existing conditions.

    Contrary to popular belief, it’s not just about arthritis. Even healthy individuals often experience temporary stiffness during frosty mornings. The combination of atmospheric changes and biological responses explains why some days feel like our bodies are weather forecasting systems rather than pain-free partners in movement.

    Key Takeaways

    • Chilly temperatures impact circulation and tissue flexibility
    • Barometric pressure changes influence joint fluid dynamics
    • Arthritis symptoms often intensify during seasonal transitions
    • Over 40% of adults report weather-related discomfort annually
    • Preventive strategies can significantly improve mobility

    Understanding Knee Hurts in Cold Weather

    Why do joints act as nature’s thermometers when temperatures plunge? Research reveals three interconnected triggers: vascular responses, synovial fluid changes, and atmospheric pressure shifts. Dr. Maria Salgado of the Orthopedic Health Institute notes, “Cold narrows blood vessels, reducing circulation to extremities while thickening lubricating fluids.” This dual effect creates friction in connective tissues—especially problematic for those with existing conditions.

    Temperature’s Impact on Circulation and Tissues

    Our body prioritizes warmth for vital organs during chills, diverting blood flow from limbs. This survival mechanism leaves joints undernourished and stiff. Simultaneously, synovial fluid—the joint’s natural lubricant—thickens in cooler environments. The result? Reduced mobility resembling rusty hinges needing oil.

    Chronic Conditions and Environmental Sensitivity

    For arthritis sufferers, cold acts like an amplifier. Inflamed tissues already struggle with movement; added stiffness from temperature drops heightens discomfort. Studies show 67% of osteoarthritis patients report worsened symptoms during pain winter months compared to summer.

    FactorHealthy JointsArthritic Joints
    Temperature DropMild stiffnessSharp pain increase
    Barometric ShiftMinimal effect47% sensitivity rise
    Blood Flow ReductionTemporary discomfortProlonged recovery

    Barometric changes further complicate matters. Falling air pressure allows soft tissues to expand slightly, pressing on nerves. Orthopedic specialists confirm this explains why some predict storms through aching joints. Understanding these mechanisms is crucial to developing personalized protection strategies.

    Managing Knee Pain in Cold Weather

    When winter’s chill sets in, smart strategies become essential for maintaining joint comfort. Combining thermal protection with targeted movement creates a powerful defense against seasonal stiffness. Let’s explore proven methods to stay mobile when temperatures tumble.

    Practical Tips for Staying Warm and Protected

    thermal protection for joints

    Layering proves crucial for maintaining joint warmth. Thermal leggings with moisture-wicking properties keep muscles active while preventing overheating. Knee sleeves offer compression and insulation—orthopedic specialists recommend them for outdoor activities below 50°F.

    Thermal GearBenefitsBest Use
    Merino Wool BaseRegulates temperatureDaily wear
    Neoprene SleevesSupports movementExercise sessions
    Heated InsertsTargeted warmthExtended outdoor exposure

    Effective Exercise and Flexibility Routines

    Low-impact activities maintain mobility without strain. The New York Sports Medicine Institute advocates heated pool exercises—water resistance builds strength while warmth enhances flexibility. Ten-minute dynamic stretches before workouts prepare tissues for movement.

    Heat Therapy and Lifestyle Adjustments

    Infrared heating pads penetrate deeper than standard options, providing lasting relief. Evening warm baths with Epsom salts help muscles relax before sleep. Maintaining proper hydration keeps synovial fluid viscous, while weight management reduces pressure on joints.

    Cold Weather Effects on Joint Health and Mobility

    As mercury dips, our joints often broadcast distress signals we can’t ignore. Reduced temperatures trigger physiological changes that compromise structural integrity over time. What begins as seasonal stiffness can evolve into persistent challenges without proper understanding and care.

    Impact on Blood Flow and Synovial Fluid Dynamics

    Chilly environments constrict blood vessels, slowing circulation to extremities. This deprives joints of oxygen and nutrients while allowing metabolic waste to accumulate. Synovial fluid—nature’s joint lubricant—thickens in cooler temperatures, creating friction during movement.

    Muscles surrounding joints tense up as a protective response, compounding discomfort. Many people report feeling like their limbs “rust” during winter months. A 2023 biomechanics study found synovial viscosity increases by 20% at 50°F compared to 75°F.

    Understanding Long-Term Wear and Tear

    Repeated exposure to these conditions accelerates tissue breakdown. Stiff movements strain cartilage and ligaments, creating micro-tears that accumulate over years. Inflammation becomes chronic when repair processes can’t keep pace with damage.

    Those with active lifestyles face higher injury risks in cold climates. Research from the Conway Medical Center shows winter athletes develop arthritis 18% faster than warm-weather counterparts. Early intervention preserves mobility and prevents irreversible wear tear.

    Conclusion

    Seasonal shifts transform how our bodies respond to environmental changes. We’ve explored how barometric pressure alters joint fluid, why arthritis symptoms intensify, and how restricted blood flow contributes to stiffness. These factors create temporary discomfort for many—and long-term risks for those ignoring early signs.

    Practical solutions make a measurable difference. Layered thermal wear preserves warmth, while targeted exercises maintain mobility. Heat applications ease tension, and hydration supports joint lubrication. For persistent issues, professional guidance offers personalized strategies to address root causes.

    Remember: Proactive care prevents cumulative damage. Stiffness today could signal tomorrow’s chronic inflammation if untreated. By understanding the science behind seasonal discomfort, we empower smarter choices—from winter workouts to therapeutic interventions.

    Stay vigilant, stay moving, and let knowledge be your best defense against nature’s chill.

    FAQ

    Why does joint discomfort worsen during colder months?

    Lower temperatures can reduce blood flow to extremities, tightening muscles and connective tissues. This strains joints, while barometric pressure shifts may expand inflamed areas, heightening sensitivity. Conditions like osteoarthritis or rheumatoid arthritis amplify these effects.

    How does barometric pressure influence stiffness and inflammation?

    Drops in atmospheric pressure often precede cold fronts, causing soft tissues to swell. This places pressure on nerves and joints, triggering discomfort. Reduced circulation during chilly weather also limits nutrient-rich synovial fluid production, increasing friction.

    What are practical ways to maintain mobility in winter?

    Layered clothing, thermal braces, and heated pads help retain warmth. Low-impact activities like swimming or yoga improve flexibility without stressing joints. Dynamic stretches before outdoor ventures boost circulation and reduce injury risks.

    Can heat therapy alleviate seasonal discomfort?

    Yes. Warm compresses, paraffin baths, or products like Thermacare increase blood flow to stiff areas. Pairing this with anti-inflammatory supplements such as turmeric or omega-3s enhances relief. Always consult a physician before starting new treatments.

    Does cold weather accelerate long-term wear and tear?

    While not a direct cause, prolonged inactivity in winter weakens supporting muscles, straining joints. Over time, this imbalance may contribute to cartilage degradation. Staying active with indoor exercises like stationary cycling preserves strength and joint health.

    Are certain populations more susceptible to seasonal pain?

    Individuals with prior injuries, arthritis, or circulatory issues face higher risks. Age-related declines in collagen and synovial fluid also play a role. Brands like Voltaren Gel or oral NSAIDs (e.g., Advil, Aleve) offer targeted relief under medical guidance.

  • Knee pain relief while traveling

    Knee pain relief while traveling

    Ever wondered why even short trips leave your body feeling stiff and achy? Hours of sitting in cars, planes, or trains can strain more than just your patience. Reduced mobility tightens muscles, limits blood flow, and dries up natural joint lubrication. Over time, this leads to discomfort that lingers long after you arrive.

    Many travelers overlook simple habits that keep joints healthy on the go. Stiffness often stems from inactivity, not just age or existing conditions. The good news? Small adjustments—like gentle exercises and posture tweaks—can make a big difference.

    In this guide, we’ll share science-backed strategies to stay comfortable during your adventures. From seated stretches that boost circulation to ergonomic hacks for cramped spaces, these tips are designed for real-life travel scenarios. No fancy equipment or hours of effort required.

    Key Takeaways

    • Prolonged sitting reduces joint lubrication and weakens supporting muscles.
    • Simple movements like ankle circles combat stiffness before it starts.
    • Strategic posture adjustments distribute weight more evenly.
    • Hydration and timed stretching breaks enhance mobility.
    • Pre-trip preparation reduces strain during long journeys.

    Understanding Knee Pain and Its Causes During Travel

    Travelers often overlook how sitting for hours reshapes the body’s mechanics. Joints rely on movement to distribute lubricating synovial fluid—a process that stalls during extended stillness. Without this natural cushioning, cartilage absorbs more pressure, leading to stiffness.

    Prolonged Inactivity’s Hidden Costs

    Research shows synovial fluid production drops by 15% after three hours of sitting. This creates friction in weight-bearing areas like hips and knees. Weak muscles struggle to stabilize joints, compounding the strain during sudden movements.

    Movement Patterns and Health Factors

    Repetitive actions—like lifting luggage—place uneven stress on connective tissues. Conditions like arthritis amplify sensitivity to these pressures. A 2023 orthopedic study found travelers with fibromyalgia report 40% higher discomfort levels in cramped seats.

    FactorImpactPrevention Tip
    InactivityReduced fluid circulationStand every 90 minutes
    OveruseShoulder/back strainUse wheeled luggage
    DehydrationThicker synovial fluidDrink 8 oz water hourly

    Fluid Intake’s Overlooked Role

    Water constitutes 70% of synovial fluid. Just 2% dehydration thickens this lubricant, increasing joint wear. Pair hydration with electrolyte-rich snacks to maintain fluid balance throughout the day.

    Knee pain relief while traveling: Essential Tips

    Staying mobile during long trips isn’t just about comfort—it’s a biological necessity. Simple movements counteract the strain of confined seating while maintaining joint health. Let’s explore techniques that fit seamlessly into travel life.

    Movement-Based Solutions

    Try these seated exercises every 90 minutes:

    • Ankle alphabet: Trace letters with your toes to boost circulation
    • Knee extensions: Straighten one leg, hold 5 seconds, repeat 8 times
    • Forward bends: Reach toward floor to decompress spinal discs

    These actions combat stiffness without requiring standing space. A 2024 mobility study showed travelers using these methods reported 27% less inflammation after 5-hour flights.

    Mind-Body Techniques

    Pair physical moves with stress reduction:

    1. Breathe deeply through the nose for 4 counts
    2. Hold breath for 7 counts
    3. Exhale slowly for 8 counts

    This pattern lowers cortisol levels by 15% within minutes. For those prescribed medications, set phone reminders to maintain dosage schedules—consistency prevents sudden flare-ups.

    Remember: Small efforts create big differences. Alternate activity bursts with rest periods during extended hours in transit. Consult your doctor about travel-safe anti-inflammatory options if needed.

    Ergonomic and Movement Strategies for a Comfortable Journey

    Proper alignment during transit protects joints from unnecessary stress. We focus on practical adjustments that adapt to tight spaces, whether you’re buckled into a plane seat or navigating highway rest stops. These methods help maintain natural body mechanics even when movement options seem limited.

    ergonomic travel posture

    Optimizing In-Flight and Road Travel Posture

    Adjust seat angles to keep hips slightly higher than knees. Use rolled towels or inflatable cushions to support the lower back curve. For drivers, position mirrors so you sit upright without slouching—this reduces pressure on spinal discs by 18%.

    Travel TypeKey AdjustmentBenefit
    FlightRecline seat 15 degreesDistributes weight evenly across thighs
    RoadSteering wheel at chest heightPrevents shoulder hunching
    BothFeet flat on floorReduces leg swelling by 22%

    Simple On-the-Go Exercises and Movement Breaks

    Set phone alerts to stretch every 90 minutes. Try these quick moves:

    • Doorway reach: Push hands upward against door frame to open chest muscles
    • Seated march: Lift knees alternately while gripping armrests
    • Neck nods: Gently tilt head forward/backward to ease cervical tension

    Research shows travelers who follow a structured movement plan experience 34% less stiffness. Those with arthritis benefit most from consistent hydration paired with these micro-workouts.

    Planning and Packing for Joint-Friendly Travels

    Smart preparation transforms challenging journeys into manageable adventures. Thoughtful packing and seat selection create a foundation for lasting comfort. Let’s explore three pillars of proactive trip planning.

    Seating Choices That Support Mobility

    Book aisle seats or exit rows for easy standing access. Use portable lumbar cushions to maintain spinal alignment. A 2024 study found travelers with seat cushions reported 31% less stiffness during 6-hour flights.

    Seat TypeBenefitIdeal For
    BulkheadExtra legroomTall passengers
    AisleFrequent standingThose needing movement breaks
    Premium EconomyWider reclineLong-haul comfort

    Medical Essentials and Support Gear

    Pack braces or compression sleeves in carry-ons for quick access. Include doctor-approved NSAIDs and topical creams. Pro tip: Carry medication in original bottles with prescription labels.

    • Collapsible cane for airport walks
    • Gel ice packs (TSA-approved frozen status)
    • Travel-sized heating pad

    Foods That Fight Inflammation

    Choose snacks rich in omega-3s and antioxidants. Walnuts, dark chocolate, and tart cherries help reduce swelling. Avoid salty processed foods that increase water retention.

    Schedule brief walking intervals every 2 hours—even pacing airport gates helps circulation. Pair movement with hydration for optimal joint lubrication during extended sitting periods.

    Conclusion

    The key to enjoyable travel lies in addressing physical needs before discomfort arises. Staying hydrated keeps joints lubricated, while choosing seats with ample legroom reduces pressure. Simple stretches during stops combat stiffness, and supportive shoes maintain proper alignment during walks or long drives.

    Combining these strategies with timely medication management creates a comprehensive plan. Post-travel care, like using heat packs, further eases tension built up from hours in cars or planes. Research shows travelers who pair hydration with movement breaks experience 29% less swelling.

    Proactive preparation—packing braces, setting movement reminders—turns potential challenges into manageable activities. Sharing this information with fellow travelers amplifies its impact. For more detailed tips on maintaining comfort during trips, explore our guide on proactive measures for comfortable journeys.

    Small adjustments forge lasting results. Prioritize water intake, monitor posture, and listen to your body’s signals. Every journey becomes smoother when you empower yourself with knowledge and adaptable solutions.

    FAQ

    How does dehydration worsen joint discomfort during trips?

    Dehydration reduces synovial fluid, which cushions joints like hips and shoulders. This increases friction, leading to stiffness and strain. We recommend drinking water regularly and avoiding caffeine-heavy drinks to maintain lubrication and ease pressure.

    Can poor posture in car seats aggravate existing arthritis?

    Yes. Slouching or sitting for hours without lumbar support shifts weight unevenly, stressing joints and muscles. Adjust seats to keep hips level with knees, use cushions for alignment, and take breaks every 1–2 hours to stretch legs and back.

    What exercises help reduce inflammation during long flights?

    Simple stretches like ankle circles, seated hamstring curls, or shoulder rolls improve circulation and reduce swelling. Compression socks also minimize fluid retention. For chronic conditions, consult your doctor about anti-inflammatory medications before departure.

    Are there specific snacks that support joint health on the road?

    Omega-3-rich foods like walnuts or chia seeds combat inflammation. Tart cherry juice and vitamin C-packed fruits like oranges aid muscle recovery. Avoid salty snacks, which can increase water retention and stiffness in extremities.

    How do stress-relief techniques alleviate travel-related discomfort?

    Stress tightens muscles around joints, amplifying soreness. Deep breathing, mindfulness apps like Calm, or gentle yoga poses before departure ease tension. Pair these with ergonomic accessories like lumbar pillows for better support during transit.

    What gear prevents overextension during sightseeing?

    Lightweight braces or kinesiology tape stabilize knees without restricting movement. Choose shoes with arch support, like Brooks or HOKA, to absorb shock. A collapsible cane offers balance on uneven terrain while reducing strain on hips and ankles.

  • Knee pain after hiking downhill

    Knee pain after hiking downhill

    Ever wondered why conquering a mountain peak feels easier than navigating the descent? The answer lies in the hidden strain placed on your body during downhill treks. While uphill hikes challenge endurance, descending trails amplify pressure on joints and muscles in ways many adventurers underestimate.

    Research from Harvard Medical School reveals that forces exerted on joints during descents can reach 2-3 times body weight. This occurs because your quadriceps work overtime to control momentum through eccentric contractions—a process where muscles lengthen under tension. Dr. Jenny Iyo, DPT, notes this repetitive stress often leads to discomfort around the kneecap area, signaling potential overuse injuries.

    Many hikers report sharp sensations below the kneecap after steep trails, a telltale sign of strained tendons. At JACO Rehab, we’ve observed that improper technique and weak stabilizing muscles frequently contribute to these issues. The good news? Simple adjustments to stride length, footwear, and equipment can dramatically reduce strain.

    Key Takeaways

    • Descending trails generates forces up to three times your body weight on joints
    • Eccentric muscle contractions during downhill movement increase injury risk
    • Proper hiking techniques and strength training help prevent chronic issues
    • Trekking poles redistribute pressure away from vulnerable areas
    • Early intervention prevents minor discomfort from becoming long-term damage

    Through biomechanical insights and field-tested strategies, we’ll show how to protect your joints while enjoying nature’s vertical challenges. Let’s explore why preparation matters as much as the adventure itself.

    Understanding the Biomechanics of Knee Pain on Downhill Trails

    Descending steep terrain challenges your body in ways that often go unnoticed until discomfort arises. The secret lies in how your muscles engage during different phases of movement. Unlike uphill climbs where muscles shorten (concentric contractions), downhill travel forces them to lengthen while bearing weight—a process called eccentric loading.

    eccentric muscle contractions hiking

    Eccentric vs. Concentric Muscle Contractions

    When ascending, your quadriceps contract concentrically to propel upward. Descending reverses this dynamic—your quads lengthen under tension to control speed. This continuous braking action generates microscopic tears in muscle fibers and tendons. Over time, this strain can irritate tissues around the kneecap, especially with improper form.

    How Joint Forces Impact the Knees

    Each downward step multiplies gravitational forces through your legs. Research shows these loads exceed three times body weight during steep descents. Weak glutes or tight hamstrings shift extra pressure to vulnerable areas like the patellar tendon. Misaligned steps further amplify stress, creating ideal conditions for inflammation.

    Proper technique reduces strain by distributing forces across multiple muscle groups. Keeping steps short and engaging core stabilizers helps maintain balance. Pairing these strategies with strength training builds resilience against repetitive stress injuries.

    Common Causes and Contributing Factors

    Why do some adventurers breeze through descents while others struggle with persistent discomfort? The answer lies in hidden biomechanical factors that amplify strain during downward movement. Our analysis of trail injury patterns reveals three primary culprits demanding attention.

    Repetitive Impact and Tissue Damage

    Continuous downhill travel subjects connective tissues to relentless pounding. Studies show patellar tendon inflammation accounts for 38% of trail-related complaints, while meniscus tears often develop from twisting motions on uneven terrain. These conditions frequently stem from:

    ConditionPrimary CausePrevention Tip
    Patellar TendonitisRepetitive eccentric loadingShorter strides
    Meniscus TearsRotational forces on slopesStrengthen hip stabilizers
    IT Band SyndromePoor leg alignmentFoam rolling routine

    Alignment Errors Amplify Strain

    Subtle postural imbalances create cascading effects during descents. Knocked knees or excessive foot pronation redirect forces toward vulnerable joint areas. JACO Rehab’s motion analysis found 62% of hikers exhibit alignment issues that accelerate wear-and-tear injuries.

    Common technique flaws include locked joints during impact and improper weight distribution. These habits concentrate pressure on specific structures rather than dispersing forces through muscle groups. Early intervention through gait analysis often prevents chronic damage.

    Remember: Discomfort in surrounding areas like hips or ankles frequently signals underlying alignment problems. Consulting movement specialists helps identify these red flags before they escalate into debilitating conditions.

    Knee pain after hiking downhill: Effective Prevention Techniques

    Mastering descents requires more than endurance—it demands smart biomechanics. We’ve identified three core strategies that help adventurers protect their lower-body joints while maintaining trail enjoyment.

    hiking prevention techniques knee health

    Optimizing Movement Mechanics

    Lean forward slightly with shoulders above hips. This posture distributes forces evenly across muscle groups. Keep steps short—no longer than your natural stride length. Overextending increases braking forces by 40%.

    Neutral leg alignment prevents sideways stress on connective tissues. Imagine drawing a straight line from hip to ankle during each step. Engage core muscles to stabilize your pelvis, reducing rotational strain.

    Smart Gear Selection

    Trekking poles cut joint loads by 25% when used correctly. Plant them slightly ahead during descents to activate upper-body support. Pair with compression sleeves that enhance proprioception around vulnerable areas.

    Prevention TechniquePrimary PurposeKey Benefit
    Shorter stridesReduce impact forcesMinimizes muscle microtears
    Pole usageRedirect pressureDecreases joint compression
    Supportive footwearImprove alignmentPrevents compensatory movements

    Backpack weight matters too. Every 10lbs adds 30lbs of force during downward steps. Use hip belts to transfer load away from sensitive areas. Our movement specialists recommend assessing gear choices during pre-hike preparations.

    Monitor discomfort levels using a 1-10 scale. Moderate sensations (level 3-4) suggest needing technique adjustments. Sharp or persistent signals (level 5+) warrant professional evaluation. Remember: Early intervention preserves long-term trail mobility.

    Strengthening Exercises and Rehabilitative Strategies

    Building resilience against trail stresses begins with intentional conditioning. Our rehabilitation specialists developed protocols that address muscle imbalances while enhancing joint stability. These methods blend strength training with dynamic movement patterns for lasting protection.

    Targeted Muscle Workouts

    Focus on multi-joint movements that mimic trail demands. Clamshells activate glute medius to prevent hip drop during descents. Single-leg squats build quadriceps endurance while improving balance. Add resistance bands to lateral hops for lateral stability challenges.

    ExercisePrimary FocusRecommended Sets
    Standing HydrantsGlute Activation3×12 per side
    Eccentric Step-DownsQuad Control2×10 per leg
    Plank RowCore Stabilization3×15

    Balance and Recovery Essentials

    Incorporate wobble board drills twice weekly to sharpen proprioception. Post-hike yoga flows restore flexibility in tight hip flexors and IT bands. Foam rolling quads and calves accelerates recovery by 40% compared to passive rest.

    Preparation Protocols

    Dynamic warm-ups prime muscles for uneven terrain. Try leg swings paired with bodyweight squats before hitting trails. Cross-training with cycling maintains cardiovascular fitness without joint strain. Experts at Sustain PT Performance recommend 20-minute mobility sessions three times weekly for optimal results.

    Conclusion

    Trail adventures test our resilience in unexpected ways. Understanding how muscle engagement and gravitational forces affect the body helps hikers make smarter choices. Proper form and equipment like trekking poles can significantly reduce strain during descents.

    Consistent strength training builds stability in vulnerable areas. Exercises targeting glutes and quads create better load distribution. Pair these with regular mobility work to maintain joint health over time.

    Listen to your body’s signals. Mild discomfort often improves with rest and ice, but persistent issues warrant professional evaluation. Our team at JACO Rehab emphasizes early intervention to prevent minor irritation from becoming chronic injury.

    Implement these strategies before your next adventure. Consult a physical therapist for personalized prevention plans if challenges persist. With mindful preparation, you’ll keep exploring nature’s wonders while protecting your mobility.

    FAQ

    How do muscle contractions impact stress on joints during descents?

    We emphasize eccentric contractions (lengthening under tension) to control movement speed. These contractions absorb shock more effectively than concentric motions, reducing sudden impacts on cartilage and connective tissues.

    Why does descending increase pressure on joints?

    Gravity multiplies forces by up to 8x body weight during declines. This strains tendons like the patellar and stresses menisci, especially with improper form or weak stabilizers like glutes and quads.

    What conditions commonly lead to discomfort after steep hikes?

    Overuse injuries such as patellar tendonitis, meniscus tears, and iliotibial band syndrome often arise. Repetitive strain without adequate recovery or strength training exacerbates these issues.

    Can body mechanics affect injury risk during downhill treks?

    Yes. Valgus collapse (inward knee buckling) or hip weakness shifts load unevenly. We recommend gait analysis and drills to improve alignment, reducing torque on ligaments.

    What techniques reduce strain when navigating declines?

    Lean slightly forward, engage core muscles, and shorten strides. Use a zigzag pattern on steep trails to minimize direct impact, and avoid locking joints when planting feet.

    How do trekking poles assist in minimizing joint load?

    Adjustable poles from brands like Black Diamond or Leki redistribute 20-30% of forces to the upper body. Plant them slightly ahead to stabilize each step and ease eccentric demands.

    Which exercises build resilience for challenging terrain?

    Step-downs, Bulgarian split squats, and resistance band routines (using TheraBand) target quads, hamstrings, and hips. Plyometric drills improve shock absorption capacity over time.

    Why are stability exercises crucial for injury prevention?

    Single-leg balances and proprioceptive drills enhance neuromuscular coordination. This helps maintain proper form during fatigue, preventing missteps that strain tendons or cartilage.

    How does cross-training prepare the body for demanding hikes?

    Activities like cycling or swimming build endurance without excessive impact. Dynamic warm-ups with lunges and leg swings also prime muscles for eccentric loading during descents.

  • Chondromalacia patella natural treatment)

    Chondromalacia patella natural treatment)

    Knee discomfort affects millions, from weekend runners to active seniors. Often dismissed as “just aging,” persistent pain below the kneecap can signal deeper issues. When cartilage softens and wears down, everyday movements become challenging. Conventional approaches sometimes prioritize quick fixes, but what if strengthening your body’s own resources offers longer-lasting relief?

    This condition, frequently seen in athletes and older adults, creates inflammation and limits motion. While medications or surgery may help temporarily, they don’t always address root causes. We’ll explore how targeted exercises, mindful habits, and holistic strategies can restore joint health without invasive steps.

    Physical therapy plays a critical role here. Strengthening muscles around the knee—like the quadriceps—reduces stress on vulnerable areas. Low-impact activities, paired with proper form, protect cartilage while improving range of motion. But recovery isn’t just physical; mental focus and stress management also influence outcomes.

    Key Takeaways

    • Strengthening leg muscles supports knee stability and reduces pressure on joints.
    • Low-impact exercises minimize wear while promoting flexibility.
    • Mind-body techniques like yoga aid both physical and emotional recovery.
    • Personalized care plans adapt to individual symptoms and lifestyles.
    • Consulting a professional ensures safe, effective rehabilitation strategies.

    Understanding Chondromalacia Patella

    Millions experience sharp discomfort when climbing stairs or squatting – a hallmark sign of cartilage breakdown beneath the kneecap. This cushioning tissue normally allows smooth gliding during movement. When it softens or frays, friction disrupts mobility and triggers persistent aches.

    knee cartilage structure

    What Is Chondromalacia?

    Medical experts define this condition as the progressive wear of cartilage lining the underside of the kneecap. Johns Hopkins Medicine notes it often results from repetitive stress or improper tracking of the patella. Without shock absorption, bones grind together, causing inflammation and reduced range of motion.

    Causes and Risk Factors

    Muscle imbalances are primary contributors. Weak quadriceps fail to stabilize the kneecap, while tight hamstrings pull unevenly. High-impact activities like running amplify pressure on vulnerable joints. Structural issues, such as flat feet or knock knees, further misalign movement patterns.

    Age and gender play roles too. Adolescents undergoing growth spurts and women with wider pelvic structures face higher risks. A 2023 study in Sports Health linked sudden increases in workout intensity to accelerated cartilage damage in athletes.

    Recognizing these triggers helps tailor strategies that address root causes rather than masking symptoms. Early intervention preserves joint health and prevents long-term limitations.

    Recognizing Symptoms and Diagnosis

    Persistent knee issues often start subtly but escalate without proper attention. Identifying early warning signs helps prevent long-term joint damage. Let’s break down what to watch for and how professionals confirm the root cause.

    knee pain diagnosis methods

    Spotting Key Indicators

    A dull ache behind the kneecap during activities like climbing stairs often signals trouble. Many report a grating sensation or audible crunching when bending. Swelling may follow prolonged sitting or intense workouts.

    Subtle changes in movement patterns can reveal cartilage wear before severe pain develops,” notes a 2023 study in the Journal of Orthopaedic Research.

    Confirming the Condition

    Doctors typically begin with hands-on assessments like the patellar grind test. Imaging tools provide deeper insights:

    MethodPurposeAccuracy
    Physical ExamAssess tenderness & alignment70-80%
    MRI ScanVisualize cartilage wear90%+
    ArthroscopyDirect tissue inspectionNear 100%

    Collaboration between physicians and physical therapists ensures comprehensive evaluation. Tracking symptom patterns over weeks helps distinguish this condition from similar issues.

    Natural Treatment Options for Chondromalacia patella natural treatment)

    Taking proactive steps to address cartilage wear can improve mobility and comfort. Non-invasive strategies focus on rebuilding strength while minimizing strain. Let’s explore methods that combine modern science with holistic principles.

    Targeted Movement Strategies

    Structured exercise programs prioritize muscle balance around affected areas. Leg presses and controlled squats build quadriceps strength without jarring impacts. A 2023 Journal of Sports Rehabilitation study found patients using these techniques reported 40% less discomfort during daily activities.

    Complementary Care Methods

    Acupuncture shows promise in reducing stiffness by improving blood flow to tissues. Chiropractic adjustments help correct alignment issues contributing to uneven pressure. Research from the National Institutes of Health notes these approaches may enhance traditional rehabilitation plans when used together.

    Nature-Inspired Solutions

    Turmeric and ginger contain compounds that may ease swelling naturally. These spices can be incorporated into meals or taken as supplements after professional guidance. One trial observed participants using ginger extract experienced improved flexibility within eight weeks.

    Always consult a healthcare provider before combining therapies. Individual responses vary, and safety should guide every decision. Pairing evidence-based practices with personalized adjustments offers the best path toward lasting relief.

    Effective Exercise Routines and Techniques

    Building strength through movement helps protect vulnerable joints while restoring mobility. The right exercises stabilize the area around the kneecap, easing strain during daily tasks. Focus on controlled motions that prioritize form over intensity.

    Strengthening and Range-of-Motion Exercises

    Start with straight leg raises to engage the quadriceps without bending the joint:

    • Lie flat, tighten thigh muscles, and lift one leg 6 inches off the ground.
    • Hold for 5 seconds, then lower slowly. Repeat 10 times per side.

    Clamshells activate hip and glute muscles, improving alignment:

    • Lie on your side with knees bent at 45 degrees.
    • Keep feet together while lifting the top knee upward. Pause, then return.

    Exercise Modifications and Avoiding High-Impact Movements

    Swap risky activities with gentler alternatives:

    ExerciseModificationBenefit
    Deep SquatsWall SitsReduces kneecap pressure
    RunningCyclingMaintains cardio with less impact
    Jumping JacksStep TapsPreserves rhythm without jarring

    Guidelines for Safe Activity Levels

    Progress gradually. Begin with 2 sets of 8-10 repetitions, increasing only when movements feel effortless. A physical therapist from this resource advises: “Rushing leads to setbacks. Consistency matters more than speed.”

    Stop immediately if sharp pain occurs. Mild discomfort during workouts is normal, but persistent aches signal overexertion. Pair exercises with stretching to maintain flexibility.

    Integrating Mind-Body Therapies for Knee Health

    Healing extends beyond physical adjustments—it requires harmony between body and mind. Research shows psychological stress amplifies discomfort by tightening muscles and altering movement patterns. Addressing both aspects creates a foundation for sustainable recovery.

    Calming Practices for Joint Support

    Meditation and yoga reduce tension that contributes to joint strain. A 2023 NIH review found 12 weeks of mindful breathing lowered inflammation markers by 18% in chronic pain patients. Gentle poses like supported bridge or seated forward folds strengthen leg muscles while improving focus.

    Biofeedback devices offer real-time data on muscle tension, helping users correct imbalances during daily activities. One study noted participants using these tools improved walking patterns within four weeks.

    Structural Alignment Techniques

    Chiropractors assess how hip or spinal misalignments affect knee pressure distribution. Soft tissue manipulation and targeted adjustments restore proper mechanics. The American Chiropractic Association reports 63% of patients experience reduced ache after six sessions.

    Combining these methods with strength-building routines creates a synergistic effect. Patients often report better posture and increased stamina during rehabilitation exercises.

    “Mental clarity directly impacts physical recovery—stress reduction allows tissues to heal efficiently,” states Dr. Elena Torres, a sports medicine specialist.

    Consistency matters. Even 10 minutes daily of mindful movement can build resilience against flare-ups. Pair these strategies with professional guidance for optimal results.

    Conclusion

    Restoring knee health demands a balanced approach that addresses both physical mechanics and daily habits. Recognizing early signs like grinding sensations or swelling allows timely intervention. Combining low-impact leg exercises with therapies like yoga creates a powerful defense against recurring discomfort.

    Personalized plans prove critical, as factors like muscle strength and activity levels vary widely. Research shows tailored programs improve joint function 30% faster than generic approaches. Always consult a healthcare professional before adjusting routines—they’ll ensure exercises align with your unique symptoms.

    Maintaining motion through safe activities preserves cartilage while reducing stiffness. Simple modifications, such as cycling instead of running, protect knees without sacrificing fitness goals. Mind-body practices further enhance results by lowering stress-related inflammation.

    We encourage readers to stay proactive. Explore trusted resources and prioritize consistent care. With the right strategies, lasting relief becomes achievable—one mindful step at a time.

    FAQ

    How does muscle imbalance contribute to knee discomfort?

    Weak quadriceps or tight hamstrings can alter kneecap alignment, increasing stress on cartilage. We recommend targeted strengthening and stretching to restore balance and reduce strain on the joint.

    Can improper footwear worsen symptoms?

    Yes. Shoes lacking arch support or cushioning may disrupt leg alignment during movement. We suggest opting for footwear designed to stabilize the feet and minimize impact during daily activities.

    Are anti-inflammatory diets effective for managing swelling?

    Incorporating omega-3-rich foods like salmon or walnuts may help reduce inflammation. We also advise limiting processed sugars and refined carbs, which can exacerbate tissue irritation.

    What role does physical therapy play in recovery?

    Therapists design routines to improve range of motion while strengthening muscles around the knee. Techniques like guided stretches or resistance training enhance joint stability without overloading the area.

    How do low-impact exercises protect cartilage?

    Activities like swimming or cycling distribute force evenly, minimizing direct pressure on the kneecap. We prioritize these movements to maintain mobility while safeguarding delicate tissues.

    Is acupuncture a viable option for pain relief?

    Studies show acupuncture may stimulate blood flow and trigger natural pain-relieving responses. Many patients report reduced stiffness and improved function after consistent sessions.

    When should imaging tests like MRI be considered?

    If rest and therapy don’t alleviate persistent discomfort, we use MRI or X-rays to assess cartilage wear or structural abnormalities. Early diagnosis helps tailor interventions to individual needs.

    Can yoga improve kneecap alignment long-term?

    Yes. Poses like chair pose or bridge pose build strength in the hips and core, promoting proper tracking. We combine yoga with biofeedback techniques to reinforce mindful movement patterns.

    What adjustments reduce strain during daily tasks?

    Avoiding deep squats, using knee pads for kneeling, and elevating the leg during rest periods can lower stress. We also teach posture modifications to protect the joint during repetitive motions.

  • Sharp knee pain when getting up from chair)

    Sharp knee pain when getting up from chair)

    Ever wondered why a simple act like rising from your seat sometimes triggers discomfort? Millions face this daily hurdle, often dismissing it as “normal” aging. We’re here to explore what your joints might be telling you.

    This stiffness or ache during transitions between sitting and standing frequently signals deeper joint wear. Conditions like osteoarthritis and patellofemoral syndrome quietly develop, altering how cartilage and tendons support movement. Recent studies show 1 in 4 adults experiences similar discomfort by age 50.

    Our analysis combines medical research with practical insights. We’ll break down how repetitive motions, muscle imbalances, and inflammation contribute to these challenges. You’ll discover why early attention matters – untreated issues can limit mobility over time.

    Key Takeaways

    • Joint discomfort during movement often stems from cartilage wear or tendon strain
    • Common triggers include arthritis, overuse injuries, and muscle weakness
    • Early intervention prevents long-term mobility issues
    • Diagnostic tools range from physical exams to imaging techniques
    • Lifestyle adjustments significantly impact joint health maintenance
    • Treatment options evolve based on symptom severity and root causes

    Overview of Knee Pain and Its Impact

    Many brush off morning stiffness as normal, but your body could be signaling joint stress. Nearly 67% of office workers report discomfort after sitting 6+ hours daily, according to recent ergonomic studies. This tension often starts subtly before evolving into persistent challenges.

    muscle imbalance and knee discomfort

    Symptoms and Warning Signs

    Early indicators often include tenderness around the front joint area or swelling after prolonged inactivity. Some notice clicking sounds during movement, while others struggle with temporary stiffness when initiating motion. Weak thigh muscles frequently exacerbate these issues, creating uneven pressure distribution.

    A 2023 Journal of Orthopedic Research analysis found sedentary lifestyles reduce quadriceps strength by 18% within three months. This muscle deterioration directly impacts how our joints absorb impact during basic activities like standing or climbing stairs.

    How Daily Routines Become Challenges

    Simple tasks transform into obstacles when discomfort persists. Rising from low couches requires arm support, and grocery bags feel heavier without proper leg strength. Even desk workers face hurdles – improper chair height strains tissues over time, while crossed legs misalign hips.

    Strategic exercises targeting hamstrings and glutes help counteract these effects. Physical therapists often recommend seated leg lifts or wall sits to rebuild stability without joint stress. Remember – addressing muscle imbalances early prevents chronic mobility limitations.

    Understanding the Causes Behind Knee Pain When Sitting and Rising

    Daily movements we take for granted can reveal hidden joint struggles. Two primary culprits often emerge during transitions between seated and standing positions – conditions rooted in mechanics and gradual wear.

    runner knee therapy

    Patellofemoral Syndrome and Runner’s Knee

    This condition develops when the kneecap shifts out of alignment during motion. Repeated stair climbing or improper sitting posture strains the patellar tendon, creating friction. Research shows 40% increased force acts on the joint when rising from low chairs compared to standard seating.

    Weak quadriceps muscles often contribute to instability. Physical therapists emphasize strengthening exercises targeting these muscles to improve tracking. Simple modifications like adjusting seat height reduce pressure during daily transitions.

    Osteoarthritis and Joint Degeneration

    Cartilage erosion transforms routine activities into painful challenges. Excess body weight multiplies stress on joints – each pound adds four pounds of pressure during standing movements. Prolonged sitting accelerates stiffness by reducing synovial fluid circulation.

    Occupational studies reveal workers who sit >6 hours daily experience 32% faster cartilage breakdown. Strategic movement breaks and weight management help preserve joint integrity. Low-impact therapies like swimming maintain mobility without exacerbating damage.

    Both conditions respond best to early intervention. Combining targeted exercises with ergonomic adjustments creates sustainable solutions for maintaining active lifestyles.

    Sharp knee pain when getting up from chair)

    The human knee operates like a precision machine – until its components fall out of sync. Three key structures collaborate during sitting-to-standing motions: shock-absorbing cartilage, stabilizing ligaments, and power-generating muscles. When any element weakens or wears, the entire system compensates unevenly.

    Extended sitting reduces synovial fluid production by 42% within 30 minutes, according to biomechanical studies. This natural lubricant loss makes initial standing movements feel gritty. “Inactivity essentially starves joints of their necessary nourishment,” notes Dr. Ellen Torres, orthopedic specialist.

    From Stiffness to Solutions

    Common intervention strategies fall into three categories:

    ApproachApplicationEffectiveness
    RICE MethodEarly-stage swelling87% success in acute cases
    Physical TherapyMuscle imbalances6-8 week improvement cycle
    Surgical OptionsAdvanced cartilage loss95% patient satisfaction

    Patellofemoral syndrome often responds to quad-strengthening routines. Simple leg extensions while seated can rebuild stability. For persistent symptoms lasting >6 weeks, clinicians typically recommend imaging tests to assess tendon alignment.

    Understanding these mechanisms empowers smarter daily choices. Strategic standing breaks every 45 minutes maintain joint lubrication. Targeted exercises preserve muscle coordination – your best defense against progressive degeneration.

    Effective Treatments and Self-Care Strategies

    Modern approaches to joint care blend immediate relief with long-term solutions. Let’s explore evidence-based methods that address both symptoms and root causes.

    RICE Method and Over-the-Counter Options

    The RICE protocol remains a frontline defense for sudden discomfort. A 2024 Sports Health study found combining rest with cold therapy reduces inflammation 45% faster than medication alone. Compression sleeves provide targeted support during daily activities, while elevation improves circulation.

    NSAIDs like ibuprofen offer short-term relief but work best when paired with activity modifications. For runners, adjustable braces help maintain alignment during training without restricting motion.

    Strengthening Exercises and Physical Therapy

    Targeted routines rebuild stability in vulnerable joints. Try these three times weekly:

    ExerciseMuscles TargetedDuration
    Straight leg raisesQuadriceps2 sets of 15
    Wall sitsGlutes & Hamstrings30-second holds
    Step-upsFull leg chain10 reps per side

    Many physical therapists now offer virtual sessions – ideal for busy schedules. “Consistency trumps intensity,” advises Dr. Rachel Kim from the Mayo Clinic. “Gradual progress prevents re-injury.”

    When to Seek Medical Advice

    Schedule an evaluation if you experience:

    • Swelling lasting >3 days
    • Clicking sounds with weight-bearing
    • Nighttime discomfort disrupting sleep

    These signs may indicate progressing arthritis or tendon damage requiring specialized care. Early intervention preserves mobility and prevents compensatory body strain.

    Adapt daily activities using ergonomic tools – raised toilet seats or shower chairs reduce joint stress. Remember: proactive strategies today prevent limitations tomorrow.

    The Role of Ergonomics and Lifestyle Adjustments in Knee Health

    Your workspace setup could be quietly contributing to joint stress. Research from Harvard Medical School reveals that improper seating arrangements increase pressure on the knee joint by 28% during standing transitions. Strategic ergonomic changes address this problem while preventing new issues.

    Proper Chair and Workstation Setup

    Chair height matters more than most realize. Mayo Clinic experts recommend seats that let feet rest flat, with knees at 90-degree angles. Armrests should support elbows without raising shoulders – this alignment reduces strain during repeated sit-to-stand motions.

    Consider these ergonomic features for optimal weight distribution:

    FeatureBenefitIdeal Measurement
    Seat DepthPrevents thigh pressure2-4 inches behind knees
    Desk HeightMaintains neutral postureElbow level when seated
    FootrestReduces lower back tensionAdjustable 0-15° tilt

    Regular movement breaks combat stiffness caused by prolonged sitting periods. Stand every 45 minutes – even brief walks boost synovial fluid production. Pair this with targeted stretches to maintain flexibility.

    Physical therapy plays a critical role in managing patellofemoral pain. Therapists often prescribe:

    • Hip-strengthening routines to improve knee tracking
    • Foam rolling for tight IT bands
    • Balance exercises to correct muscle imbalances

    Small changes create lasting impacts. Swap low sofas for chairs with firm support, and use lumbar cushions to maintain spinal alignment. These adjustments tackle the root causes of discomfort while fostering long-term joint resilience.

    Conclusion

    Joint health forms the foundation of pain-free movement. Discomfort during daily transitions often stems from muscle weakness, cartilage wear, or alignment issues. Addressing these root causes early prevents long-term limitations.

    Proven strategies like the RICE method and targeted exercises help reduce strain during activities such as climbing stairs. For chronic conditions like knee osteoarthritis, physical therapy strengthens muscles around the joint while improving flexibility. Research shows these approaches boost mobility in 83% of cases when applied consistently.

    Simple adjustments make significant impacts. Avoid prolonged periods of sitting by taking standing breaks every hour. Use chairs with proper lumbar support to distribute weight evenly. If discomfort persists beyond two weeks, consult a specialist to rule out ligament damage or advanced degeneration.

    Our collective experience confirms that proactive care creates lasting results. Combining medical guidance with smart lifestyle choices empowers individuals to maintain active routines. Remember – every step toward joint awareness today builds stronger movement patterns for tomorrow.

    FAQ

    What causes discomfort when standing after sitting for long periods?

    Prolonged sitting can strain muscles around joints and reduce lubrication in the knee. Conditions like patellofemoral syndrome or early osteoarthritis often worsen during transitions from sitting to standing. Weak thigh muscles or improper alignment may also contribute.

    How does patellofemoral syndrome contribute to front-of-joint discomfort?

    This condition occurs when the kneecap doesn’t track smoothly over the femur, creating friction. Activities like climbing stairs or sitting for extended periods aggravate this misalignment, leading to inflammation and sharp sensations.

    Are there effective home remedies for managing stiffness?

    Yes. The RICE method (rest, ice, compression, elevation) helps reduce swelling. Over-the-counter anti-inflammatories like ibuprofen provide short-term relief. Gentle stretches and low-impact exercises, such as swimming, can improve flexibility without stressing joints.

    Can chair height or workstation setup impact joint health?

    Absolutely. Chairs that are too low force excessive bending, increasing pressure on the kneecap. Ergonomic adjustments—like using footrests or ensuring knees align with hips—promote better posture and reduce strain during prolonged sitting.

    When should someone consult a specialist about persistent issues?

    Seek medical advice if discomfort lasts over two weeks, limits daily activities, or includes swelling or instability. Persistent symptoms may indicate cartilage damage, ligament tears, or advanced arthritis requiring imaging or customized therapy.

    Do strengthening exercises truly help prevent recurring problems?

    Targeted exercises, like leg lifts or wall sits, build quadriceps and hamstring strength. Physical therapy programs also improve balance and joint stability, reducing the risk of future flare-ups. Consistency is key for long-term results.

  • Knee pain after sitting at desk all day

    Knee pain after sitting at desk all day

    Does your body send warning signals when you finally stand up from a long work session? That nagging tension in your lower body isn’t just fatigue—it’s often a sign of deeper strain. Modern desk habits can quietly sabotage joint health, even if you’re not lifting heavy objects or running marathons.

    Research from Harvard Medical School shows that remaining stationary for 6-8 hours daily heightens risks of muscle tightness and reduced flexibility. Poor posture or chairs lacking lumbar support force joints into unnatural angles, creating pressure points. Over time, this leads to persistent discomfort that impacts focus and mobility.

    But here’s the good news: small changes can make a big difference. Simple ergonomic adjustments and movement breaks help counteract stiffness before it becomes chronic. We’ll explore how to identify root causes—from chair height to seated posture—and share science-backed strategies for relief.

    Key Takeaways

    • Extended inactivity contributes to muscle tension and reduced joint flexibility
    • Chair design and workstation setup directly impact lower-body strain
    • Medical studies link prolonged sitting with increased discomfort risks
    • Preventive measures can stop minor stiffness from becoming chronic
    • Immediate adjustments and targeted exercises offer rapid relief

    Understanding Why Sitting Causes Knee Pain

    The modern workday’s hidden toll on joints often goes unnoticed until discomfort sets in. Research reveals that remaining seated for 6+ hours daily reduces blood flow to legs by 50%, according to Johns Hopkins studies. This stagnation triggers muscle tightness and compresses cartilage, creating a chain reaction of strain.

    desk posture and joint stress

    How Inactivity Changes Your Body

    Extended periods of immobility force muscles to remain static, weakening support structures around joints. A poorly positioned desk setup compounds this stress—monitors too low or chairs without adjustability force unnatural angles. Over weeks, this imbalance can shorten tendons and reduce flexibility by up to 30%.

    Contributing FactorImmediate EffectLong-Term Risk
    Poor PostureUneven pressure distributionChronic inflammation
    Prolonged InactivityReduced blood flowMuscle atrophy
    Existing ConditionsHeightened sensitivityAccelerated joint wear

    Hidden Health Multipliers

    Underlying issues like arthritis amplify discomfort during desk work. Inflammation from these conditions increases joint pressure by 40% when seated, per University of Michigan data. Even minor misalignments become problematic when maintained for hours—like a car tire slowly losing air.

    Recognizing these factors unlocks effective treatment options. Simple exercises and ergonomic tweaks—which we’ll explore next—can reverse early-stage damage before it becomes permanent.

    Workspace Ergonomics and Correct Posture

    The foundation of joint comfort starts with your workstation design. Mayo Clinic research confirms that 73% of office-related discomfort stems from poor equipment choices. Ergonomic adjustments address root causes rather than masking symptoms.

    ergonomic workspace setup

    Choosing the Right Chair and Desk Setup

    An ill-fitting chair forces your body into stressful angles. Look for these features:

    • Adjustable seat depth to support thigh length
    • Lumbar curves matching spinal alignment
    • Armrests level with desk height

    Desk surfaces should sit at elbow height when arms form 90-degree angles. This prevents slouching that causes knee strain from compressed joints.

    Adjusting Your Seating Position

    Proper alignment begins with three contact points: hips, back, and feet. Keep feet flat using a footrest if needed—this maintains optimal knee joint alignment. Monitor height matters too; screens at eye level prevent neck craning that disrupts whole-body posture.

    MistakeFixBenefit
    Feet danglingUse adjustable footrestReduces hip pressure
    Slouched spineActivate chair reclineDistributes weight evenly
    Overextended armsBring keyboard closerPrevents shoulder strain

    Set reminders to shift positions hourly. Even micro-movements boost circulation, helping prevent this condition from developing. Those who experience knee pain during sitting long hours often find relief through these targeted adjustments.

    Effective Exercises and Stretches to Relieve Knee Discomfort

    Movement breaks through stiffness like sunlight through morning fog. Targeted exercises counteract joint stress caused by static positions, offering relief even during demanding workdays. Let’s explore three evidence-based strategies to restore mobility.

    Targeted Stretches and Leg Movements

    Begin with seated hamstring stretches. Extend one leg straight while keeping your foot flexed. Lean forward slightly until you feel tension—hold for 20 seconds. Repeat 3x per side. This improves circulation and reduces pressure that can cause knee strain.

    ExerciseStepsBenefit
    Calf RaisesLift heels, hold 5 secondsBoosts ankle-knee alignment
    Quad StretchPull foot toward glutesRelieves front thigh tension
    Chair SquatsStand/sit slowly 10xStrengthens support muscles

    Strengthening Muscles Around the Knee

    Wall slides build endurance. Stand with your back against a wall, feet shoulder-width. Slowly lower into a partial squat—hold for 10 seconds. Daily repetitions reduce arthritis symptoms by 22% according to UCLA Health studies.

    Incorporating Movement Breaks

    Set hourly reminders to:

    1. March in place for 30 seconds
    2. Rotate ankles clockwise/counter
    3. Adjust your chair position to maintain proper posture

    These micro-actions prevent stiffness buildup. Those who experience knee relief consistently report combining stretches with ergonomic adjustments. Consistency matters more than intensity—small efforts yield lasting results.

    Knee pain after sitting at desk all day: How-To Guide for Immediate Relief

    Combatting joint stiffness starts with smart workspace tweaks. We’ve distilled expert recommendations into actionable steps to reduce strain during long hours of focused work. These adjustments take minutes to implement but deliver hours of comfort.

    Step-by-Step Ergonomic Adjustments

    Begin by verifying your chair’s height. Your feet should rest flat with thighs parallel to the floor. If needed, use a sturdy footrest—this simple fix reduces pressure on joints by 27% according to OSHA guidelines.

    Align your desk surface with relaxed elbows. Keep keyboards close to prevent overreaching, and position monitors at eye level. Those using standing desks should alternate positions every 30-45 minutes to maintain circulation.

    Quick Exercises You Can Do at Your Desk

    Try seated leg extensions: Straighten one leg slowly, hold for 5 seconds, then lower. Repeat 10x per side. This movement combats stiffness without interrupting workflow.

    Incorporate calf raises during phone calls. Lift heels until you feel tension in your lower legs—this improves blood flow and supports proper alignment. Pair these with hourly shoulder rolls to maintain full-body mobility.

    Consistency matters most. As one physical therapist notes: “Micro-adjustments throughout the day prevent cumulative damage better than heroic once-a-week efforts.” Track your progress using phone reminders or productivity apps to build lasting habits.

    Lifestyle Adjustments and Treatment Options

    Daily habits shape joint health as much as workstation setups. A 2023 CDC report shows combining movement with targeted care reduces discomfort risks by 38%. Lasting relief requires both immediate fixes and strategic lifestyle shifts.

    When to Seek Professional Advice

    Persistent symptoms demand expert evaluation. Watch for these warning signs:

    SymptomPossible CauseAction
    Swelling lasting >3 daysPatellofemoral inflammationSchedule orthopedic consult
    Sharp pain during stairsCartilage wearRequest imaging scans
    Limited range of motionTendon shorteningBegin physical therapy

    Weight management matters too. Every 10 lbs lost reduces joint pressure by 40 lbs per step. Combine dietary changes with low-impact activities like swimming or cycling.

    Home Remedies and Long-Term Strategies

    Effective home care starts with ice packs and elevation. For chronic cases, consider these options:

    • Compression sleeves during work hours
    • Anti-inflammatory turmeric supplements
    • Yoga poses that strengthen hip flexors

    “Consistency beats intensity. Ten minutes of daily stretching outperforms weekly marathon sessions.”

    Dr. Ellen Torres, PT

    Maintain ergonomics beyond the office. Use lumbar cushions in cars and avoid cross-legged positions on the floor. Track progress with a journal—note which exercises bring the most relief each day.

    Conclusion

    Joint discomfort from prolonged sitting is a growing workplace concern. Research confirms that combining ergonomic adjustments with regular movement breaks significantly reduces pressure on lower-body joints. Simple changes like aligning chair height or adding calf stretches every hour address root causes rather than masking symptoms.

    Early intervention prevents minor stiffness from evolving into chronic problems. Prioritize activities that strengthen supporting muscles—wall slides and seated leg extensions require minimal time but deliver measurable relief. Those experiencing persistent issues should consult professionals before considering medication.

    Implement these strategies today using ergonomic solutions paired with movement reminders. Consistency transforms temporary fixes into lasting results. Remember: your workspace setup and daily habits work together to either strain or sustain joint health.

    By addressing the challenges of sitting long periods proactively, we reclaim comfort and productivity. Start small, stay committed, and trust the science—your joints will thank you.

    FAQ

    How does prolonged sitting contribute to stiffness in joints?

    Remaining stationary for hours reduces blood flow and tightens muscles around the knee joint. This strain can compress cartilage and ligaments, leading to discomfort during extended desk work.

    Can improper chair height worsen existing joint issues?

    Yes. If seats are too low or high, they force awkward angles that increase pressure on the patellofemoral area. We recommend adjusting furniture so feet rest flat, with thighs parallel to the floor.

    What stretches help alleviate tension during work hours?

    Gentle hamstring stretches, seated leg extensions, and calf raises improve flexibility. Incorporate these movements every 60–90 minutes to maintain circulation and reduce stiffness.

    When should someone consult a specialist about persistent discomfort?

    Seek professional advice if sharp pain, swelling, or limited mobility persists beyond two weeks. Conditions like arthritis or meniscus tears require tailored treatment plans for long-term relief.

    How does posture affect pressure distribution in legs?

    Slouching shifts body weight unevenly, overloading quadriceps and hip flexors. We advise aligning ears with shoulders and hips while keeping knees at a 90-degree angle to minimize strain.

    Are standing desks effective for reducing joint stress?

    Alternating between sitting and standing every 30–60 minutes balances muscle engagement. Pair this with anti-fatigue mats to support proper alignment and reduce compressive forces.

    Can weak glutes contribute to patellofemoral syndrome?

    Weak hip stabilizers often cause inward knee collapse during sitting or walking. Strengthening glutes through bridges or clamshells helps stabilize the joint and prevent overuse injuries.

    What home remedies provide quick relief from stiffness?

    Applying ice packs reduces inflammation, while heat therapy loosens tight muscles. Over-the-counter NSAIDs like ibuprofen can also ease acute symptoms when used as directed.

  • Upper knee cap pain during cycling

    Upper knee cap pain during cycling

    Ever finish a cycling session wondering why your front thigh area feels like it’s been through a wrestling match? You’re not alone. Many riders experience discomfort near the patella that turns joyful rides into endurance tests. This challenge often stems from hidden factors in your setup and physiology.

    Mechanical stress from repetitive motion can strain the joints and soft tissues. When knee hurt from biking becomes routine, it’s usually a sign of imbalance between your quads, hips, and pedal mechanics. Even minor issues like cleat position or saddle height can create big problems over time.

    Our research shows 58% of recreational cyclists develop anterior discomfort within six months of regular riding. The good news? Understanding your bike fit and muscle engagement patterns can transform your experience. We’ll break down how factors like foot alignment and hip stability contribute to healthier rides.

    Key Takeaways

    • Front-thigh discomfort often links to pedal stroke mechanics and equipment setup
    • Muscle imbalances between quads and hips create excessive joint pressure
    • Professional bike fitting reduces strain on vulnerable areas
    • Early intervention prevents chronic conditions like patellar compression
    • Targeted strength training improves cycling efficiency and comfort

    Understanding Knee Mechanics and Cycling Impact

    Cycling’s repetitive motion creates unique demands on the body’s largest hinge joint. The patellofemoral joint acts as a pulley system, guiding the kneecap along grooves in the femur during each pedal stroke. When this alignment falters, riders may feel discomfort in the front thigh area.

    Anatomy of the Knee in Cycling

    Three key players govern knee function during rides:

    • Quadriceps: Primary drivers of the downstroke
    • Hamstrings: Control upward pedal motion
    • Patellar tendon: Transfers muscle force to the shinbone

    Research shows cyclists generate forces up to 2.5 times body weight through these structures. Poor foot alignment or incorrect bike fit adjustments can shift pressure to vulnerable areas.

    Common Overuse Injuries and Pain Locations

    Fatigue-induced form breakdown often leads to these issues:

    Injury TypeLocationPrimary Cause
    Patellar TendinitisFront of jointExcessive quad strain
    IT Band SyndromeOuter thighHip instability
    Plica IrritationMedial areaRepetitive flexion

    Seventy-three percent of recreational riders report discomfort in the anterior region after 90-minute sessions. Muscle imbalances between hip stabilizers and thigh muscles frequently accelerate wear patterns.

    Identifying the Root Causes of Knee Pain

    Persistent discomfort around the kneecap often signals deeper issues in training habits and physical alignment. Our analysis of 2,300 cycling injuries reveals 61% stem from preventable mechanical stressors. Two primary culprits emerge: external training demands and internal bodily limitations.

    knee pain causes

    Training Load and Overuse Factors

    Rapid mileage increases strain joints faster than tissues adapt. A 2022 study showed cyclists boosting weekly distance by over 20% faced 67% higher injury rates. “The body needs gradual adaptation phases,” notes Dr. Ellen Torres, sports physiologist. “Flooding tissues with repetitive stress without recovery windows creates microtears and inflammation.”

    Common triggers include:

    • Sudden hill training additions
    • Extended single-gear efforts
    • Inadequate rest between intense sessions

    Intrinsic Biomechanics and Muscle Imbalances

    Weak hip stabilizers and overdeveloped quads alter patella tracking. Research indicates 54% of recreational riders have underactive VMO muscles – critical for medial knee support. This imbalance forces lateral structures like the IT band to compensate, creating uneven pressure distribution.

    Equipment setup amplifies these issues. Cleats angled outward by just 5° increase lateral joint strain by 18%. As cycling coach Marco Ricci observes: “Your bike becomes a magnifying glass for existing weaknesses.” Early identification through motion analysis helps tailor solutions before chronic damage occurs.

    Strategies for Upper knee cap pain during cycling

    Proper equipment configuration transforms how your body interacts with the bike. Our analysis of 1,400 cyclists shows strategic adjustments reduce anterior joint stress by 42% within three weeks. Let’s explore practical changes that protect your patella while boosting power output.

    bike setup adjustments for knee comfort

    Optimizing Equipment Configuration

    Three critical settings influence front-thigh strain:

    AdjustmentCorrect SetupBenefit
    Saddle Height25-35° knee bend at pedal’s lowest pointReduces quad overextension
    Cleat PositionAlign ball of foot over pedal spindleBalances lateral and medial pressure
    Handlebar Reach30° elbow bend when gripping barsDecreases hip flexion strain

    Bike fit specialist Tara Mills emphasizes: “Millimeter-level tweaks to cleat angle prevent cascading alignment issues. Start with neutral positions before making individual adaptations.”

    Revolutionizing Pedal Stroke Efficiency

    Refining movement patterns distributes workload across muscle groups:

    • Focus on circular motion rather than downward stomping
    • Engage hamstrings during upstroke phase
    • Maintain 80-100 RPM cadence to minimize joint loading

    Cyclists using these techniques report 31% less inflammation post-ride. Pair equipment modifications with conscious pedaling habits to create sustainable riding mechanics. Regular self-checks during climbs help identify lingering imbalance issues before they escalate.

    Effective Exercises and Stretching Techniques

    Building resilient muscle groups transforms how your body handles cycling demands. Targeted routines improve stability around critical areas while enhancing power transfer. We’ll explore evidence-based methods to strengthen vulnerable regions and maintain tissue flexibility.

    Strengthening the VMO and Glute Muscles

    The vastus medialis oblique (VMO) acts as your kneecap’s primary stabilizer. Weakness here allows lateral shifting during pedal strokes. Try these drills twice weekly:

    • Wall sits with knees at 45° – hold 30 seconds
    • Step-ups focusing on controlled lowering
    • Side-lying leg lifts for glute activation

    Research shows cyclists who strengthen these areas reduce joint pressure by 37% in six weeks. Proper form matters – keep hips level during movements to avoid compensation patterns.

    Targeted IT Band and Quadriceps Stretches

    Tight thigh muscles pull the patella out of alignment. Foam rolling before rides improves tissue mobility:

    1. Roll IT band from hip to knee (2 minutes/side)
    2. Use lacrosse ball for quad trigger points
    3. Hold kneeling hip flexor stretches 45 seconds

    Post-ride static stretches maintain flexibility. Cross-body leg pulls and standing quad grabs work best. Pair these with regular bike fit checks for comprehensive protection.

    Consistent routines prevent recurring issues. As physical therapist Dr. Lisa Nguyen advises: “Think of these exercises as tune-ups for your biological suspension system.” Three 20-minute sessions weekly yield measurable improvements in pedal stroke comfort.

    Optimizing Training Loads and Recovery Routines

    Smart training habits often separate enjoyable rides from injury cycles. Balancing effort and recovery prevents excessive strain on vulnerable areas while boosting performance. Our data reveals 74% of riders who follow structured plans reduce joint stress within eight weeks.

    Phasing Your Progress Strategically

    Sudden mileage spikes overwhelm biological adaptation processes. A 2022 study found cyclists increasing weekly distance by over 15% faced 52% higher injury rates. Build endurance through three-phase cycles:

    Training PhaseWeekly Mileage IncreaseBenefit
    Base Building5-10%Strengthens connective tissues
    Intensity IntroductionAdd 1 high-cadence sessionImproves pedal efficiency
    Peak TrainingMaintain mileage + hillsBuilds power without overload

    “The body adapts to stress in 21-day cycles. Progressively challenge systems, then allow consolidation phases.”

    Dr. Rachel Kim, Sports Physiologist

    Mastering the Recovery Equation

    Active restoration techniques accelerate tissue repair while maintaining mobility. Prioritize these four pillars:

    • 7-9 hours of quality sleep nightly
    • Protein-rich meals within 45 minutes post-ride
    • Low-intensity spins (30 mins) on rest days
    • Foam rolling focused on quadriceps and IT bands

    Our analysis shows 68% of cyclists overlook recovery nutrition, delaying muscle repair. Pair these habits with bike fit adjustments for comprehensive protection. Listen to your body’s signals – persistent tightness or clicking warrants immediate load reduction.

    Enhancing Bike Fit and Equipment Adjustments

    Why do some cyclists breeze through long rides while others struggle with persistent discomfort? The answer often lies in millimeter-perfect equipment configurations. Precise adjustments to your setup can mean the difference between effortless miles and nagging joint stress.

    Assessing Saddle, Cleats, and Crank Length

    Three components dramatically influence joint alignment:

    ComponentOptimal SettingImpact
    Saddle HeightHip remains stable during pedal rotationPrevents overextension of leg muscles
    Cleat PositionAligns with natural foot rotationBalances pressure across hip and thigh
    Crank LengthMatches rider’s femur lengthReduces excessive knee bend

    Tour de France mechanics report 3mm saddle shifts can alter muscle engagement by 22%. A 2023 study found cyclists using proper crank lengths experienced 31% less inflammation post-ride.

    Consulting a Professional for a Personalized Fit

    Certified bike fitters use motion capture tech to identify hidden stressors. “We often discover riders need asymmetric cleat positions,” explains fit specialist Jenna Cole. “Feet rarely mirror each other perfectly.”

    Pro cyclist Marco Torres credits his injury-free season to a 90-minute fitting session. Key benefits include:

    • Customized handlebar reach measurements
    • Dynamic assessment of hip mobility
    • Real-time pedal stroke analysis

    Investing in expert guidance pays dividends. Riders with professional fits report 47% fewer joint issues within six months. Your bike should adapt to your body – not force your body to compensate.

    Conclusion

    The path to comfortable rides lies in harmonizing body mechanics with equipment precision. Our analysis confirms that addressing front-thigh discomfort requires three pillars: proper technique, gradual training progression, and personalized bike adjustments.

    Understanding how joint stress develops helps prevent chronic issues. Small changes to saddle position or pedal stroke efficiency often yield dramatic improvements. Regular strength training and mobility work maintain muscle balance critical for smooth rotations.

    Early intervention stops minor irritation from becoming debilitating. Track changes in discomfort patterns and adjust your routine accordingly. If issues persist, consult a certified fit specialist or physical therapist for tailored solutions.

    By applying these strategies, riders transform their experience. Consistent effort protects your body’s natural alignment while boosting performance. Remember – proactive care today ensures countless joyful miles ahead.

    FAQ

    How does cycling impact the front of the knee joint?

    Repetitive pedaling stresses the patella and surrounding tendons, especially with improper saddle height or cleat alignment. This can lead to inflammation in the quads, patellar tendon, or fat pad beneath the kneecap.

    Can weak glutes contribute to discomfort near the kneecap?

    Yes. Weak gluteal muscles force the thigh and IT band to overcompensate, pulling the kneecap sideways. Strengthening exercises for the glutes and VMO (inner quad) help stabilize tracking during pedal strokes.

    Why does saddle position matter for front-of-knee issues?

    A low saddle increases pressure on the patellofemoral joint. We recommend adjusting saddle height so your leg maintains a 25-35° bend at the bottom of the pedal stroke. Forward/backward saddle tilt also affects load distribution.

    How do cleat adjustments reduce strain on the knee?

    Misaligned cleats force the foot into unnatural angles, twisting the joint. Positioning cleats to match your natural foot stance (often 1-3° outward) and ensuring proper float reduces lateral stress on tendons and ligaments.

    Are specific stretches effective for preventing this type of injury?

    Focus on dynamic stretches for the IT band, quads, and hamstrings pre-ride. Post-ride, use static holds for the same muscle groups. A foam roller applied to the lateral thigh can relieve IT band tension linked to kneecap misalignment.

    When should riders consider a professional bike fitting?

    If pain persists after self-adjustments, consult a certified fitter. They analyze hip-knee-ankle alignment, crank length, and pedal stance width to address biomechanical inefficiencies causing chronic overuse injuries.

    Does gear selection influence kneecap stress during climbs?

    Absolutely. Pushing high resistance at low cadences forces excessive load through the joint. We advise maintaining 80-90 RPMs and gradually increasing hill training intensity to avoid sudden strain spikes.