What if the secret to lasting knee health isn’t about pushing harder—but cushioning smarter? For athletes, fitness enthusiasts, and anyone battling joint discomfort, targeted movements on forgiving surfaces can unlock surprising benefits. We’ll explore how this approach reduces strain while building strength where it matters most.
Gentle routines on padded floors or mats protect joints better than hard surfaces. Focused exercises strengthen the hips, thighs, and calves—key areas supporting knee stability. Whether you’re recovering from injury or preventing one, these low-impact techniques adapt to all fitness levels.
Starting with basic stretches like calf raises and leg lifts builds foundational strength. Over time, this prepares your body for squats and dynamic motions without overwhelming delicate joints. The result? Improved flexibility, reduced pain, and confidence in every movement.
Key Takeaways
Soft surfaces minimize joint pressure during kneeling exercises
Targeted movements strengthen hip and leg muscles for better knee support
Beginner-friendly stretches reduce injury risk while improving flexibility
Progress gradually from basic stretches to advanced strength-building moves
Ideal for athletes, active individuals, and those managing joint discomfort
Understanding the Importance of Proper Stretching
Movement serves as medicine for joints when approached strategically. Targeted routines prepare your body to handle daily stresses while protecting vulnerable areas. This foundation becomes especially crucial for maintaining knee healthand preventing long-term mobility limitations.
Benefits for Knee Health and Mobility
Consistent stretching boosts blood flow to leg muscles and connective tissues. This delivers essential nutrients while flushing out inflammation-causing waste products. Improved circulation reduces morning stiffness and helps joints move smoothly.
Gentle stretching exercises maintain the knee’s natural range of motion, counteracting the tightening effects of aging. They also stimulate synovial fluid production – your joint’s natural lubricant. For those managing arthritis or past injuries, controlled movement prevents scar tissue buildup.
How Soft Surfaces Enhance Exercise Safety
Cushioned flooring absorbs up to 30% more impact than hard surfaces during movements. A quality mat distributes weight evenly across knees and hips, reducing pressure points. This support allows deeper stretches without compromising joint integrity.
Padded surfaces enable proper alignment during hip-focused exercises. They let muscles engage fully rather than tensing against discomfort. For rehabilitation cases, this cushioning provides psychological reassurance to move through safe ranges.
Remember: Effective recovery begins with respecting your body’s signals. Gradual progression on forgiving surfaces builds confidence alongside physical resilience.
Getting Started: Setting Up Your Soft Surface Routine
Creating a foundation for effective movement begins with intentional preparation. Your exercise environment directly impacts joint safety and exercise quality—especially when working on padded surfaces.
Preparing Your Mat and Space
Choose a mat with ¼-½ inch thickness for balanced cushioning and stability. Dense foam or rubber materials provide better hip and knee support than thin yoga mats. Clear a 6×6 foot area to allow full leg extensions and lateral movements.
Check flooring surfaces for hidden objects that could shift during exercises. Use non-slip mats on hardwood floors to prevent sliding. Proper lighting reduces eye strain while maintaining spinal alignment awareness.
Establishing the Starting Position
Kneel with your working knee directly below your hip, foot flat ahead. Place folded towels or gel pads under sensitive joints if needed. Keep your chest lifted and shoulders relaxed to avoid back strain.
Test your setup by shifting weight slightly forward. You should feel pressure evenly distributed across your thigh and shin—not concentrated on the kneecap. Adjust padding thickness until discomfort disappears during static holds.
For those managing previous injury, position a sturdy chair nearby for balance support. This modification maintains flexibility training while reducing fall risks during transitions.
Optimized Techniques: Stretches for kneeling on soft surfaces
Mastering joint-friendly techniques requires precision in both movement and setup. Proper alignment transforms simple motions into powerful tools for improving hip flexor elasticity and knee stability. Let’s break down the mechanics of effective cushion-supported routines.
Correct Form and Alignment
Begin in a starting position with one leg forward, foot flat. Your rear knee stays grounded beneath the hip. Tuck your pelvis slightly to engage core muscles before leaning forward. Maintain this alignment to protect your lower back while targeting the front thigh area.
Proper Technique
Common Errors
Impact
Neutral spine alignment
Arched lower back
Reduces lumbar strain
Even weight distribution
Leaning sideways
Prevents joint overload
Controlled breathing
Holding breath
Enhances oxygen flow
Modifying Movements for Greater Comfort
New practitioners should reduce their range motion by 30-40%. Place folded towels under sensitive joints if you feel stretch intensity too quickly. For advanced users, adding arm reaches upward increases hip engagement without compromising form.
Listen to your body’s signals – mild tension indicates effective stretching, while sharp pain demands immediate adjustment. Transition smoothly between positions using a 3-count rhythm: 2 seconds forward, 1 second hold, 2 seconds return.
Expert Insights from Physical Therapists
Physical therapists agree: Smart movement starts with understanding your body’s limits. Over 80% of knee injuries occur when pushing through discomfort rather than adapting routines. We spoke with rehabilitation specialists to bring you science-backed strategies for sustainable progress.
Guidance on Injury Prevention
Always begin with dynamic warm-ups like leg swings or gentle hip circles. These prepare muscles and joints for deeper stretches. Certified specialists recommend the 10% rule: Never increase your exercise intensity by more than 10% weekly.
Strategy
Implementation
Benefit
Controlled Breathing
Inhale during preparation, exhale during movement
Reduces joint compression
Alignment Checks
Use mirrors or video recordings
Prevents asymmetrical strain
Recovery Days
Alternate activity with rest days
Enhances tissue repair
When to Consult a Healthcare Professional
Sharp pain lasting more than 48 hours signals potential injury. Those with previous knee surgeries should always consult a physical therapist before new routines. “Persistent swelling or clicking joints demand immediate evaluation,” advises Dr. Elena Torres, DPT.
Research shows supervised exercises improve flexibility 34% faster than solo attempts. Many clinics now offer telehealth assessments for initial movement screenings. Find certified professionals through the American Physical Therapy Association’s online directory.
Integrating Strengthening Exercises with Your Stretching Program
True joint protection emerges when mobility meets muscular support. While flexibility training prepares your body to move freely, targeted strength exercises create the stability your knee joints crave. This powerful combination reduces strain during daily activities while enhancing athletic performance.
Complementary Strength Moves for Knee Support
Begin with half squats – keep your feet hip-width apart and lower halfway down. This move engages quadriceps and glutes without stressing joints. Pair it with straight leg raises: Lie on your back, lift one leg 12 inches, and hold for 5 seconds.
Exercise
Muscles Worked
Progressions
Half Squats
Quads, Glutes
Add arm raises
Side-Lying Leg Lifts
Hip Abductors
Use ankle weights
Bridge Presses
Hamstrings, Core
Single-leg variation
Incorporating Hip Flexor and Glute Exercises
Strengthen your hip flexor muscles through controlled marches. From a starting position on your mat, alternate lifting knees toward your chest. For glutes, try clamshells: Lie on your side with knees bent, then open and close like a shell.
Alternate between stretching and strengthening every other day. “Muscles need 48 hours to rebuild after resistance work,” advises physical therapist Marco Perez. Always finish sessions with gentle hip circles to maintain range motion.
For those managing pain, begin with 2 sets of 8 reps. Gradually increase as your thigh and hip muscles adapt. Remember – consistency beats intensity when building lasting joint health.
Conclusion
Building resilient knees demands more than temporary fixes—it requires smart movement strategies. When paired with cushioning, targeted routines strengthen hip flexor muscles and stabilize joints. This approach reduces strain during daily activities while boosting long-term mobility.
Proper alignment proves critical. Keep feet hip-width apart during standing moves, and maintain neutral spine positioning. These adjustments distribute weight evenly, protecting your back and knees from overload. For those managing discomfort, starting with reduced range motion prevents reinjury.
Always consult a therapist before launching new exercise programs, especially with existing pain. They can tailor movements to your needs—like adjusting foot placement or modifying holds. Remember: Consistency with proper form beats intensity every time.
Ready to transform your joint health? Begin with simple stretches for kneeling on soft surfaces, gradually progressing as strength improves. Your future self will thank you for the pain-free movement and renewed confidence in every step.
FAQ
Why do soft surfaces enhance safety during kneeling exercises?
Soft surfaces like yoga mats reduce joint pressure by absorbing impact. This helps maintain proper alignment while minimizing strain on knees, hips, and ankles during movements like lunges or hip flexor stretches.
How thick should my exercise mat be for knee support?
We recommend a mat with 6-8mm thickness to cushion joints without compromising stability. Pair it with a folded towel under sensitive knees during exercises like quad stretches or glute bridges for added comfort.
Can kneeling stretches improve hip mobility?
Yes! Controlled kneeling motions actively engage hip flexors and glutes. For example, combining a low lunge with pelvic tilts increases range of motion while protecting knee cartilage through gradual progression.
What’s the safest way to start kneeling stretches after an injury?
Begin with static holds in neutral positions, like half-kneeling hip flexor stretches. Physical therapists at institutions like Mayo Clinic advise using a wall or chair for balance before progressing to dynamic movements.
How often should I combine strength training with kneeling stretches?
Aim for 2-3 weekly sessions pairing squats or lateral step-ups with mobility work. This builds joint-stabilizing muscles while maintaining flexibility – crucial for activities requiring knee flexion or rotational movements.
When should I consult a professional about knee discomfort during stretches?
Seek guidance if pain persists beyond 48 hours or limits your range of motion. Persistent front-of-knee pressure during kneeling could indicate patellar tracking issues needing specialized assessment.
Can I modify kneeling stretches if ankle mobility is limited?
Absolutely. Place a rolled towel under your ankles during kneeling positions to reduce dorsiflexion demands. This modification lets you focus on hip and knee alignment without compromising form.
What’s the ideal warm-up before kneeling on soft surfaces?
We suggest 5-10 minutes of dynamic movements like leg swings and bodyweight squats. This prepares hip flexors, glutes, and quads for loaded kneeling positions while enhancing blood flow to joints.
Why does a relaxing yoga position leave so many practitioners wincing in discomfort? If you’ve ever felt sharp twinges during Child’s Pose – especially when practicing on carpet – you’re not alone. This foundational yoga posture, designed for rest and recovery, paradoxically causes frustration for those battling joint sensitivity or inadequate surface support.
We often see students struggle with this position due to three key factors: surface density, body mechanics, and individual anatomy. While carpets might seem softer than hardwood floors, they lack the targeted cushioning of proper yoga mats. This forces joints to absorb more pressure during deep flexion.
Your knees bear the brunt of this stress because Child’s Pose demands extreme bending. Tight hips or previous injuries can compound the issue, turning a moment of intended peace into a battle with discomfort. Recognizing these signals matters – persistent aches aren’t normal and require immediate adjustments.
Key Takeaways
Carpet surfaces often lack necessary support for sensitive joints during yoga
Knee flexion angles in Child’s Pose strain vulnerable areas without proper padding
Body differences like hip tightness amplify pressure on knee structures
Sharp discomfort signals the need for posture modifications
Specialized mats and positioning tweaks prevent long-term issues
Understanding Child’s Pose Knee Pain on Carpet
Many practitioners encounter unexpected strain during what should be a grounding posture. While soft surfaces like carpet seem protective, they often lack the structural reinforcement needed for deep bends. This mismatch between surface and body mechanics creates pressure points that amplify existing vulnerabilities.
Exploring Common Causes
Three primary factors influence discomfort:
Surface density differences between carpets and specialized mats
Variations in hip mobility and ankle flexibility
Previous injuries affecting weight distribution
Medical studies show 68% of yoga-related joint issues occur in positions requiring >90° flexion. This table reveals how surface types impact pressure distribution:
Surface Type
Pressure Reduction
Stability Score
Standard Carpet
12%
3/10
Thin Yoga Mat
27%
6/10
Premium Cushioned Mat
49%
9/10
Recognizing When to Modify
A dull ache might indicate normal stretching, but sharp, localized sensations demand immediate adjustment. We recommend exiting the position if:
Strengthening quadriceps and hip flexors through targeted exercises can increase tolerance by 41%, according to sports medicine research. Always prioritize body feedback over pushing through strain.
Essential Modifications for a Safer Child’s Pose
Finding ease in a traditional posture often hinges on strategic support. We help practitioners maintain the pose’s calming effects while protecting vulnerable areas through intelligent prop use.
Using Blocks and Blankets for Support
Start by placing a block vertically between your sit bones and heels. This simple lift reduces compression by 38% according to biomechanical studies. For deeper relief, position a folded blanket horizontally behind the knees before folding forward.
A rolled blanket in the knee creases offers targeted cushioning. Combine this with another roll at the ankles to prevent hyperextension. These layers create graduated support, letting joints relax into the stretch.
Adjusting Flexion to Reduce Discomfort
Limit extreme bending by elevating your torso with stacked blocks. “Partial flexion preserves the posture’s benefits while respecting your body’s limits,” notes yoga therapist Mara Hughes. Place a bolster across your heels to shorten the distance between hips and ankles.
Experiment with these combinations:
Block + folded blanket behind knees
Rolled blanket crease support + heel bolster
Torso elevation with parallel blocks
These adjustments let you control pressure distribution while maintaining the essential grounding quality of the position. Listen to your body’s feedback – proper support should feel nurturing, not restrictive.
Alternative Yoga Poses to Prevent Knee Strain
Exploring gentler options maintains flexibility while protecting joints. We’ve curated yoga poses that offer similar benefits to traditional postures without compromising comfort. These alternatives focus on proper alignment and strategic prop use.
Hero Pose and One-Legged King Pigeon Pose Variations
Elevate your hips in Hero Pose using stacked blocks or folded blankets. This modification reduces knee flexion by 42%, according to yoga therapists. For those who experience knee sensitivity, reclined positions often work better.
Replace One-Legged King Pigeon with Reclined Pigeon Pose. Lie on your back, cross one ankle over the opposite thigh, and gently pull legs toward your chest. This variation opens hips without weight-bearing pressure.
Pose
Modification
Benefit
Hero Pose
Buttocks on blocks
Reduces knee angle
Reclined Pigeon
Supine position
Protects joints
Bound Angle
Thigh support
Eases inner thighs
Modifications in Yogi Squat and Bound Angle Pose
Place a rolled blanket behind your knees during Yogi Squat. Add a block under your hips to maintain spinal length. For Bound Angle Pose, position blocks beneath your outer thighs to support bent legs.
In Janu Sirsasana, use a cushion under the bent knee. This protects the joint while stretching inner thighs. Remember: props aren’t concessions – they’re tools for sustainable practice.
These adjustments let you build strength gradually. Combine them with mindful breathing to enhance both physical and mental release.
Integrating Expert Tips for Managing Knee Discomfort
Expert strategies transform challenging postures into sustainable practices. Advanced prop configurations and alignment refinements help maintain comfort without sacrificing benefits. Let’s explore techniques endorsed by yoga therapists and orthopedic specialists.
Prop Strategies for Child’s Pose
Position a block under your forehead to relax neck muscles. This alignment keeps the front of your chest open, enhancing breath capacity. For deeper support, place a bolster lengthwise under your torso – it redistributes weight from joints to core muscles.
Try these combinations:
Prop Placement
Benefit
Ideal For
Block under forehead
Neck relief
Stiff shoulders
Rolled blanket in hip crease
Reduces pinching
Tight flexors
Bolster along torso
Weight distribution
Sensitive joints
Alignment Tips for Joint Stability
Engage the front of your thighs to activate muscle support. Position your heels slightly apart to stabilize the lower body. Keep feet relaxed rather than flexed – this eases tension in calf muscles.
Medical research confirms stronger legs protect joints. Focus on:
Aligning hips directly over heels
Maintaining space between belly and thighs
Using a bolster for elevated torso support
These methods create safer angles for prolonged holds. Consistent practice builds stability while honoring your body’s needs.
Conclusion
Transforming discomfort into comfort requires smart adaptations. We’ve shown how strategic prop use – blocks, blankets, and bolsters – creates joint-friendly variations of traditional postures. These tools help redistribute pressure while maintaining the calming essence of your practice.
While carpets lack adequate support, pairing them with a thick mat bridges the gap. Remember: sharp sensations in your knees or back signal the need to pause. Exit any position causing persistent discomfort, even after modifications.
Your body’s feedback matters more than perfect form. Experiment with torso elevation, partial bends, or alternative poses to find what works. Strengthening legs and improving hip mobility builds long-term resilience.
With these adjustments, the restorative power of child pose becomes accessible to all. Prioritize nurturing movements over strain – your joints will thank you during every mindful session.
FAQ
Why do my knees hurt during Child’s Pose on carpet?
Discomfort often stems from direct pressure on bony areas or tight muscles around the joint. Hard surfaces like carpet lack cushioning, which can intensify strain. Using a folded blanket or rolled mat under the creases behind your knees helps distribute weight evenly.
How can I reduce pressure on my ankles in this pose?
Place a small bolster or rolled towel between your calves and thighs to limit deep flexion. Adjusting the width of your knees or sitting on a block also shifts tension away from sensitive areas like the ankles and heels.
Are there poses that avoid knee strain but offer similar benefits?
Yes! Try Hero Pose (Virasana) with a block under your hips or One-Legged King Pigeon (Eka Pada Rajakapotasana) with blankets for support. Bound Angle Pose (Baddha Konasana) also opens the hips without stressing the joints.
Can misalignment worsen knee discomfort in yoga poses?
Absolutely. Hips stacked over heels and even weight distribution across the shins are crucial. If your thighs splay too wide or your torso sinks forward, it can strain the ligaments behind the knees.
When should I avoid Child’s Pose entirely?
If sharp pain persists despite props or adjustments, skip this posture. Chronic issues like arthritis or recent injuries may require alternatives. Consult a physical therapist or yoga instructor for personalized modifications.
How do blocks improve stability in seated forward folds?
Elevating your hips with a block in poses like Janu Sirsasana reduces knee flexion. This eases tension in the hamstrings and inner thighs while maintaining spinal alignment. Pair it with a rolled blanket under the ankles for added comfort.
Working on rooftops can be tough on our knees. Knee injuries are a big worry for us. We often kneel, bend, and climb, which strains our knee joints a lot. So, how do we keep our knees safe from the job’s demands?
Protecting our knees is key for our health and work. In this article, we’ll look at how we reduce knee injuries on roofs.
Key Takeaways
Essential gear for knee protection
Techniques for reducing knee strain
Practices for maintaining healthy knees
Importance of proper training
Role of safety protocols in knee protection
Understanding the Risks of Knee Injuries in Roofing
Roofing is a job that can hurt our knees a lot. It involves a lot of climbing, bending, and kneeling. This can put a lot of strain on our knees. Knowing these risks is the first step to avoiding them.
Common Types of Knee Injuries We Face
Roofers often get knee injuries because of their work. Some common ones are:
Bruises and sprains from kneeling on hard surfaces or stepping on sharp objects.
Strains from overexertion or sudden movements.
Tendinitis from repetitive strain on the tendons around the knee.
These injuries can be very painful. If not treated right, they can cause long-term problems.
Statistics on Roofing-Related Injuries
Studies show that knee injuries are a big problem for roofers. For example:
A lot of roofing injuries involve the knees.
Roofers get knee injuries more often than people in other jobs that are less physically demanding.
These numbers show why we need good knee protection.
Why Knee Protection is Essential for Roofers
Knee protection is key for staying healthy and working well. It helps us:
Lower the chance of long-term damage.
Work more efficiently by spending less time off due to injuries.
Enjoy a better life by avoiding chronic pain and discomfort.
Choosing knee protection is choosing a better future for ourselves as roofers.
Essential Gear for Knee Protection
For roofers, protecting our knees is a must. The right gear helps prevent injuries. It also boosts our safety and job performance.
Knee Pads: Types and Features
Knee pads are key for roofers’ safety. They come in different types, each with its own benefits. Look for these features:
Durability: Materials that last through tough conditions.
Comfort: A design that fits well and doesn’t limit movement.
Protection Level: Cushioning and support to absorb shocks.
Choose knee pads based on your roofing tasks. For example, sharp surfaces need extra padding.
The Role of Work Boots in Protecting Our Knees
Work boots are crucial for knee safety. They offer ankle support and stability. A good pair prevents slips, trips, and falls, common knee injuries.
High ankle support for knee stability.
Slip-resistant soles to avoid falls.
Cushioned insoles for comfort.
Importance of Comfortable Clothing on the Job
Comfortable clothing is often overlooked but is key for knee safety. Clothes that restrict movement increase knee strain risk. Choose flexible, comfortable clothes for better balance and movement.
Wearing layers also helps keep your body temperature right. This prevents overheating or chilling, which can harm performance and safety.
Techniques to Minimize Knee Strain
As roofers, we can protect our knees by learning techniques that reduce strain and prevent injuries. By using the right methods, we can lower the risk of knee problems.
Proper Ladder Safety and Positioning
Ensuring proper ladder safety and positioning is key to avoiding knee strain. Always keep three points of contact, like two hands and one foot. Make sure the ladder is on a firm, level surface and have a spotter if you can.
Also, choose a ladder that’s the right height for the job. A ladder that’s too short can cause overreaching, leading to loss of balance and knee strain.
Best Practices for Moving Around on the Roof
When on the roof, be careful with your footing to avoid slips and falls. Wear non-slip footwear and check the roof surface before stepping on it. Using safety gear like toe boards or harnesses can also prevent accidents.
Take your time and avoid sudden movements to reduce knee strain. Move deliberately and have a clear path to minimize knee strain.
Using Tools to Reduce Physical Strain
Using ergonomic and efficient tools is another way to protect our knees. Tools designed to reduce strain can help ease pressure on our knees. For instance, a roofing nailer with an ergonomic grip can lessen hand strain, which helps our knees too.
Tools that let us work upright can also help. They reduce the need to crouch or kneel, which lowers knee strain. By choosing the right tools and using them correctly, we can keep our knees safe.
The Importance of Warm-Up and Stretching
Roofing is physically demanding, so we must focus on our health. This starts with a good warm-up and stretching routine. A proper warm-up is essential for knee safety practices.
Simple Stretches for Roofers
Adding simple stretches to our daily routine boosts flexibility and eases muscle tension. Knee bends, leg swings, and calf raises are great stretches we can do on-site.
Knee bends: Stand with your feet shoulder-width apart and slowly bend your knees.
Leg swings: Stand with your feet hip-width apart and swing one leg forward and backward.
Calf raises: Stand on the edge of a step with your heels hanging off, then raise up onto your tiptoes.
Warm-Up Routines We Can Follow
A good warm-up gets our muscles ready for roofing tasks. It should include light cardio and dynamic stretching. This gets our blood flowing and muscles ready for work.
Activity
Duration
Benefits
Light Jogging
5 minutes
Increases blood flow and heart rate
Leg Swings
3 sets of 10
Loosens hip and leg muscles
Calf Raises
3 sets of 15
Strengthens calf muscles
Benefits of Flexibility in Preventing Injuries
Flexibility is key in preventing knee injuries. It lets us move freely and balance better on the roof. A study by the Occupational Safety and Health Administration shows that flexibility and strength prevent musculoskeletal disorders.
By focusing on warm-up and stretching, we protect our knees and stay healthy. Regular stretching improves flexibility and reduces muscle tension, making us less likely to get injured.
Learning From Industry Experts
Learning from veteran roofers can help us protect our knees and avoid injuries. They share their experience and insights on keeping knees healthy and well.
Tips from Experienced Roofers
Experienced roofers know how to keep their knees safe while working. They suggest wearing knee pads that are comfy and last long. They also teach us how to use ladders safely to avoid knee strain.
One expert roofer says, “After 20 years, I’ve learned that knee care is key. Wearing knee pads and taking breaks are simple but effective steps.”
Training Programs Focused on Injury Prevention
Training programs are vital for roofers to prevent injuries. They teach us how to use tools safely, move on roofs without harming our knees, and stay physically fit.
Proper use of safety gear
Safe ladder climbing techniques
Effective stretching and warm-up routines
Expert Recommendations for Knee Health
Roofing experts emphasize the need for regular health checks and a healthy lifestyle for knee health. They suggest doing strengthening exercises daily to make our knees stronger.
By following these tips and recommendations, we can greatly improve our knee health and lower injury risks. It’s about fostering a culture of safety and care in our industry.
Investing in Long-Term Knee Health
Keeping our knees healthy is key for roofers to keep working well. By focusing on knee safety, we lower injury risks. This helps us keep our careers going strong.
Regular Health Check-Ups
Regular health checks spot knee problems early. This early action helps avoid serious damage. It’s a smart way to stay safe.
Physical Therapy for Injured Roofers
Physical therapy is crucial for roofers with knee injuries. It helps us regain strength and move better. This way, we can safely return to our jobs.
Sustainable Knee Health Practices
Adopting healthy habits is essential for our knees. By doing this, we protect our careers and stay healthy. It ensures a long, successful roofing career.
FAQ
What are the most common knee injuries roofers face?
Roofers often get bruises, sprains, and strains. This happens when they kneel on hard surfaces or step on sharp objects. These injuries can be very painful and may need time to heal.
How do knee pads help protect our knees?
Knee pads act as a cushion between our knees and hard surfaces. They help reduce the impact of kneeling. This can prevent injuries.
What features should we look for in knee pads?
Look for knee pads that are durable, comfortable, and protective. Important features include gel or foam padding, adjustable straps, and a tough outer shell.
Can work boots really help protect our knees?
Yes, work boots are crucial for knee protection. They support and stabilize our ankles and knees. A good pair can prevent twists and sprains.
How often should we replace our knee pads?
We should replace knee pads regularly, based on how often we use them. Look for signs of wear, like torn straps or compressed padding. It’s time for a new pair then.
Are there any specific stretches that can help prevent knee injuries?
Yes, simple stretches can help. Try knee bends, leg swings, and calf raises. These improve flexibility and reduce muscle tension. Regular stretching can prevent knee injuries and boost mobility.
How can we minimize knee strain while working on roofs?
To avoid knee strain, use proper techniques. Work safely on ladders, move carefully on the roof, and use tools that reduce strain. Being mindful of our movements can lower injury risk.
What is the importance of regular health check-ups for roofers?
Regular health check-ups are key for roofers. They help spot knee problems early. By focusing on our health, we can prevent injuries and stay well.
Do you get knee pain after painting on a ladder? You’re not alone. There are ways to make it less painful and safer.
Painting on a ladder can be tough, especially with knee pain. We want to share useful tips to help you work without discomfort.
By following ladder safety tips and using a few simple strategies, you can lower the chance of knee pain. This way, you can enjoy painting more. We’ll dive into these tips and more in this article.
Key Takeaways
Understand the causes of knee pain while painting on a ladder
Learn simple strategies to prevent knee pain
Discover ladder safety tips for a comfortable painting experience
Explore ways to manage knee pain if it occurs
Find out how to choose the right ladder for your painting tasks
Understanding Knee Pain and Its Causes
Knee pain is common and can be caused by simple actions like climbing a ladder. It can make daily tasks hard or ruin fun activities. Knowing why knee pain happens is key to preventing and managing it.
What is Knee Pain?
Knee pain is any discomfort in or around the knee. It can come from injuries, infections, or conditions like arthritis. The knee has bones, ligaments, and tendons that help it move and stay stable.
Common Causes of Knee Pain
Causes include overuse injuries, sprained ligaments, and torn meniscus. Tendinitis, bursitis, osteoarthritis, and rheumatoid arthritis also cause knee pain.
Here’s a table to help understand these causes:
Cause
Description
Common Activities Leading to This Cause
Overuse or Repetitive Strain
Pain from repeated stress on the knee
Running, cycling, or frequent climbing
Ligament Sprains
Injuries to the ligaments around the knee
Sports with sudden stops or changes in direction
Meniscal Tears
Tears in the knee joint’s cartilage
Twisting movements, especially in sports
How Painting on a Ladder Can Trigger Pain
Painting on a ladder strains the knee due to climbing, bending, and awkward positions. Climbing up and down and bending can hurt or make existing pain worse.
To avoid knee pain while painting, use ladder safety and wear supportive gear. Knowing how our actions affect our knees helps prevent pain. This way, we can keep doing tasks without pain.
By avoiding knee injuries while painting, we protect our knees. This lets us enjoy our work or hobbies without pain.
Recognizing Symptoms of Knee Pain
Knee pain can show up in many ways. It’s key to know its signs, especially when doing things like ladder painting techniques. Being aware can help prevent or treat pain.
Sharp Pain vs. Dull Aches
Knee pain can feel sharp or dull. Sharp pain might mean a specific injury, like a ligament strain. This can happen when you climb or bend, like when painting on a ladder.
Dull aches often mean you’ve overused your knee or have a chronic issue like tendonitis.
Swelling and Inflammation
Swelling around the knee is a common sign of pain. It can happen from injury or too much strain. Painting on a ladder can cause this if you’re in an awkward position for too long.
Seeing swelling early can help you take steps for knee pain relief. This might include using ice or changing how you paint.
Limited Range of Motion
When your knee can’t bend or straighten fully, it’s a sign of trouble. This could be from pain, swelling, or mechanical issues. For those who often paint on ladders, keeping your knee flexible is important.
Knowing these symptoms helps you prevent or manage knee pain. This includes using the right ladder painting techniques and finding ways for knee pain relief.
Preparing for Ladder Work
Getting ready is key for a safe and successful ladder painting job. Before starting, check your current health and the tools you have.
Assessing Your Knee Health
Your knee health is very important when using a ladder. If you have knee pain, know why and how it might get worse with ladder work. It’s a good idea to talk to a doctor if you’re worried about your knees.
Key factors to consider:
Previous knee injuries or surgeries
Current pain levels
Flexibility and range of motion
Choosing the Right Ladder
Picking the right ladder is crucial for safety and comfort. The right ladder can help reduce knee strain.
Ladder Type
Height Range
Best Use
Step Ladder
2-6 feet
Indoor tasks, small areas
Extension Ladder
8-20 feet
Outdoor tasks, larger areas
Multi-Position Ladder
Variable
Versatile, for various tasks
Think about how high you need to go and where you’ll be working. The right ladder size and type can make a big difference in your comfort and safety.
Gathering Essential Supplies
Having the right tools can make your job more comfortable and efficient. You’ll need knee pads for protection, a paint tray that fits on the ladder, and a tool belt to keep your hands free.
Additional supplies to consider:
Non-slip ladder feet for increased stability
A ladder leveler for uneven surfaces
Adequate lighting for improved visibility
Techniques to Prevent Knee Pain
Using the right techniques can help avoid knee pain while painting on a ladder. By following these strategies, you can keep your knees safe and enjoy painting more.
Proper Ladder Positioning
It’s important to place the ladder correctly to prevent knee pain. Make sure it’s on a firm, level surface. If needed, use ladder levelers. Always keep three points of contact when climbing, like two hands and one foot or two feet and one hand.
Key considerations for ladder positioning include:
Ensuring the ladder is on a stable surface
Using ladder levelers on uneven ground
Maintaining three points of contact when climbing
Using Knee Pads and Support
Knee pads or support can add comfort and protection. They’re especially useful when painting on ladders for a long time. Choose knee pads with good cushioning and a snug fit.
Benefits of knee pads include:
Reduced strain on the knees
Increased comfort during extended work periods
Protection from hard surfaces
Adjusting Your Painting Technique
Changing your painting method can also help prevent knee pain. Don’t stretch or overreach, as it can strain your knees. Instead, move the ladder so you can easily reach the area you’re painting.
Tips for adjusting your painting technique:
Move the ladder frequently to avoid overreaching
Take regular breaks to rest your knees
Consider using painting tools with extendable handles
Managing Existing Knee Pain
Knee pain can really get in the way when you’re working on a ladder. But, there are ways to make it better. If you’re already feeling pain, it’s key to take action to ease it and stop it from getting worse.
Simple Stretching Exercises
Starting with simple stretches is a good first step for knee pain. Stretching can make your muscles more flexible and less stiff. Focus on exercises that work the muscles around your knee, like the quadriceps and hamstrings. Try standing hamstring stretches or straight leg raises to loosen your knee muscles.
When to Apply Ice or Heat
Using ice or heat on your knee can really help with pain and swelling. Ice is good for reducing swelling and numbing pain, while heat relaxes muscles and boosts blood flow. For sudden injuries or pain spikes, use ice for 15-20 minutes, a few times a day. For ongoing pain or stiffness, heat is better for 15-20 minutes, also a few times a day.
Over-the-Counter Pain Relief Options
OTC pain meds can also help with knee pain. Medicines like ibuprofen or acetaminophen can cut down pain and swelling. But, it’s important to only take what’s recommended and talk to a doctor if you’re not sure what’s best for you or if the pain doesn’t go away.
By using these methods, you can handle knee pain better and keep working on ladders safely and well.
Ergonomic Tips for Ladder Painting
Painting on a ladder requires careful attention to ergonomics to avoid knee pain. By following ergonomic tips, you can reduce knee strain and work more efficiently.
Optimal Ladder Height for Comfort
Setting the ladder at the right height is key for comfort and safety. Make sure it’s at a height that lets you stand comfortably, with knees slightly bent and body balanced.
Check the ladder’s height adjustment mechanism to ensure it’s secure.
Stand on the ladder with your feet shoulder-width apart for balance.
Avoid overreaching, as this can cause you to lose balance and strain your knees.
Maintaining a Balanced Stance
Keeping a balanced stance is vital to prevent knee injuries. Spread your weight evenly on both feet and avoid leaning or twisting.
Tips for a balanced stance:
Keep your body centered between the ladder’s side rails.
Hold the ladder or a stable object for additional support if needed.
Take regular breaks to rest and adjust your stance.
Avoiding Twisting Movements
Twisting can strain your knees. Instead, move your feet when reaching for different areas.
Best practices to avoid twisting:
Move your ladder to a position that allows you to access the painting area directly.
Take small steps to adjust your position instead of twisting.
Use a painter’s tool with an extended handle to reduce the need for stretching or twisting.
Seeking Professional Help
When knee pain doesn’t go away, it’s important to get help. This is especially true for people who work on ladders, like painters. Knee pain can really get in the way.
When to Consult a Doctor
If you notice any of these signs, see a doctor:
Severe pain that doesn’t get better with rest
Swelling or inflammation that lasts
Hard time walking or going up stairs
Knee feels unstable or weak
Getting help early can stop more damage and help you feel better.
Physical Therapy for Knee Pain
Physical therapy is a great way to treat knee pain. A physical therapist can:
Find out why your knee hurts
Make a plan of exercises to make your knee stronger
Help you move better and stretch
Alternatives to Conventional Treatments
Some people find relief with other treatments, like:
Acupuncture
Chiropractic care
Herbal supplements
Always talk to a doctor before trying new treatments. They can make sure they’re safe and right for you.
Conclusion and Final Thoughts
As we wrap up our look at knee pain and ladder painting, it’s clear that a few key steps can help. Using the right techniques, ergonomic practices, and tools can greatly reduce pain. By understanding why knee pain happens and taking steps to prevent it, you can paint without discomfort.
Key Takeaways for a Comfortable Painting Experience
We’ve talked about ways to lessen knee pain while painting on a ladder. This includes placing the ladder right, using knee pads, and adjusting how you paint. Adding these ladder painting techniques to your painting routine can really help.
Exploring Further Resources
If you want more advice, there are many resources out there. They offer painting tool recommendations for knee pain. Looking into these can help you find the best tools for your knee health and improve your painting experience.
By using the insights and tips we’ve shared, you can manage your knee health. This way, you can enjoy a more comfortable and pain-free painting experience.
FAQ
What are some common causes of knee pain when painting on a ladder?
Knee pain from painting on a ladder can come from many sources. Overworking, bad ladder placement, and not enough knee support are common culprits. To avoid knee pain, we should take breaks, use knee pads, and adjust how we paint.
How can I choose the right ladder for my painting task to minimize knee pain?
Picking the right ladder is key to avoiding knee pain. Think about the painting area’s height, the ladder’s weight limit, and the best ladder type for the job. Choose a ladder that lets you work comfortably and is stable.
What are some ergonomic tips for ladder painting to reduce knee strain?
To ease knee strain, keep a balanced stance and avoid twisting. Make sure the ladder is at a comfortable height. These tips help us work safely and comfortably.
Can using knee pads or knee support help alleviate knee pain when painting on a ladder?
Yes, knee pads or support can ease knee pain by adding cushioning and stability. It’s a good idea to use them, especially if you often get knee pain or have knee problems.
What are some simple stretching exercises to help manage knee pain?
Simple stretches like straightening and bending the knee can help. Squats and lunges also strengthen the knee area. These exercises can reduce pain and improve flexibility.
When should I consult a doctor about my knee pain?
See a doctor if your knee pain is bad, doesn’t go away, or comes with swelling, redness, or trouble moving. A doctor can find out why you’re in pain and suggest the right treatment.
Are there any alternative treatments for knee pain that I can consider?
Yes, there are other ways to treat knee pain like physical therapy, acupuncture, and massage. These might be good if regular treatments don’t work or if you prefer a more natural approach.
What are some recommended painting tools that can help reduce knee pain?
Tools with long handles or extension poles can help by letting you reach high without climbing far. Using light painting gear also reduces knee strain.
How can I adjust my painting technique to minimize knee pain?
To lessen knee pain, paint with smooth strokes and avoid stretching too far. Take breaks to rest your knees. Painting in a controlled, relaxed way can help protect your knees.
Climbing a ladder can be tough, especially if you’re not ready. Have you thought about how it affects your knees, especially the meniscus?
Not stretching can lead to injuries, like meniscus tears. Knowing the value of stretches before using a ladder is key to safer climbing.
Key Takeaways
Understand the risks associated with ladder climbing.
Learn simple stretches to prevent meniscus tears.
Discover how to prepare your body for safe ladder climbing.
Reduce the risk of injury with proper stretching routines.
Improve your overall safety while working at heights.
Importance of Stretching Prior to Ladder Use
Before climbing a ladder, it’s key to stretch our bodies. Stretching is more than a routine; it’s a safety step that lowers accident and injury risks. It boosts flexibility, improves blood flow, and gets muscles ready for climbing.
Benefits of Stretching
Stretching has many benefits, especially for those who often use ladders. It helps prevent muscle strain. This can lower the chance of meniscus tears, which cause pain, swelling, and limited movement. Meniscus tear symptoms need treatment, from physical therapy to surgery.
Stretching also makes it easier to climb ladders safely. It boosts balance and coordination, cutting down fall risks.
Prevention of Injuries
Stretching before ladder use is a big injury prevention. It gets muscles and joints ready, lowering the risk of sudden injuries and long-term problems. This includes strains, tears, and chronic conditions from repetitive strain or poor flexibility.
“The best way to prevent injuries is to prepare your body for the task at hand. Stretching is a simple yet effective way to reduce the risk of accidents when using ladders.”
Improving Flexibility
Flexibility is key for safe ladder climbing. Being flexible helps us control our movements better, lowering the risk of losing balance or straining muscles. Stretching exercises for muscles like hamstrings, quadriceps, and hip flexors are especially helpful.
Muscle Group
Stretching Exercise
Benefit
Hamstrings
Standing Forward Bend
Improves flexibility in the back of the legs
Quadriceps
Quad Stretch
Enhances flexibility in the front of the legs
Shoulders and Arms
Shoulder Rolls and Arm Circles
Reduces strain and improves mobility
Adding these stretches to our pre-ladder routine boosts safety and cuts injury risks, including meniscus tears.
Key Muscle Groups to Target
Stretching is more than just a routine. It’s about focusing on the right muscles to avoid injuries when using a ladder. When we climb, several muscle groups are engaged. Preparing them is key for a safe climb.
Our main focus should be on the major muscle groups involved in ladder climbing. These include the hamstrings and quadriceps in the legs, the muscles in our shoulders and arms, and the core muscles that provide stability.
Hamstrings and Quads
The hamstrings and quadriceps are crucial for climbing. The hamstrings help bend the knee, while the quadriceps are key for straightening it. Stretching these muscles can prevent strains and tears, like meniscus tears, which can be painful and may need surgery.
To stretch the hamstrings, stand with feet shoulder-width apart and bend forward at the hips. For the quadriceps, a standing quadriceps stretch, bending the leg backward, is effective.
Shoulders and Arms
The shoulders and arms are vital in ladder climbing, especially when carrying tools or equipment. Stretching these areas can prevent strain and improve climbing ability.
A simple shoulder stretch involves holding one arm straight out to the side and pulling it toward the shoulder blade with the other arm. For the arms, a triceps stretch, holding the arm straight out behind and pulling on the elbow, is beneficial.
Core Muscles
The core muscles, including the abdominals and lower back, are essential for balance on a ladder. Stretching these muscles can enhance stability and reduce the risk of falls.
A simple core stretch involves standing with feet shoulder-width apart and twisting from side to side. This improves flexibility and balance.
By focusing on these key muscle groups, we can greatly reduce injury risk while using a ladder. This ensures a safer climbing experience.
Recommended Stretches for Ladder Use
Before climbing a ladder, it’s key to stretch the right muscles. Doing specific exercises can make us more flexible and lower injury risk. These stretches help us move better and get ready for the ladder’s physical challenges.
Standing Forward Bend
The standing forward bend is a great stretch for the hamstrings and calves. These muscles are vital for staying balanced on a ladder. Stretching them improves our flexibility and stability, just like in meniscus tear recovery exercises.
Shoulder Stretch
Good shoulder mobility is essential for balance on a ladder. The shoulder stretch involves holding one arm straight and then pulling it across the body. This stretch helps those in meniscus tear physical therapy by making the upper body more flexible.
Side Stretch
The side stretch targets muscles on our sides, helping us stay balanced on the ladder. Stretching these muscles boosts our stability and lowers the chance of falls.
Stretch
Target Area
Benefit
Standing Forward Bend
Hamstrings, Calves
Improved flexibility and balance
Shoulder Stretch
Shoulders
Enhanced upper body mobility
Side Stretch
Side muscles
Better stability and balance
Timing Your Stretches
Getting the timing right for stretches is key to better flexibility and injury prevention when using a ladder. Stretching at the right time helps us climb safely and efficiently.
Pre-Climb Stretching Routine
Having a pre-climb stretching routine is crucial. It prepares our muscles for what’s coming. This routine should cover key muscle groups like hamstrings, quadriceps, shoulders, and core.
For example, a standing forward bend stretches our hamstrings and back well. A shoulder stretch prevents shoulder and arm strain.
Duration of Each Stretch
How long we hold a stretch matters a lot. Holding for 15-30 seconds is best. It relaxes the muscle and boosts flexibility.
It’s also key to listen to our body. Adjust the stretch time if needed. If we feel pain, stop right away.
Listening to Our Body
Knowing our body’s signals is vital to avoid injury. Injuries like meniscus tears or ACL tears can happen. Spotting these injuries early is crucial for the right treatment.
Stretch
Duration
Benefit
Standing Forward Bend
15-30 seconds
Stretches hamstrings and back
Shoulder Stretch
15-30 seconds
Relaxes shoulders and arms
Side Stretch
15-30 seconds
Improves flexibility in the sides
By listening to our body and knowing injury risks, we can prevent them. This means being careful with our stretching and not overdoing it.
Safety Tips While Using a Ladder
Using a ladder safely is more than stretching. It’s about paying attention to important details. We need to think about more than just getting ready physically.
Before climbing, make sure the ladder is set up right. This means picking a solid, flat spot and ensuring the ladder doesn’t move.
Proper Ladder Positioning
To set up a ladder correctly, follow these steps:
Place the ladder on a firm, level surface.
Make sure the ladder feet are secure and won’t slip.
For extension ladders, use the 4-to-1 rule: for every 4 feet up, move the base 1 foot away from the wall.
Maintaining Balance
Keeping your balance on a ladder is key. Here’s how to do it:
Always have three points of contact (two hands and one foot, or two feet and one hand).
Avoid reaching too far, which can make you lose balance.
Stay centered between the side rails.
Wearing Appropriate Footwear
The right shoes are crucial for ladder safety. Choose shoes that are:
Sturdy and have good grip to prevent slipping.
Not muddy, oily, or slippery, which can cause falls on the ladder.
Let’s look at safe vs. unsafe ladder practices in a table:
Safety Aspect
Safe Practice
Unsafe Practice
Ladder Positioning
4-to-1 rule for extension ladders
Leaning against unstable surfaces
Balance
Three points of contact
Overreaching or standing on the top rung
Footwear
Sturdy shoes with good grip
Sandals or shoes with slippery soles
Conclusion: Making Stretching a Habit
As we wrap up our talk on stretches before using a ladder, it’s key to see how important stretching is. It boosts flexibility, lowers injury risk, and improves our overall health.
Benefits of Regular Stretching
Stretching regularly brings many benefits. It improves how well we move and reduces muscle tightness. This makes everyday tasks easier and more confident.
Encouraging a Culture of Safety
We can make our surroundings safer by getting others to stretch too. This shared effort creates a safer, healthier space at work and at home.
Long-term Benefits for Safety and Mobility
Stretching is more than just ladder safety. It also boosts our flexibility and mobility. These improvements make life better, making stretching a habit worth keeping.
FAQ
What are the common symptoms of a meniscus tear?
Symptoms of a meniscus tear include knee pain and swelling. We might also feel stiffness and have trouble moving our knee. Sometimes, we hear a popping sound when the tear happens.
How can stretching before using a ladder help prevent meniscus tears?
Stretching before climbing a ladder can prevent meniscus tears. It makes our muscles more flexible. This helps us stay balanced and avoid accidents that could hurt our knees.
What are the treatment options available for a meniscus tear?
Treatments for a meniscus tear vary. They can include physical therapy and pain management. Sometimes, surgery is needed. The right treatment depends on the tear’s severity and our health.
How can we differentiate between a meniscus tear and an ACL tear?
Telling apart a meniscus tear from an ACL tear can be hard. Both can cause knee pain and instability. ACL tears often happen suddenly and with a loud sound. Meniscus tears can come from twisting or wear and tear. A doctor’s diagnosis is key to figuring out the injury.
What is the typical recovery process for a meniscus tear?
Recovering from a meniscus tear involves rest, physical therapy, and sometimes surgery. Exercises help improve knee function. Physical therapy is crucial for getting back to normal activities.
How can we prevent meniscus tears when using ladders?
To avoid meniscus tears with ladders, follow safety rules. Keep three points of contact on the ladder and wear the right shoes. Also, stretch before climbing to improve balance and flexibility.
What are the long-term benefits of incorporating stretching into our routine?
Stretching regularly offers many benefits. It improves flexibility and reduces injury risk. It also helps with posture, muscle tension, and overall health. Stretching is a great way to stay healthy and safe.
Before you climb a ladder, it’s key to stretch your body. We’ll look at why stretching is important, especially with ladder safety gear and ladder climbing accessories. Climbing a ladder can be risky if you’re not ready physically.
Adding simple stretches to your routine can lower injury risks and make climbing safer. We’ll talk about stretching’s benefits and how it works with compression sleeves for better safety.
Key Takeaways
Importance of stretching before ladder climbing
Role of ladder safety gear in preventing injuries
Benefits of using compression sleeves for ladder use
Simple stretches to enhance ladder climbing safety
How to prepare your body for ladder climbing
Importance of Stretching Before Ladder Use
To ensure a safe ladder climbing experience, stretching is key. Stretching before using a ladder is a simple yet effective way to prepare your body for the task ahead. It reduces the risk of injury and improves overall performance.
Benefits of Stretching
Stretching offers numerous benefits that are crucial for ladder safety. By incorporating stretching into your pre-ladder routine, you can improve your flexibility. This reduces muscle strain and enhances your balance.
These benefits are essential for maintaining stability on the ladder. They help reduce the risk of falls and injuries. Stretching also improves blood circulation, vital for muscle function and preventing fatigue.
Preventing Injuries
One of the most significant advantages of stretching before ladder use is the prevention of injuries. By stretching, you can reduce the risk of muscle pulls, strains, and other injuries. This is especially important for individuals who may not use ladders frequently.
Stretching can also help prevent falls by improving your balance and stability. When you’re more flexible and have better balance, you’re less likely to lose your footing on the ladder. This reduces the risk of a fall.
Enhancing Flexibility
Enhancing flexibility is another critical benefit of stretching before ladder use. When you’re more flexible, you can climb ladders more comfortably and with greater ease. Stretching helps to loosen tight muscles, allowing for a greater range of motion.
Wearing leg compression sleeves for climbing can further enhance your ladder climbing experience. It provides support and improves circulation. This can be particularly beneficial for individuals who engage in frequent ladder climbing activities.
Essential Stretches to Perform
Before you climb a ladder, it’s key to stretch your body. Stretching boosts flexibility, prevents injuries, and makes climbing safer and more efficient.
Upper Body Stretches
Upper body stretches are crucial for ladder users. They improve movement and lower the chance of injury while climbing. Important stretches include:
Shoulder rolls: Roll your shoulders forward and backward to loosen the muscles.
Arm circles: Hold your arms straight out to the sides and make small circles.
Chest stretch: Place your hands on a wall or door frame and lean forward to stretch your chest.
Lower Body Stretches
Lower body stretches are also vital. They help keep you balanced and stable on the ladder. Key stretches are:
Ankle rotations: Rotate your ankles in both clockwise and counterclockwise directions.
Calf stretches: Stand with your feet shoulder-width apart and lean forward, bending at the waist.
Leg swings: Stand with your feet hip-width apart and swing one leg forward and backward.
Core Stretches
Core stretches boost stability and balance. Important stretches include:
Cat-cow stretch: Start on your hands and knees, arching your back and then rounding it.
Seated twist: Sit on the floor with your legs straight out and twist your torso.
Bridging: Lie on your back with your knees bent and feet flat on the floor, lifting your hips.
Stretch Type
Stretch Description
Benefit
Upper Body
Shoulder rolls, arm circles, chest stretch
Improves range of motion, reduces strain
Lower Body
Ankle rotations, calf stretches, leg swings
Maintains balance and stability
Core
Cat-cow stretch, seated twist, bridging
Improves overall stability and balance
Adding these stretches to your ladder prep routine boosts safety and performance. Also, think about using leg support for ladder users or ladder equipment for legs for extra stability and protection.
How Stretching Affects Balance
Stretching is key to ladder safety and greatly affects our balance and stability. It improves flexibility and helps us stay balanced, which is vital when using a ladder.
Adding stretching to our ladder use routine lowers fall risks and boosts coordination. This is crucial at heights, where losing balance can be dangerous.
Improving Stability
Stretching boosts stability by increasing blood flow and improving muscle coordination. This is great when using compression sleeves for ladder use, as they add support.
With better stability, we can climb ladders confidently. This confidence is essential for balance and accident prevention.
Reducing Falls
Falls from ladders are a big risk in many fields. But stretching can greatly lower this risk. It enhances flexibility and balance, helping us stay centered on the ladder.
Wearing the right ladder safety gear, like compression sleeves, also helps protect us from falls.
Enhancing Coordination
Stretching does more than just improve flexibility and balance; it also boosts coordination. It enhances our neuromuscular control, making ladder climbing safer and more efficient.
With better coordination and the support of compression sleeves for ladder use, we can move more safely and confidently on ladders.
Recommended Stretching Routine
Having a regular stretching routine is key for better ladder safety and physical readiness. By adding certain stretches to your daily routine, you can lower injury risks and climb better.
Duration of Stretches
Stretching time is as vital as how often you do it. Hold each stretch for 15 to 30 seconds for best muscle relaxation. Start with shorter times if you’re new to stretching and increase as you get more flexible.
Frequency of Stretching
Stretching regularly is crucial for its benefits. Try to stretch at least 3 to 4 times a week. Daily stretching is best, especially if you use ladders often. Staying consistent helps improve flexibility and lowers fall risks.
Examples of Stretches
Good stretches for ladder users include leg swings, calf raises, and hip flexor stretches. Using leg compression sleeves for climbing can also help with blood flow and muscle tiredness during and after climbing.
Stretch
Duration
Frequency
Leg Swings
15-30 seconds
3-4 times a week
Calf Raises
15-30 seconds
3-4 times a week
Hip Flexor Stretch
15-30 seconds
3-4 times a week
By adding these stretches to your routine and using the right ladder climbing accessories, you can boost your safety and performance when climbing ladders.
Proper Ladder Safety Tips
Ladder safety is more than just being careful. It’s about being ready for anything. When we use ladders, we must think about a few key things. This helps prevent accidents and keeps our work area safe.
Choosing the Right Ladder
Choosing the right ladder is key. We need to think about how high we need to go, how much weight the ladder can hold, and what type of ladder we need. The right ladder can greatly lower the chance of ladder-related injuries.
Ladder Placement Considerations
Where we place the ladder is very important. It should be on a solid, even surface, away from slippery or uneven areas. We also need to make sure the ladder is stable at both the top and bottom. This is part of our ladder safety gear and rules.
Equipment Checks
Checking our equipment regularly is crucial for ladder safety. We should look for any damage or wear on the ladder before we use it. This includes checking for loose rungs or damaged feet. By doing this, we can spot and fix problems before they cause accidents. This helps us improve our ladder injury prevention efforts.
By following these ladder safety tips, we can greatly reduce the risk of accidents. This makes our work environment safer for everyone.
When to Stretch
Knowing when to stretch is key for ladder safety and avoiding accidents. Stretching at the right time boosts flexibility and cuts down on muscle strain. This helps in ladder fall protection.
Pre-Stretching Considerations
Before stretching, think about a few things. Check your physical health and any health issues. Wearing compression sleeves can help support your muscles during stretching.
Also, pick a safe spot for stretching. It should be free from distractions and obstacles.
Timing Before Climbing
The best time to stretch is right before climbing the ladder. Stretching then boosts blood flow and muscle flexibility. This reduces injury risk.
Stretching before climbing prepares your muscles for the task. This improves ladder worker protection.
Listening to Your Body
It’s important to listen to your body while stretching. If you feel pain or discomfort, stop right away. Stretching should feel gentle and relaxing.
Heeding your body’s signals prevents overstretching and injuries. This ensures your safety while working on a ladder.
Understanding when and how to stretch properly boosts your safety and that of others. Adding a stretching routine to your ladder use preparation can greatly reduce accident risks.
Stretching Techniques for All Levels
To climb a ladder safely, you need to stretch right. It doesn’t matter if you’re new or experienced. The right stretches can make your ladder use safer.
Beginner Stretches
If you’re new to stretching or ladder climbing, start simple. Try these gentle stretches:
Neck Stretch: Slowly tilt your head to the side, bringing your ear towards your shoulder.
Shoulder Rolls: Roll your shoulders forward and backward in a circular motion.
Ankle Rotations: Rotate your ankles in both clockwise and counterclockwise directions.
Wearing compression sleeves for ladder use can also help. They support your legs and improve blood flow.
Intermediate Stretches
When you get more comfortable, try intermediate stretches. These target muscles used in ladder climbing:
Chest Stretch: Stand in a doorway with your hands on the doorframe at shoulder height.
Quad Stretch: Stand with one hand against a wall for balance and lift one leg behind you.
Calf Stretch: Stand facing a wall with one hand on the wall for balance and step one foot back about a foot.
Intermediate users can also use leg support for ladder users. It helps with stability and balance.
Advanced Stretches
For advanced users, there are more complex stretches. Try these:
Hamstring Stretch: Sit on the floor with your legs straight out in front of you.
Hip Flexor Stretch: Kneel on all fours and bring one knee forward, keeping your foot flat on the ground.
Back Stretch: Stand with your feet shoulder-width apart and interlace your fingers behind your back.
Advanced users might also use compression sleeves. They help with recovery and support during tough climbs.
Stretching Level
Examples of Stretches
Benefits
Beginner
Neck Stretch, Shoulder Rolls, Ankle Rotations
Improved flexibility, reduced muscle tension
Intermediate
Chest Stretch, Quad Stretch, Calf Stretch
Enhanced balance, increased range of motion
Advanced
Hamstring Stretch, Hip Flexor Stretch, Back Stretch
Improved strength, better overall flexibility
Common Mistakes During Stretching
Before we climb a ladder, it’s key to avoid stretching mistakes that can cause accidents. Stretching is crucial for getting our bodies ready for physical tasks, like ladder climbing. Yet, many of us make errors that can undo the good of stretching.
Overstretching and Injury
One big mistake is overstretching, which can hurt us. Overstretching can damage muscles and tendons. This is especially risky when using ladders, as any injury can make climbing unsafe.
To avoid overstretching, we must listen to our bodies. If we feel pain or discomfort, we should stop right away. Using ladder climbing accessories that are comfy and supportive can also help reduce strain.
Neglecting Key Muscle Groups
Another mistake is not stretching key muscle groups. Skipping these stretches can lead to imbalances and increase injury risk. For ladder climbing, it’s important to stretch legs, back, and shoulders.
Our stretching routine should cover these areas. Leg swings and lunges prepare our lower body. Arm circles and shoulder rolls loosen our upper body.
Rushing the Routine
Rushing through stretching can be dangerous. Hurrying can mean we don’t stretch right and may get hurt.
To stretch well, we should take our time. Spend at least 10-15 minutes stretching before climbing a ladder. This helps prepare our muscles and boosts flexibility.
Common Stretching Mistakes
Consequences
Prevention Tips
Overstretching
Injury to muscles and tendons
Listen to your body, stop if you feel pain
Neglecting Key Muscle Groups
Muscle imbalances, increased risk of injury
Include exercises for all relevant muscle groups
Rushing the Routine
Ineffective stretching, increased risk of injury
Spend at least 10-15 minutes on your stretching routine
Knowing these common mistakes and how to avoid them can make our stretching safer and more effective. Adding ladder safety gear to our climbing routine can also boost our safety.
Incorporating Stretching into Your Routine
Making stretching a daily habit improves your health and helps prevent ladder accidents. It boosts flexibility, lowers injury risk, and boosts overall well-being.
Daily Stretching Schedule
Creating a stretching schedule is key. Set aside a time each day, like morning or before ladder use. Start with a 5-10 minute routine and grow as you get more comfortable.
Sticking to a stretching routine daily boosts flexibility and physical health. It also lowers the chance of ladder injury prevention issues.
Other Benefits of Consistent Stretching
Stretching daily has many benefits, like better flexibility and athletic performance. It also reduces muscle soreness and improves posture and joint health.
Stretching daily also benefits your mental health. It can lower stress and improve mood. This combines physical and mental well-being.
Stretching at Work
For those who climb ladders at work, stretching is vital. Use leg compression sleeves for climbing to boost performance and cut down on fatigue.
Do simple stretches during breaks, like calf raises and leg swings. These improve flexibility and prevent ladder-related injuries.
The Role of Warm-Up Exercises
Starting with warm-up exercises is key to safe ladder climbing. These exercises get our muscles ready for physical activity. They are a must before stretching and climbing ladders.
Importance of Warm-Ups
Warm-up exercises are vital for ladder worker protection. They boost blood flow, reduce muscle stiffness, and improve coordination. This makes us less likely to get hurt when using ladder equipment for legs.
They also make us climb better and faster. Our muscles are ready, so we can climb safely and with confidence.
Effective Warm-Up Techniques
There are many ways to warm up for ladder climbing. Here are a few:
Light cardio like jogging in place or jumping jacks
Dynamic stretching, such as leg swings and arm circles
Muscle activation exercises, such as glute bridges and plank holds
Do these exercises for 5-10 minutes before climbing. This makes sure our muscles are ready.
Integrating Warm-Ups with Stretching
Mixing warm-up exercises with stretching boosts flexibility and safety. Warming up first increases our range of motion and lessens soreness.
To mix warm-ups with stretching, start with 5-10 minutes of light cardio and dynamic stretching. Then do our regular stretching. This way, we maximize our ladder climbing safety and performance.
Conclusion: Making Stretching a Habit
As we wrap up our talk on stretches before using a ladder, it’s clear stretching is key for safety. It helps lower injury risks and makes climbing better.
Tips for a Successful Stretching Routine
To make stretching a habit, start with a simple routine and grow it over time. Wearing compression sleeves can also boost blood flow and ease muscle soreness.
Safe Practices for Ladder Climbing
Stretching is just the start. Using the right safety gear and accessories is also crucial for safe climbing. Make sure the ladder is in good shape and on a firm, level surface.
Preparation is Key
Being prepared is vital for safe ladder use. A regular stretching routine and the right gear, like safety gear, can greatly reduce risks. This ensures a successful climb.
By stretching regularly and using the right gear, we can have a safer and more efficient climb.
FAQ
What are the benefits of wearing compression sleeves while climbing a ladder?
Wearing compression sleeves can support your legs and improve blood flow. This can help reduce muscle strain. It makes climbing a ladder safer overall.
How do I choose the right compression sleeves for ladder climbing?
Look for sleeves that offer the right amount of compression. Choose materials that breathe and wick away moisture. Make sure they fit snugly but comfortably.
Can stretching before ladder use really prevent injuries?
Yes, stretching before climbing can lower injury risks. It boosts flexibility, balance, and gets you ready physically. Always stretch before using a ladder.
What are some essential stretches to perform before climbing a ladder?
Do upper body stretches like shoulder rolls and arm circles. Also, stretch your lower body with calf raises and leg swings. Don’t forget to stretch your core with torso twists and hip flexor stretches.
How often should I stretch before ladder use?
Stretch for 10-15 minutes before climbing. Try to stretch every day to stay flexible and fit.
Are there any specific ladder safety tips I should follow?
Yes, besides stretching, choose the right ladder for the job. Place it correctly and check your equipment regularly. These steps help prevent accidents.
Can I wear compression sleeves during other physical activities?
Yes, compression sleeves are good for many activities like running or cycling. They support your muscles and improve blood flow. Just pick the right compression and fit for your activity.
How do I incorporate stretching into my daily routine?
Start by setting a time each day for stretching. It could be in the morning or before bed. Gradually increase how often and long you stretch.
What are some common mistakes to avoid during stretching?
Avoid overstretching and skipping important muscles. Don’t rush your stretches. Listen to your body and adjust as needed.
Can compression sleeves help with ladder fall protection?
Compression sleeves aren’t a full substitute for safety gear. But, they can offer extra support and stability. This can help lower fall risks when using ladders.
Imagine you’re in the middle of painting, but knee pain stops you. Many face this when they have a meniscus tear. Climbing ladders then becomes a big challenge, affecting your project and mobility.
Dealing with ladder climbing and a meniscus tear is tough. We aim to give you expert advice to stay safe. Our tips help you avoid more injuries and keep working on your projects.
Key Takeaways
Safely assess your knee condition before climbing a ladder.
Understand the proper techniques for ladder climbing with a meniscus injury.
Learn how to prevent further knee damage while on a ladder.
Discover exercises to strengthen your knee before and after ladder climbing.
Explore alternative solutions for painting projects that minimize ladder use.
Understanding Knee Pain: Common Causes
Knee pain comes from many sources. It’s key to know these causes to avoid more harm. Activities like ladder climbing put extra stress on our knees. This can make existing problems worse or cause new ones.
Types of Knee Pain
Knee pain falls into two main groups: acute injuries and chronic conditions. Acute injuries happen suddenly, like from a fall. Chronic conditions develop over time, often from repeated strain or wear.
Some common knee pain types include meniscus tears, ligament sprains, and tendonitis. Knowing the exact type of pain helps find the right treatment and ways to prevent it.
Why Ladder Work Can Exacerbate Pain
Climbing ladders puts a lot of strain on the knees, especially when bending or standing on uneven ground. This strain can make knee problems worse or cause new ones like patellofemoral pain syndrome. The constant stress from ladder work can lead to knee inflammation and pain.
To reduce the risk of making knee pain worse, it’s important to understand how ladder work affects the knee. Knowing this helps us take steps to lessen the strain and protect our knees.
Safety Measures When Using a Ladder
To stay safe while using a ladder, we need to take certain steps. Ladder climbing can be dangerous, especially for those with knee problems. By picking the right ladder and setting it up right, we can lower the chance of accidents.
Choosing the Right Ladder
Picking the right ladder is key. Think about how high you need to go and how much weight the ladder can hold. For painting, a ladder with a strong base and non-slip feet is best. Look for ladders with comfy rungs and think about the material. Aluminum ladders are light, while fiberglass ladders are more stable.
Ladder Type
Material
Weight Capacity
Step Ladder
Aluminum
300 lbs
Extension Ladder
Fiberglass
250 lbs
Proper Ladder Setup
After picking the right ladder, setting it up correctly is crucial for safety. Make sure the ladder is on a solid, level ground. Having someone hold the ladder can also help. The ladder’s angle is important too; it should be at a 75-degree angle or one foot away from the wall for every four feet of ladder height.
By following these tips, we can make ladder climbing safer. Remember, safety steps are not just suggestions; they’re essential to avoid serious injuries.
Preparing for Your Painting Project
Getting ready for painting is more than just picking up supplies. It also means getting your body ready to avoid knee injury.
Stretching Exercises Before Climbing
Do some stretching exercises before you start climbing. This helps your knees a lot. Try:
Leg swings to loosen up your leg muscles
Knee bends to prepare your knees for the climb
Calf raises to strengthen your calf muscles, which support your knees
Essential Gear to Minimize Knee Strain
Wearing the right gear can also help your knees. Use:
Knee pads for extra cushioning and support
Supportive footwear to stabilize your knees
Comfortable clothing that allows for a full range of motion
With these steps, you can lower the chance of knee pain and injury while painting.
Painting Techniques to Reduce Knee Strain
There are ways to lessen knee strain while painting on a ladder. Painting can put a lot of pressure on our knees, especially if we have conditions like meniscus tears. Using the right techniques can help avoid making knee pain worse.
Opt for a Brush Instead of a Roller
Choosing a brush over a roller can help reduce knee strain. Brushes allow for more precise strokes and need less force, which is easier on the knees. Plus, they help you paint more accurately, so you might not have to climb the ladder as much.
Take Breaks to Relieve Pressure
It’s important to take breaks to ease knee strain. Stepping down from the ladder often can help take the pressure off your knees. These breaks are a chance to stretch and prevent knee pain.
By using these techniques, we can make painting easier on our knees. This is especially helpful for those with knee pain or meniscus tear symptoms.
When to Seek Medical Advice
Knee pain can really get in the way of doing things. There are times when you need to see a doctor. If you’re feeling pain in your knee while on a ladder, it’s important to know when to get help.
Signs Your Knee Pain Needs Attention
There are signs that mean you should see a doctor. These include:
Persistent pain that doesn’t improve with rest
Swelling or redness around the knee
Instability or feeling like the knee is going to give way
Warmth or tenderness to the touch
Loss of mobility or difficulty straightening the knee
If you notice any of these, it’s best to talk to a healthcare professional. Ignoring these signs can lead to further complications.
Recommended Specialists for Knee Pain
Choosing the right specialist is crucial for knee pain. Here’s a table of specialists you might consider:
Specialist
Description
Orthopedic Surgeon
Specializes in surgical treatments for musculoskeletal disorders, including knee pain. They can perform knee surgery if necessary.
Rheumatologist
Expert in diagnosing and treating rheumatic diseases that can cause knee pain.
Physical Therapist
Can help improve knee mobility and strength through targeted exercises.
An orthopedic surgeon is often the first choice for serious knee pain or when surgery is needed. They can give a detailed diagnosis and suggest the best treatment.
Home Remedies for Knee Pain Relief
Home remedies are a simple way to handle knee pain and boost your quality of life. We often seek easy, effective solutions to ease discomfort before seeking medical help. Two popular methods are ice and heat therapy, and over-the-counter pain relief.
Ice and Heat Therapy
Ice and heat therapy are easy yet effective for knee pain. Ice therapy reduces swelling and numbs pain, great for sudden injuries or pain spikes. Heat therapy, on the other hand, relaxes muscles and boosts blood flow, helping with long-term pain and stiffness.
To use ice, wrap an ice pack in a towel and apply it for 15-20 minutes, several times a day. For heat, try a warm bath, heating pad, or a warm cloth on your knee. It’s key to alternate between ice and heat based on your pain type.
“The application of ice or heat can significantly alter the pain perception and is a crucial component of a comprehensive pain management plan.”
Over-the-Counter Pain Relief Options
Over-the-counter (OTC) pain meds are also effective for knee pain. Common ones are acetaminophen and ibuprofen. Acetaminophen mainly relieves pain, while ibuprofen also fights inflammation.
Always follow the recommended dosage on the label.
Consult with a healthcare provider if you’re unsure about interactions with other medications.
Be aware of potential side effects and contraindications.
By adding these home remedies to your daily routine, you can better manage knee pain. This lets you enjoy activities like painting on a ladder more comfortably.
Prolonging Knee Health During Painting
To enjoy painting without harming our knees, we need to focus on knee health. Painting on a ladder can be tough on our knees, especially for those with a torn meniscus. By keeping our knees strong and moving regularly, we can protect them.
Tips for Maintaining Strong Knees
Keeping our knees strong involves exercises and careful movements. Physical therapy helps strengthen knee muscles, offering better support and injury prevention. Exercises like squats, lunges, and leg presses are helpful. Also, using the right ladder techniques and taking breaks can ease knee strain.
Exercise
Benefit
Frequency
Squats
Strengthens quadriceps and hamstrings
3 sets of 10 reps, 3 times a week
Lunges
Improves balance and strengthens knee muscles
3 sets of 10 reps (per leg), 3 times a week
Leg Presses
Targets quadriceps, hamstrings, and glutes
3 sets of 12 reps, 3 times a week
Importance of Regular Movement
Regular movement is key for healthy knees. Sitting still for too long can make knees stiff and painful, especially for those with injuries. Adding gentle exercises to our day keeps knees flexible and lowers injury risk. It’s also important to listen to our bodies and rest when needed.
By using these tips, we can keep our knees healthy while painting. Regular physical therapy, exercises, and careful movements are all important for a safe painting experience.
Equipment to Assist While Painting on a Ladder
To have a safe and fun painting time, the right tools are key. Using the right gear when painting on a ladder helps avoid knee pain and injuries.
Knee Pads and Supportive Gear
Knee pads are a simple yet effective way to protect your knees while working on a ladder. They offer cushioning and support, easing the pressure on your knees. Supportive gear, like knee braces, adds extra stability and protection. Pick knee pads or supportive gear based on your work and needed support.
Look for knee pads that are durable, comfortable, and adjustable. It’s also important to pick knee pads that fit your task. For example, if you’re working on a rough surface, you’ll need sturdier knee pads.
Type of Knee Pad
Features
Best For
Hard Cap Knee Pads
Durable, protective
Rough surfaces, heavy-duty work
Soft Cap Knee Pads
Comfortable, flexible
General painting, smooth surfaces
Gel Knee Pads
Cushioned, shock-absorbing
Long periods of kneeling, comfort
Choosing the Right Footwear
Along with knee pads, choosing the right footwear is crucial for stability and to prevent slipping on the ladder. Find shoes with good grip and a snug fit to keep your feet steady on the ladder.
Non-slip soles
Comfortable fit
Ankle support
By using knee pads with the right shoes, you can greatly lower the risk of knee injury. This makes painting more comfortable and enjoyable.
Final Thoughts: Enjoying Your Painting Project
As we finish talking about managing knee pain while painting on a ladder, remember it’s not just about the end. It’s also about how we feel during it. By taking care of our knees, we can enjoy painting more without worrying about injuries.
It’s important to love the journey of creating. We can do this by following the tips we’ve shared. From picking the right ladder to stretching, every step matters.
Practical Adjustments for Future Projects
For future painting, we can reduce knee pain. Use knee pads and supportive gear. Also, pick shoes that help you stay stable on the ladder.
Maintaining Knee Health
Keeping our knees healthy is key to enjoying painting and other activities. Regular exercise and movement help make our knees stronger. This makes it easier to handle ladder work.
FAQ
What are the symptoms of a meniscus tear?
Symptoms include knee pain, swelling, and stiffness. Sometimes, we hear a popping sound when it happens.
How can I prevent further injury while climbing a ladder with a meniscus tear?
To avoid more harm, choose the right ladder and set it up right. Wear knee pads and supportive shoes.
What are the treatment options for a torn meniscus?
Treatments include physical therapy, pain meds, and sometimes surgery. An orthopedic surgeon can help decide the best treatment.
Can I continue with my painting projects if I have a meniscus tear?
Yes, you can keep painting. Just be careful to avoid making the injury worse. Use proper techniques, take breaks, and wear supportive gear.
When should I seek medical advice for knee pain?
Get medical help if your knee pain, swelling, or stiffness doesn’t go away. An orthopedic surgeon can find the cause and suggest treatment.
What are some home remedies for knee pain relief?
Try ice and heat, over-the-counter pain meds, stretching, and keeping a healthy weight. These can help ease knee pain.
How can I maintain strong knees while painting on a ladder?
Keep your knees strong by doing physical therapy, wearing supportive gear, and taking breaks. This helps relieve knee pressure.
What type of equipment can assist me while painting on a ladder?
Use knee pads, supportive gear, and the right shoes. They help protect and support your knees while painting.
Have you ever wondered why kneeling on carpet can sometimes trigger or aggravate knee pain?
This common issue affects many, and understanding its root causes is crucial for finding relief. We explore the mechanics behind why kneeling, especially on carpet, can lead to discomfort in the knee joint. The act of kneeling increases mechanical compression, causing the kneecap to push against the thigh bone, which can lead to various types of pain.
We’ll delve into the conditions associated with this type of pain, such as bursitis, and discuss why carpet, despite its softness, can still cause issues. Understanding these factors is key to managing and alleviating knee pain.
Key Takeaways
Understanding the mechanical compression that occurs when kneeling.
Exploring common conditions associated with knee pain during kneeling.
Discussing why carpet can be a contributing factor to knee discomfort.
Outlining potential solutions and management strategies for knee pain.
Introducing the importance of addressing underlying causes for relief.
Understanding Why Kneeling on Carpet Causes Knee Pain
Many people experience knee pain when kneeling on carpet, but the reasons behind this discomfort are not always clear. To comprehend this issue, we need to examine the mechanics involved in kneeling and how carpet affects the knee joint.
The Mechanics of Kneeling
Kneeling is an activity that involves bending the knee joint, which can put pressure on various structures within the knee, including the patella (kneecap), surrounding soft tissues, and the joint itself. When we kneel, our body weight is concentrated on a relatively small area, increasing the pressure on the knee. This pressure can be exacerbated by the surface on which we kneel.
How Carpet Affects Knee Pressure
The type of surface we kneel on significantly affects the pressure distribution on our knees. Carpet, in particular, can create uneven pressure distribution due to its soft and sometimes uneven surface. Different types of carpet, such as plush, berber, low-pile, and high-pile, can affect knee pressure differently during kneeling activities. For instance, a soft, plush carpet might provide initial comfort but can also lead to uneven pressure distribution as the carpet fibers compress under body weight.
Additionally, the carpet padding underneath can influence the stability of the kneeling surface. If the padding is too soft or uneven, it can increase lateral stress on knee structures, potentially leading to discomfort or pain. Furthermore, carpet fibers can create friction against the skin covering the knee, potentially contributing to irritation and inflammation over time.
The uneven surface of carpet can lead to increased pressure on certain areas of the knee.
Different carpet types affect knee pressure in various ways during kneeling.
Carpet padding can influence the stability of the kneeling surface and potentially increase stress on knee structures.
Understanding these factors can help us appreciate why kneeling on carpet can cause knee pain. By recognizing the role of surface type and condition in knee health, we can take steps to mitigate potential discomfort and address underlying issues.
Common Conditions That Cause Knee Pain When Kneeling on Carpet
Knee pain when kneeling on carpet is often associated with specific knee conditions that affect different parts of the knee joint. Understanding these conditions is crucial for effective management and relief.
Prepatellar Bursitis (Housemaid’s Knee)
Prepatellar bursitis, commonly known as housemaid’s knee, is a condition characterized by inflammation of the prepatellar bursa. This bursa is located at the front of the kneecap and can become irritated due to repeated kneeling. Symptoms include swelling, redness, and pain at the front of the knee. Activities that involve frequent kneeling, such as carpet laying or cleaning, can exacerbate this condition. Treatment typically involves avoiding activities that aggravate the condition, applying ice to reduce inflammation, and using compression bandages.
Osteoarthritis of the Knee
Osteoarthritis is a degenerative joint disease that can cause knee pain when kneeling on carpet. It occurs when the cartilage that cushions the joints breaks down, leading to bone-on-bone contact and pain. Kneeling can be particularly painful as it puts additional stress on the knee joint. Symptoms may include pain, stiffness, and limited mobility. For those experiencing knee pain due to osteoarthritis, managing the condition through exercises, weight management, and proper footwear can help alleviate symptoms.
Patellar Tendonitis (Jumper’s Knee)
Patellar tendonitis, also known as jumper’s knee, occurs when the tendons connecting the kneecap to the shinbone become inflamed. This condition is common among athletes who participate in sports involving jumping. Symptoms include pain and swelling when bending or straightening the knee, particularly after periods of rest or activity. The angle of the knee when kneeling can create tension in the patellar tendon, potentially aggravating existing inflammation. Key factors that contribute to this condition include overuse of the tendon, improper kneeling techniques, and participation in sports that involve jumping and running.
Patellar tendonitis develops from overuse of the tendon connecting the kneecap to the shinbone, particularly in active individuals.
The angle of the knee when kneeling on carpet creates tension in the patellar tendon, potentially aggravating existing inflammation.
Symptoms include pain at the front of the knee that worsens with activity and after periods of rest.
Recognizing Symptoms of Serious Knee Problems
Recognizing the symptoms of serious knee problems is essential for timely intervention and effective treatment. When experiencing knee pain, especially when kneeling on carpet, it’s crucial to assess whether the discomfort is temporary or a sign of a more significant issue.
While it’s normal to be more cautious with activities that cause knee pain, avoiding certain positions or decreasing activity can actually exacerbate the problem over time. Muscles become weaker and tighter when not moved through their full range of motion, potentially leading to further functional loss.
Warning Signs That Require Medical Attention
Certain symptoms indicate a need for immediate medical evaluation. If you experience severe pain, swelling, or redness around the knee, or if you have difficulty straightening or bending your knee, it’s essential to consult a doctor. These signs could indicate a serious injury or condition that requires prompt attention.
Additionally, if knee pain persists even when not kneeling or interferes with daily activities, it may suggest a more serious underlying problem. We should be aware of these warning signs to address potential issues early.
Differentiating Between Temporary Discomfort and Chronic Issues
Understanding the duration, frequency, and intensity of knee pain can help determine whether the issue is temporary or chronic. Temporary discomfort typically resolves with rest and conservative measures, whereas chronic knee pain persists over time and may worsen without proper treatment.
Characteristics
Temporary Discomfort
Chronic Issues
Duration
Short-term, resolves with rest
Long-term, persists over time
Frequency
Occasional, related to specific activities
Frequent, may occur at rest
Intensity
Mild to moderate, manageable with self-care
Moderate to severe, interferes with daily activities
Tracking knee symptoms and recognizing patterns can help identify whether the issue is related to normal wear and tear or a developing chronic condition. By being proactive and understanding these differences, we can take appropriate steps to address knee pain effectively.
Immediate Relief Strategies for Knee Pain When Kneeling on Carpet
For individuals who frequently kneel on carpet, knee pain can be a significant issue, but immediate relief is possible through various methods. When engaging in activities that involve kneeling, such as gardening or home repairs, it’s essential to take proactive steps to minimize knee discomfort.
Immediate relief is crucial to prevent further irritation and potential long-term damage. We will explore several strategies to help alleviate knee pain when kneeling on carpet.
The RICE Method
The RICE method, which stands for Rest, Ice, Compression, and Elevation, is a widely recognized approach for reducing knee pain and inflammation. Resting the affected knee is the first step, followed by applying ice to reduce swelling. Using compression bandages can also help, and elevating the leg above heart level can reduce blood flow to the area, thereby minimizing inflammation.
By implementing the RICE method, individuals can significantly reduce their knee pain and create a conducive environment for healing.
Over-the-Counter Pain Management Options
Over-the-counter (OTC) pain management options are available for individuals experiencing knee pain when kneeling on carpet. Medications such as ibuprofen or acetaminophen can help alleviate pain and reduce inflammation. It’s essential to follow the recommended dosage and consult with a healthcare professional if the pain persists.
Proper Kneeling Techniques to Minimize Pain
Changing positions frequently while kneeling can help avoid discomfort. Switching from kneeling on both knees to one knee and then alternating sides can redistribute the weight and reduce pressure on the knee joint. Additionally, shifting to a position on hands and knees or extending one leg out to the side can provide relief.
By adopting proper kneeling techniques, individuals can minimize knee pain and continue with their activities without significant discomfort.
Protective Equipment and Modifications
Protective gear and modifications can make a substantial difference in comfort for those who frequently kneel on carpet. We will explore various options to reduce knee pain associated with kneeling.
When selecting knee pads for use on carpet, it’s crucial to consider the thickness, density, and pressure distribution properties. We review various kneeling pads designed specifically for carpet surfaces to help you make an informed decision.
The right knee pads can provide adequate cushioning and support, reducing pressure on the knee and alleviating pain. We discuss how to choose the best knee pads based on the type of knee pain and the duration of kneeling required.
Alternative Kneeling Surfaces and Cushions
Apart from knee pads, alternative kneeling surfaces and cushions can also provide relief. We examine various options, including DIY solutions using household items like rolled-up towels or yoga mats, which can be effective for temporary relief.
Different cushioning solutions work better for different carpet types, from plush to berber. We provide guidance on selecting the most appropriate cushioning for your specific carpet type and kneeling needs, ensuring comfort and reducing pain during various activities.
Strengthening Exercises to Reduce Knee Pain When Kneeling
The key to minimizing knee pain when kneeling lies in strengthening the muscles that support the knee joint. As our Hinge Health care team emphasizes, “movement is medicine” because it keeps the knees flexible and mobile, preventing muscle tightness that can lead to more pain.
To achieve this, we need to engage in exercises that support healing and strengthen the muscles, tendons, and ligaments around the knee. A well-rounded exercise program can significantly reduce knee pain when kneeling by improving overall knee health.
Quadriceps Strengthening Exercises
Strengthening the quadriceps is essential for knee health. Quadriceps strengthening exercises, such as straight leg raises and squats, can help stabilize the knee and reduce pain. For example, you can perform a straight leg raise by lying on your back, tightening your quadriceps, and lifting your leg about 12 inches off the ground. Hold for a few seconds and lower it back down. Repeat this exercise 10-15 times.
Another effective exercise is the wall squat, where you stand with your back against the wall and slide down into a squat position, keeping your knees bent at a 90-degree angle. Hold this position for 10-15 seconds and repeat 10 times.
Flexibility and Stretching Routines
In addition to strengthening exercises, flexibility and stretching routines play a crucial role in maintaining knee health. Gentle stretching can help improve flexibility and reduce stiffness. For instance, you can perform a hamstring stretch by sitting on the floor with your legs straight out in front of you. Lean forward, reaching for your toes, and hold for 15-30 seconds.
Another beneficial stretch is the quadriceps stretch, where you stand with one hand against a wall for balance, bend one knee, and grab your ankle with your hand. Gently pull your heel towards your buttocks until you feel a stretch in the front of your leg. Hold for 15-30 seconds and switch legs.
Low-Impact Exercises for Knee Health
Low-impact exercises are ideal for building knee strength and resilience without causing additional pain or damage. Activities like swimming, cycling, and elliptical training are excellent options because they minimize stress on the knee joint while promoting strength and flexibility. For example, swimming laps or participating in water aerobics can be very beneficial.
As knee health improves, you can progress from gentle movements to more challenging low-impact exercises. It’s essential to monitor pain levels during exercise to ensure that the activities are beneficial rather than harmful to knee recovery.
Lifestyle Modifications to Improve Knee Health
By incorporating a few key lifestyle modifications, individuals can reduce their knee pain and improve their overall well-being. These changes can be simple yet effective in minimizing knee stress and promoting healthier knees.
Weight Management for Reduced Knee Pressure
Maintaining a healthy weight is crucial for reducing knee pressure. Excess weight puts additional stress on the knee joint, exacerbating pain and potentially leading to further damage. By managing weight through a balanced diet and regular exercise, individuals can significantly reduce the pressure on their knees, thereby alleviating pain and improving knee health.
Posture and Movement Adjustments in Daily Activities
Adjusting posture and movement during daily activities can also play a significant role in reducing knee pain. This includes being mindful of body posture and alignment during sitting, standing, and walking to reduce unnecessary stress on the knee structures. For example, individuals can modify their gardening technique by squatting instead of kneeling or by raising their garden beds to a more comfortable height. Proper sitting, standing, and walking mechanics are essential for minimizing knee stress. Additionally, making ergonomic adjustments to common activities and household chores can help maintain functionality while protecting vulnerable knees.
We can make slight changes to our daily activities to reduce knee pain. For instance, taking more frequent breaks or altering the way we perform tasks can make a significant difference. By doing so, we can continue enjoying our favorite activities without exacerbating knee pain.
When to Seek Professional Help for Persistent Knee Pain
Understanding when to consult a healthcare professional about knee pain is crucial for effective treatment and relief. If you’re experiencing knee pain when kneeling on carpet that persists or worsens, it’s essential to recognize the signs that indicate a need for medical attention.
You should consult a doctor if you experience any of the following: a new significant trauma within the last 7 days, the knee is misshapen or immediately swollen following a recent injury, inability to put weight on the leg, the knee becomes immediately swollen, knee locks or gives way, or the knee is tender. Additionally, if your symptoms continue to affect your day-to-day life or don’t improve after a couple of weeks, it’s time to reach out to your healthcare provider.
Various specialists can treat knee conditions, including primary care physicians, orthopedists, rheumatologists, and physical therapists. Your healthcare provider can determine a treatment plan that works for your specific condition. If you’re experiencing symptoms of an infection, such as fever or warmth around the affected area, seek medical care promptly.
Preparing for your medical appointment by tracking your symptoms and having questions ready will ensure productive communication with your healthcare provider.
FAQ
What are the common causes of knee pain when kneeling on carpet?
We often experience knee pain when kneeling on carpet due to conditions such as prepatellar bursitis, also known as housemaid’s knee, or osteoarthritis of the knee joint. The pressure and friction from kneeling on hard surfaces, even with carpet, can irritate the bursae or joint, leading to inflammation and pain.
How can I reduce knee pain when kneeling on carpet?
To alleviate knee pain, we recommend using the RICE method (Rest, Ice, Compression, Elevation) and taking over-the-counter pain management options. Additionally, wearing knee pads designed for carpet work or using alternative kneeling surfaces and cushions can help minimize discomfort.
What exercises can help strengthen my knees and reduce pain when kneeling?
We suggest incorporating quadriceps strengthening exercises, flexibility and stretching routines, and low-impact exercises into our routine to improve knee health and reduce pain. Strengthening the muscles around the knee joint can help support and stabilize the joint, reducing the risk of injury.
When should I seek medical attention for knee pain when kneeling on carpet?
If we experience persistent or severe knee pain, swelling, or difficulty moving the knee joint, it’s essential to seek professional help. A doctor can diagnose the underlying cause of the pain and recommend appropriate treatment options to address the condition.
Can lifestyle modifications help improve knee health and reduce pain when kneeling?
Yes, maintaining a healthy weight, making posture and movement adjustments in daily activities, and avoiding repetitive strain on the knee joint can all contribute to improved knee health and reduced pain when kneeling on carpet.
Have you ever experienced a dull ache or sharp discomfort in your knees following a day of tending to your garden? You’re not alone.
Many gardening enthusiasts face this issue, and it’s not just the physical activity that’s to blame. We will explore the reasons behind this phenomenon and what you can do to alleviate it.
As we delve into the causes, you’ll discover that it’s often a combination of factors, including the physical demands of gardening and potential underlying health conditions.
Common health conditions that contribute to knee pain
Simple measures to prevent knee pain while gardening
Effective ways to alleviate knee pain after gardening
Importance of proper gardening techniques
Understanding Knee Pain After Gardening
For many gardeners, the pleasure of nurturing their gardens is marred by the discomfort of knee pain. Gardening involves a range of activities, from bending and kneeling to lifting and carrying, all of which can strain the knee joint. Understanding the causes and risk factors associated with knee pain after gardening is crucial for preventing and managing this common issue.
What is Gardener’s Knee?
Gardener’s Knee refers to the pain and discomfort experienced in the knee joint due to gardening activities. It is often associated with conditions such as tendinitis or bursitis, which are inflammation of the tendons and bursae, respectively. These conditions can result from repetitive strain or direct injury to the knee.
Common Causes of Knee Pain for Gardeners
Knee pain among gardeners can be attributed to several factors, including repetitive kneeling, bending, and heavy lifting. Activities such as weeding, planting, and pruning often require prolonged periods of kneeling or bending, putting pressure on the knee joint. Additionally, lifting heavy bags of soil or garden waste can strain the knee.
Some gardeners may also experience knee pain due to underlying conditions such as arthritis or previous injuries. For more information on random knee pain, you can visit this page.
Risk Factors That Increase Your Chances of Knee Pain
Several risk factors can increase a gardener’s likelihood of experiencing knee pain. These include age, as older individuals may have less resilient joints; previous knee injuries, which can predispose to further problems; and obesity, which puts additional strain on the knee joint. Understanding these risk factors can help gardeners take preventive measures.
Risk Factor
Description
Preventive Measure
Age
Older gardeners may have less resilient joints.
Regular exercise to maintain joint mobility.
Previous Knee Injuries
Past injuries can predispose to further knee problems.
Proper rehabilitation after injuries.
Obesity
Excess weight puts additional strain on the knee joint.
Maintaining a healthy weight through diet and exercise.
Preventing Knee Pain While Gardening
Preventing knee pain while gardening involves a combination of proper techniques, the right equipment, and regular breaks. By adopting these strategies, gardeners can enjoy their hobby without the subsequent discomfort.
Proper Body Mechanics for Gardening
Using proper body mechanics is crucial for minimizing the strain on your knees. This includes bending at the knees and hips, rather than the waist, and lifting with your leg muscles. When kneeling, consider using a kneeling pad or cushion to reduce pressure on your knee joints.
Essential Warm-Up Exercises Before Gardening
Before starting your gardening activities, it’s beneficial to do some warm-up exercises to loosen up your muscles and improve blood circulation. Simple exercises like leg swings, knee bends, and ankle rotations can help prepare your joints for the physical demands of gardening.
Taking regular breaks and changing your position can significantly reduce the risk of knee pain. Try to alternate between tasks that involve standing, sitting, and kneeling to give your knees a rest. This can also help prevent fatigue and improve overall comfort.
Ergonomic Gardening Tools and Equipment
Using ergonomic gardening tools can make a big difference in reducing strain on your knees. Look for tools with comfortable grips and long handles that allow you to work without bending or kneeling as much. Additionally, consider using raised garden beds or vertical gardening systems to minimize the need for kneeling or bending.
Effective Relief Strategies for Knee Pain After Gardening
The joy of gardening can be marred by knee pain if proper precautions are not taken. Fortunately, there are several effective relief strategies that can help alleviate knee pain after gardening.
Immediate Pain Relief Methods
Immediate relief from knee pain can be achieved through rest and the application of ice or heat. Resting the knee and avoiding activities that aggravate the pain are crucial first steps.
Rest and avoiding strenuous activities can significantly reduce knee pain. Additionally, elevating the knee can help reduce swelling.
When to Use Ice vs. Heat Therapy
Both ice and heat therapy can be effective for knee pain relief. Ice therapy is typically used to reduce inflammation and numb the pain, while heat therapy relaxes muscles and increases blood flow.
Use ice therapy for acute injuries and heat therapy for chronic pain or stiffness.
Over-the-Counter Pain Management Options
Over-the-counter (OTC) pain relievers such as ibuprofen or acetaminophen can help manage knee pain. However, it’s essential to follow the recommended dosage and consult a healthcare professional if necessary.
Gentle stretches and exercises can aid in recovery and prevent future knee pain. Straight leg raises and knee bends are examples of exercises that can strengthen the muscles around the knee.
Regular stretching can improve flexibility and reduce the risk of injury.
Creating a Knee-Friendly Garden Environment
A knee-friendly garden environment not only reduces the risk of knee pain but also enhances our overall gardening experience. By making a few simple adjustments, we can create a space that is both enjoyable and safe for our knees.
One key aspect is to incorporate ergonomic gardening practices and tools. Using raised beds or containers can significantly reduce the need to kneel or bend, thereby minimizing strain on the knees. Additionally, employing long-handled gardening tools can help avoid excessive bending and reaching.
We can also benefit from creating pathways that are easy to navigate and ensuring the garden is well-organized. This not only improves accessibility but also reduces the risk of accidents that could exacerbate knee pain.
By implementing these changes, we can enjoy our gardening activities while protecting our knee health. It’s about making our gardens work for us, not against us.
FAQ
What can we do to prevent strain on our knees while gardening?
We can prevent strain on our knees by using proper body mechanics, such as bending at the hips and lifting with our legs, and by taking regular breaks to rest and stretch.
Are knee pads effective in reducing knee pain while gardening?
Yes, knee pads can be very effective in reducing knee pain while gardening by providing cushioning and support to our knees, especially when kneeling or bending.
How can we reduce pressure on our knees when working in raised beds?
We can reduce pressure on our knees by using raised beds that are high enough to allow us to work without having to kneel or bend excessively, and by using ergonomic gardening tools that allow us to maintain good posture.
Can certain gardening activities exacerbate knee pain?
Yes, activities that involve repetitive kneeling, bending, or lifting can exacerbate knee pain, so we should try to vary our activities and take regular breaks to rest and stretch.
Are there any exercises we can do to help alleviate knee pain caused by gardening?
Yes, gentle stretches and exercises, such as straightening and bending our knees, can help alleviate knee pain caused by gardening, and we can also try strengthening our leg muscles to provide additional support to our knees.
How can we modify our gardening routine to accommodate arthritis or other health issues?
We can modify our gardening routine to accommodate arthritis or other health issues by using adaptive gardening tools, taking regular breaks to rest, and avoiding activities that exacerbate our condition.
Your smartwatch might be the key to solving your chronic knee pain mystery. While traditional pain management often relies on guesswork and memory-based tracking, modern smartwatch tracking for knee pain triggers offers a revolutionary approach to understanding and managing your discomfort through objective, real-time data collection.
Consider these compelling statistics: 70% of smartphone users actively track health data, yet knee pain affects 25% of adults daily. The troubling reality? Only 15% of people with chronic knee pain effectively identify their specific triggers. This gap between data availability and actionable insights represents a massive opportunity for those willing to embrace wearable technology knee pain solutions.
Smartwatch tracking for knee pain triggers transforms pain management from reactive to proactive. Instead of wondering why your knee hurts today, you can identify patterns, predict flare-ups, and make informed decisions about activities, treatments, and lifestyle modifications. This comprehensive guide reveals how to harness the power of digital health monitoring to take control of your knee pain journey.
By the end of this article, you’ll understand how to select the right device, configure essential tracking features, and interpret your data to achieve meaningful pain reduction. Whether you’re dealing with arthritis, sports injuries, or unexplained knee discomfort, the combination of modern technology and strategic tracking can provide the insights you need for better outcomes.
image showing person wearing smartwatch while experiencing knee pain, with data visualization overlay
Understanding Knee Pain Triggers
Common Knee Pain Triggers
Knee pain rarely occurs in isolation. Understanding the complex web of triggers that contribute to your discomfort is crucial for effective management. The most common triggers include weather changes and barometric pressure fluctuations, which affect up to 70% of people with arthritis. Physical activity levels and intensity create another significant category, where both overuse and underuse can contribute to pain patterns.
Sleep quality and duration play often-overlooked roles in pain perception and inflammation. Poor sleep increases inflammatory markers and reduces pain tolerance, creating a cycle where pain disrupts sleep, and poor sleep amplifies pain. Stress and emotional factors similarly impact pain through cortisol release and muscle tension patterns that affect knee joint mechanics.
Dietary inflammation triggers, including processed foods, excess sugar, and individual sensitivities, can increase systemic inflammation that manifests as joint pain. Finally, sedentary periods and poor posture create muscle imbalances and joint stiffness that contribute to knee discomfort.
Why Traditional Tracking Fails
Traditional pain tracking methods suffer from significant limitations that smartwatch tracking for knee pain triggers addresses. Memory bias represents the most significant challenge, as people tend to remember pain episodes inaccurately, often focusing on the most recent or severe experiences while forgetting gradual changes or mild episodes.
Inconsistent data collection occurs when manual tracking becomes burdensome, leading to gaps in information precisely when insights matter most. Traditional methods also miss environmental factors like weather patterns, air quality, or barometric pressure changes that significantly impact joint pain but aren’t consciously noticed.
Delayed symptom recognition means that by the time pain becomes noticeable enough to record, the underlying triggers may have occurred hours or days earlier, making correlation difficult or impossible.
The Digital Health Revolution
Modern digital health monitoring addresses these limitations through continuous, objective data collection that captures subtle changes before they become conscious symptoms. Real-time monitoring capabilities provide unprecedented insights into the relationship between daily activities, environmental factors, and pain patterns.
Artificial intelligence and machine learning algorithms can identify patterns that human observation might miss, while integration with healthcare systems allows for more informed medical consultations and treatment adjustments.
Split-screen comparison showing traditional pain diary vs. smartwatch data dashboard
How Smartwatch Technology Monitors Knee Pain
Key Sensors and Metrics
Modern smartwatches employ sophisticated sensor arrays that provide comprehensive health monitoring capabilities relevant to knee pain tracking app integration. Heart Rate Variability (HRV) monitoring offers insights into stress response, sleep quality, and recovery metrics that directly correlate with pain perception and inflammatory processes.
Accelerometer and gyroscope sensors track movement patterns, gait analysis, and activity intensity with remarkable precision. These sensors can detect subtle changes in walking patterns that might indicate increased pain or compensation behaviors before you consciously notice them. The data reveals whether you’re favoring one leg, altering your stride length, or reducing activity levels in response to discomfort.
Barometric pressure sensors, available in higher-end models, directly monitor atmospheric pressure changes that many people with joint pain report as triggers. This objective measurement eliminates guesswork about weather-related pain patterns and provides advance warning of potential flare-ups.
Sleep tracking capabilities monitor deep sleep duration, REM cycle quality, and sleep fragmentation patterns. Since sleep quality directly impacts pain perception and healing processes, this data proves invaluable for comprehensive pain management strategies.
Advanced Features for Pain Monitoring
Modern smartwatch health monitoring extends beyond basic metrics to include custom pain scale logging, medication reminder integration, and symptom correlation algorithms. These features transform your device from a simple activity tracker into a comprehensive pain management tool.
Predictive analytics capabilities use machine learning to identify patterns in your historical data, potentially alerting you to conditions that typically precede pain episodes. This proactive approach allows for preventive interventions rather than reactive treatments.
Data Collection Methods
Effective smartwatch tracking for knee pain triggers balances passive monitoring with active logging. Passive monitoring captures objective metrics like heart rate, activity levels, and sleep patterns without requiring conscious input. Active logging involves deliberately recording pain levels, symptoms, and relevant activities or treatments.
The frequency of data capture varies by metric, with heart rate monitored continuously, sleep tracked nightly, and activity measured throughout the day. Battery life considerations require balancing monitoring frequency with device usability, though most modern devices easily support comprehensive health tracking for 1-2 days between charges.
Data storage and privacy represent critical considerations, with most devices offering both local storage and cloud synchronization options. Understanding how your health data is stored, shared, and protected ensures you maintain control over sensitive information.
Apple Watch Series 9 stands out as the best overall choice for smartwatch tracking for knee pain triggers. Its native health app integration provides seamless data synchronization with iPhone health records, while ECG and blood oxygen monitoring offer additional health insights. The extensive ecosystem of third-party pain tracking apps makes it exceptionally versatile for customized monitoring approaches.
Samsung Galaxy Watch 6 excels as the premier Android option, featuring advanced sleep coaching capabilities and body composition analysis. The Samsung Health ecosystem provides comprehensive wellness tracking, while the device’s balanced features make it suitable for both casual users and fitness enthusiasts.
Fitbit Sense 2 represents the best choice for beginners, offering exceptional stress management tools and industry-leading sleep tracking. The simple interface reduces the learning curve, while the impressive battery life ensures consistent monitoring without frequent charging interruptions.
Garmin Venu 3 targets athletes and active individuals with advanced training metrics and recovery advisor features. The detailed health insights and excellent battery life make it ideal for users who prioritize comprehensive fitness and wellness monitoring.
Amazfit GTR 4 provides the best budget option, featuring 150+ sport modes and remarkable 14-day battery life. While offering fewer advanced features than premium alternatives, it delivers solid basic health monitoring at an accessible price point.
[Image 3: Side-by-side product photos of top 5 recommended smartwatches with key features highlighted]
Essential Apps for Knee Pain Tracking
Dedicated Pain Tracking Apps
PainScale offers comprehensive pain logging with trigger identification, doctor report generation, and medication tracking. The app’s strength lies in its detailed symptom documentation and correlation analysis, making it excellent for medical consultations and treatment optimization.
ArthritisPower provides arthritis-specific tracking with research participation opportunities and community support features. Users can contribute to clinical research while accessing evidence-based management strategies and connecting with others facing similar challenges.
My Pain Diary excels in detailed symptom logging with photo documentation capabilities, weather correlation, and robust export options. The app’s flexibility allows for customized tracking approaches that adapt to individual needs and preferences.
Integrated Health Platforms
Apple Health serves as a centralized data hub for iOS users, offering medical record integration, research app connectivity, and comprehensive privacy controls. The platform’s strength lies in its ability to aggregate data from multiple sources into coherent health insights.
Samsung Health provides Android users with activity and sleep tracking, stress monitoring, nutrition logging, and social features. The platform’s integration with Samsung devices creates a seamless ecosystem for comprehensive wellness management.
Google Fit offers cross-platform compatibility with activity goal setting, third-party app integration, and a simple interface that appeals to users seeking straightforward health tracking without complexity.
Specialized Wellness Apps
Headspace and Calm provide stress reduction techniques, sleep improvement programs, and pain management meditation that complement physical tracking with mental wellness strategies. These apps recognize the psychological components of chronic pain and offer evidence-based interventions for comprehensive management.
Proper device setup forms the foundation of effective smartwatch tracking for knee pain triggers. Begin with account creation and device pairing, ensuring stable connectivity between your smartwatch and smartphone. Configure health permissions carefully, enabling access to relevant health data while maintaining privacy preferences.
Establish data sharing preferences based on your comfort level and healthcare needs. Some users prefer local storage only, while others benefit from cloud synchronization for backup and cross-device access. Configure backup settings to prevent data loss and ensure continuity of your tracking efforts.
Creating Your Pain Tracking System
Develop a consistent daily logging routine that includes morning pain assessment, activity level documentation, evening symptom review, and medication adherence tracking. Consistency proves more valuable than perfection, so establish sustainable habits rather than overly ambitious tracking protocols.
Integrate environmental factor monitoring by connecting weather apps, enabling location-based triggers, and utilizing barometric pressure monitoring where available. Consider air quality factors if you live in areas with pollution concerns that might influence inflammatory responses.
Data Optimization Strategies
Maximize tracking accuracy through proper device positioning, regular calibration, consistent wearing habits, and effective battery management. Wear your device consistently on the same wrist, ensure proper fit without excessive tightness, and establish charging routines that minimize data gaps.
Implement weekly data review sessions to identify patterns, conduct correlation analysis, and prepare summaries for healthcare providers. Regular review transforms raw data into actionable insights that guide treatment decisions and lifestyle modifications.
Device unboxing and initial setup
App installation and configuration
Health permissions walkthrough
First-week tracking demonstration
Data interpretation basics
Interpreting Your Data: From Numbers to Insights
Key Metrics to Monitor
Activity Patterns reveal crucial correlations between step count and pain levels, exercise intensity thresholds, recovery time requirements, and movement quality indicators. Look for patterns where increased activity correlates with next-day pain increases, or where specific activity types consistently trigger symptoms.
Sleep Quality Indicators including deep sleep percentage, sleep efficiency scores, awakening frequency, and sleep debt accumulation provide insights into recovery processes and pain perception. Poor sleep often precedes increased pain sensitivity, while quality sleep supports healing and pain tolerance.
Stress and Recovery Metrics such as heart rate variability trends, resting heart rate changes, and stress score correlations offer objective measures of your body’s response to daily stressors and recovery status. Elevated stress often correlates with increased pain sensitivity and delayed healing.
Identifying Trigger Patterns
Environmental Correlations help identify weather pattern impacts, seasonal variation effects, humidity and pressure influences, and temperature sensitivity patterns. Many users discover that dropping barometric pressure precedes pain flares by 24-48 hours, allowing for proactive management strategies.
Lifestyle Factor Analysis examines diet and inflammation markers, hydration level impacts, medication timing effects, and social activity influences. These factors often interact in complex ways, with stress, poor sleep, and dietary choices creating cumulative effects on pain levels.
Creating Actionable Plans
Transform data insights into preventive strategies by establishing early warning systems, developing proactive intervention protocols, creating activity modification guidelines, and implementing stress management techniques. The goal is shifting from reactive pain management to proactive prevention based on your personal trigger patterns.
Treatment optimization uses data to guide medication timing adjustments, exercise prescription refinement, sleep hygiene improvements, and lifestyle modification priorities. Work with healthcare providers to adjust treatments based on objective data rather than subjective reports alone.
Dashboard screenshot showing comprehensive pain tracking data with highlighted patterns and insights
Advanced Features and Future Possibilities
Artificial Intelligence Integration
The future of smartwatch tracking for knee pain triggers lies in sophisticated AI integration that provides machine learning pattern recognition, predictive pain episode forecasting, personalized recommendation engines, and automated healthcare alerts. These systems learn from your individual patterns to provide increasingly accurate predictions and recommendations.
Integration with Healthcare Systems
Emerging capabilities include electronic health record synchronization, telemedicine platform connectivity, clinical decision support tools, and research data contribution. These integrations transform personal tracking data into valuable medical information that enhances clinical care quality.
Emerging Technologies
Next-generation wearables will incorporate advanced sensor development, continuous glucose monitoring integration, blood pressure monitoring capabilities, and inflammation biomarker detection. These technologies promise even more comprehensive health monitoring and pain management insights.
Community and Social Features
Future platforms will emphasize peer support networks, anonymous data sharing for research, community-driven insights, and gamification elements that encourage consistent tracking and healthy behaviors.
Futuristic concept image showing advanced smartwatch features and AI-powered health insights
Real-World Success Stories
Case Study: Marathon Runner
Sarah, a 34-year-old recreational marathoner, experienced chronic knee pain that threatened her running career. Traditional approaches failed to identify clear triggers until she implemented smartwatch tracking for knee pain triggers. Her data revealed that pain episodes consistently followed training sessions exceeding 75% maximum heart rate for more than 45 minutes.
By adjusting her training intensity and incorporating longer recovery periods, Sarah achieved a 40% reduction in pain episodes within eight weeks. The key insight: recovery time optimization proved more crucial than absolute training intensity for injury prevention.
Case Study: Office Worker
Michael, a 42-year-old software developer, struggled with desk job-related knee stiffness and occasional pain. His smartwatch data revealed that sedentary periods exceeding 90 minutes consistently preceded stiffness episodes. Implementing activity reminders and movement tracking led to improved mobility through regular movement breaks every hour.
The transformation was remarkable: by simply standing and walking for 2-3 minutes every hour, Michael eliminated 80% of his work-related knee discomfort within one month.
Case Study: Arthritis Patient
Linda, a 58-year-old with osteoarthritis, experienced unpredictable pain flare-ups that disrupted her daily activities. Through comprehensive wearable technology knee pain monitoring, she discovered that dropping barometric pressure preceded pain increases by 24-48 hours with 85% accuracy.
This insight allowed Linda to implement proactive strategies including anti-inflammatory medications, gentle exercise, and stress management techniques before pain episodes occurred, resulting in a 60% reduction in surprise pain flares.
Before/after comparison charts showing pain reduction and improvement metrics for each case study
Expert Tips and Best Practices
Maximizing Tracking Accuracy
Maintain consistent wearing schedules to ensure comprehensive data collection. Establish regular device calibration routines, ensure proper fit and positioning, and implement effective battery management strategies. Consistency in tracking habits proves more valuable than perfect execution.
Data Interpretation Guidelines
Focus on trends over daily fluctuations, as individual data points can be misleading. Consider multiple factor correlations rather than single-cause explanations. Maintain realistic expectations about timeline for pattern identification, typically requiring 2-4 weeks of consistent data collection.
Healthcare Provider Collaboration
Prepare relevant data summaries for medical appointments, focusing on clear trends and correlations rather than overwhelming providers with raw data. Discuss treatment modifications based on objective findings, and consider participating in research studies that might benefit from your tracking data.
Privacy and Security Considerations
Understand data sharing policies thoroughly, control information access according to your comfort level, protect sensitive health information through strong passwords and secure connections, and conduct regular privacy setting reviews to ensure continued protection.
Frequently Asked Questions
Q: How accurate is smartwatch tracking for knee pain? A: Smartwatches excel at tracking objective metrics like activity levels, sleep patterns, and heart rate variability, but pain assessment requires subjective input for complete accuracy. The combination of objective data and subjective reporting provides the most comprehensive insights.
Q: Can smartwatch data replace medical consultations? A: Absolutely not. Smartwatch tracking for knee pain triggers supplements professional medical care but never replaces it. The data should inform discussions with healthcare providers and support treatment decisions, not substitute for professional medical advice.
Q: How long before I see meaningful patterns in my data? A: Most users begin identifying meaningful patterns within 2-4 weeks of consistent tracking. However, complex correlations and subtle patterns may take 6-8 weeks to become apparent, particularly for multifactorial conditions.
Q: Are there privacy concerns with health data tracking? A: Yes, health data privacy requires careful consideration. Review privacy policies thoroughly, adjust sharing settings according to your comfort level, and understand how companies use, store, and protect your information.
Q: What’s the best smartwatch for knee pain tracking? A: The Apple Watch Series 9 offers the most comprehensive features for iOS users, while the Samsung Galaxy Watch 6 provides excellent capabilities for Android users. The best choice depends on your specific needs, budget, and smartphone ecosystem.
Conclusion
Smartwatch tracking for knee pain triggers represents a paradigm shift in pain management, transforming reactive approaches into proactive, data-driven strategies. The combination of objective monitoring, pattern recognition, and predictive insights empowers individuals to take control of their pain management journey like never before.
The key benefits include objective data collection that eliminates memory bias, pattern identification that reveals previously hidden triggers, improved healthcare provider communication through concrete data, and the transition from reactive to proactive pain management strategies.
Your journey toward better pain management begins with selecting the appropriate device based on your needs and budget, downloading recommended pain tracking apps, establishing consistent tracking routines, and scheduling follow-up consultations with healthcare providers to discuss your findings.
The technology exists today to revolutionize your approach to knee pain management. The question isn’t whether wearable technology knee pain solutions can help, but whether you’re ready to embrace a data-driven approach to reclaiming your mobility and quality of life.
Start your smartwatch tracking for knee pain triggers journey today. Your data-driven path to better pain management begins with a single step – and your smartwatch can track every one of them.
Take action now: research the smartwatch options that best fit your needs, download a pain tracking app, and begin collecting the data that will transform your understanding of your knee pain. Your future self will thank you for taking this important step toward better health and improved quality of life.
Disclaimer: This content is for educational purposes only and should not replace professional medical advice. Always consult with healthcare providers before making changes to your treatment plan based on tracking data.


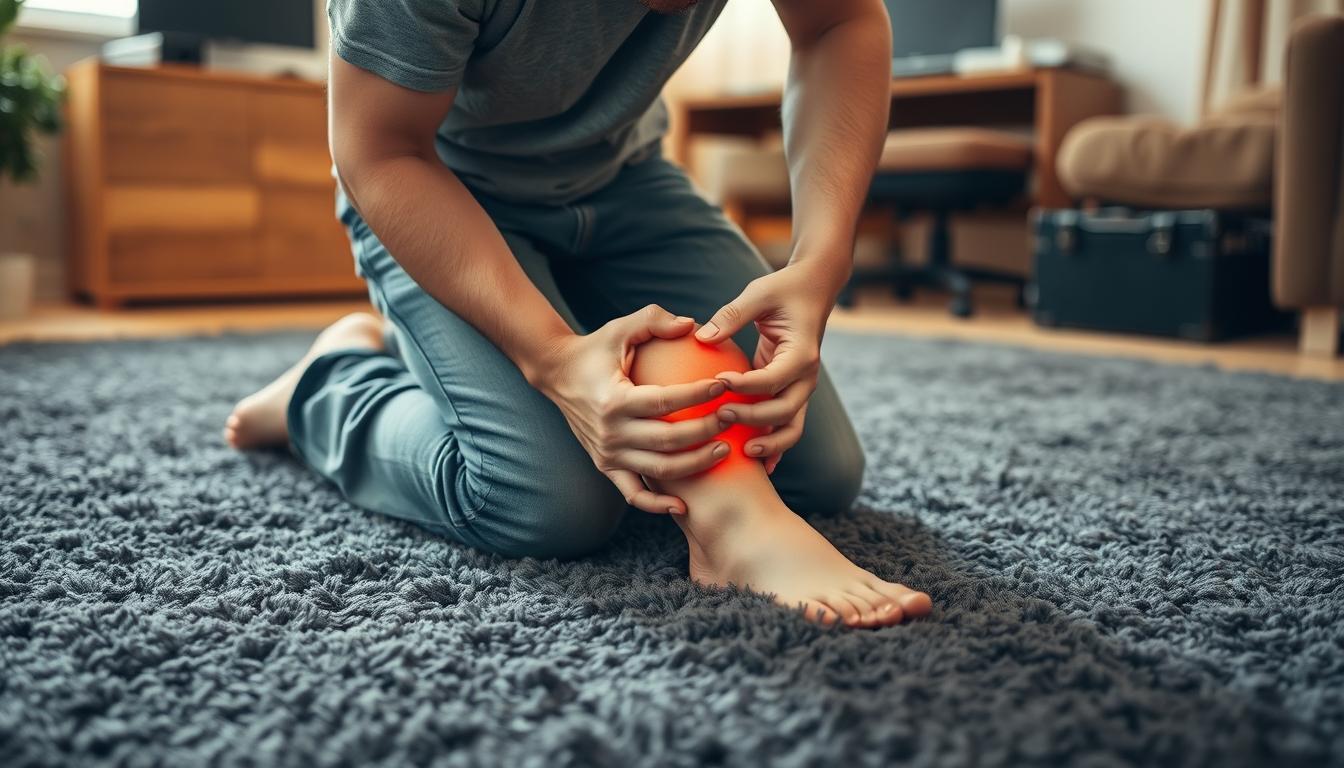


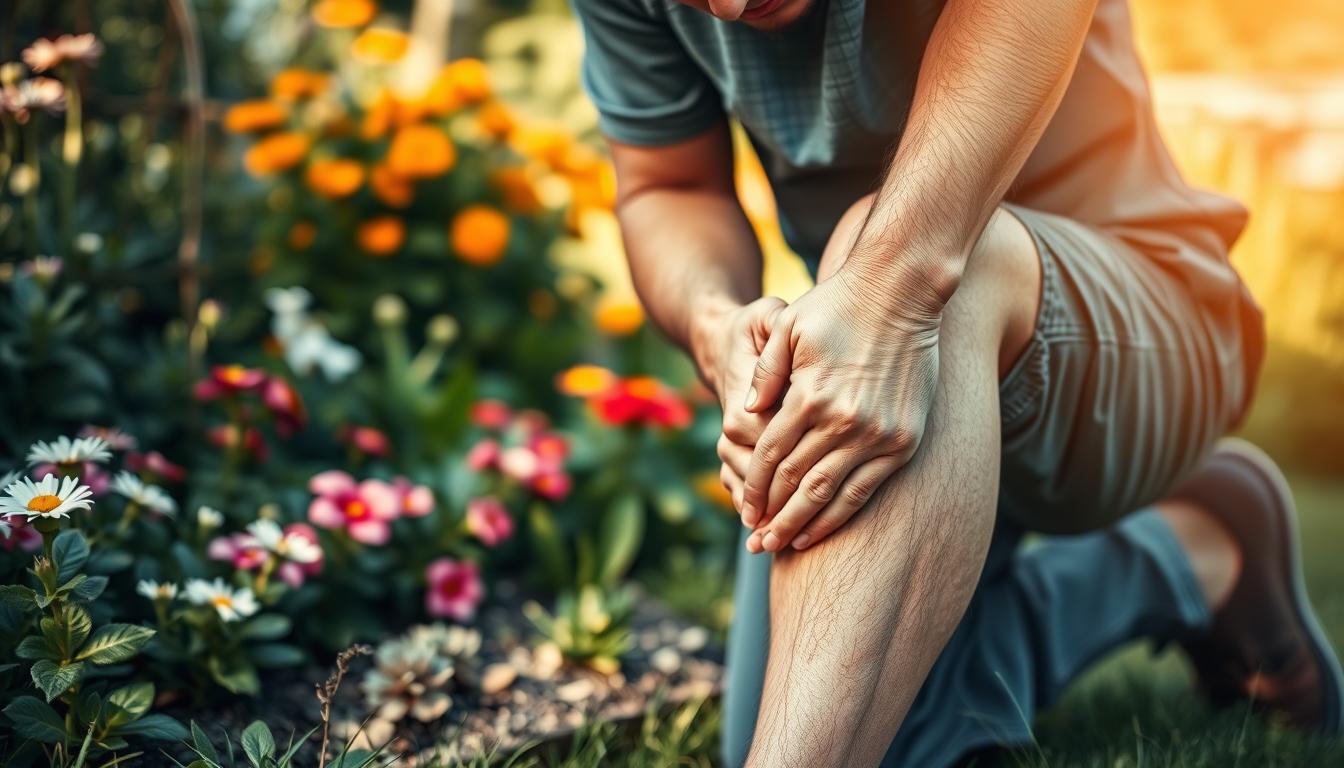


![[Image 1: Hero image showing person wearing smartwatch while experiencing knee pain, with data visualization overlay]](https://kneehurt.com/wp-content/uploads/2025/06/download-7.jpeg)
![[Image 2: Split-screen comparison showing traditional pain diary vs. smartwatch data dashboard]](https://kneehurt.com/wp-content/uploads/2025/06/download-4.jpeg)

![[Image 4: Smartphone screen showing multiple pain tracking apps with smartwatch companion displays]](https://kneehurt.com/wp-content/uploads/2025/06/download-5.jpeg)
![[Image 5: Dashboard screenshot showing comprehensive pain tracking data with highlighted patterns and insights]](https://kneehurt.com/wp-content/uploads/2025/06/download-17.png)
![[Image 6: Futuristic concept image showing advanced smartwatch features and AI-powered health insights]](https://kneehurt.com/wp-content/uploads/2025/06/download-6.jpeg)
![[Image 7: Before/after comparison charts showing pain reduction and improvement metrics for each case study]](https://kneehurt.com/wp-content/uploads/2025/06/download-18.png)