Last Updated: June 2025 | Reading Time: 12 minutes
Table of Contents
- Introduction
- Understanding Knee Pain Statistics
- 7 Most Common Causes of Knee Pain
- Comprehensive Diagnosis Guide
- Non-Surgical Treatment Options
- ACL/Meniscus Recovery Timeline
- Top 10 Strengthening Exercises
- Advanced Treatment Modalities
- Prevention Strategies
- When to See a Doctor
- Recovery Success Stories
- Frequently Asked Questions
Introduction
Struggling with knee pain relief? You’re not alone in this battle against one of the most debilitating joint conditions affecting modern adults. Recent studies reveal that 25% of adults experience knee discomfort daily, making it the second most common cause of chronic pain after back problems.
Whether you’re dealing with arthritis in knee joints, recovering from ACL injuries, or seeking effective swollen knee treatment, this comprehensive guide provides science-backed solutions to help you reclaim your mobility and active lifestyle.
From understanding the root causes of your discomfort to implementing proven knee injury rehabilitation protocols, we’ll walk you through everything you need to know about conquering knee pain once and for all. By the end of this guide, you’ll have a clear roadmap to recovery and the tools to prevent future injuries.
Quick Fact: The knee joint bears 3-4 times your body weight during normal walking and up to 7 times during activities like climbing stairs.
Understanding Knee Pain Statistics
The prevalence of knee pain has reached epidemic proportions, with significant implications for quality of life and healthcare costs:
- 54.4 million adults in the US alone suffer from doctor-diagnosed arthritis
- Knee osteoarthritis affects 1 in 8 adults over age 45
- Sports-related knee injuries account for 41% of all athletic injuries
- ACL tears occur in approximately 200,000 Americans annually
- Economic impact: Knee pain costs the US healthcare system over $27 billion annually
These numbers underscore the critical importance of understanding effective knee pain relief strategies and implementing proper knee injury rehabilitation protocols.
7 Most Common Causes of Knee Pain
Understanding the root cause of your knee pain is crucial for selecting the most effective treatment approach. Here are the seven most prevalent conditions:
1. Osteoarthritis (Degenerative Joint Disease)
Arthritis in knee joints represents the most common form of knee pain, affecting over 32.5 million adults in the United States. This degenerative condition occurs when the protective cartilage cushioning your knee joint gradually wears away.
Key Symptoms:
- Morning stiffness lasting 30+ minutes
- Pain that worsens with activity
- Grinding or crackling sounds (crepitus)
- Reduced range of motion
- Joint swelling and tenderness
2. ACL/Meniscus Tears (Sports Injuries)
ACL recovery challenges affect athletes and active individuals across all age groups. The anterior cruciate ligament (ACL) and meniscus tears often occur simultaneously, creating complex injury patterns requiring specialized treatment.
Common Mechanisms:
- Sudden direction changes during sports
- Landing awkwardly from jumps
- Direct collision impacts
- Pivoting with planted foot
3. Bursitis and Tendinitis (Overuse Injuries)
These inflammatory conditions develop from repetitive stress and overuse, particularly common in runners, cyclists, and individuals with physically demanding jobs.
Affected Areas:
- Prepatellar bursitis (housemaid’s knee)
- Infrapatellar bursitis (clergyman’s knee)
- Patellar tendinitis (jumper’s knee)
- Iliotibial band syndrome
4. Gout and Inflammatory Arthritis
Systemic conditions causing swollen knee treatment needs often present with acute, severe pain episodes accompanied by significant inflammation.
5. Patellofemoral Pain Syndrome (Runner’s Knee)
This condition affects the cartilage under the kneecap, causing pain during activities like climbing stairs, squatting, or prolonged sitting.
6. Ligament Sprains and Strains
Partial tears or overstretching of knee ligaments (MCL, LCL, PCL) create instability and pain requiring targeted rehabilitation.
7. Fractures and Dislocations
Traumatic injuries including patellar fractures, tibial plateau fractures, and knee dislocations require immediate medical attention.

Comprehensive Diagnosis Guide
Accurate diagnosis forms the foundation of effective knee pain relief. Healthcare providers use multiple assessment methods:
Physical Examination Tests
- Lachman Test: ACL integrity assessment
- McMurray Test: Meniscus tear detection
- Valgus/Varus Stress Tests: Collateral ligament evaluation
- Drawer Tests: Overall ligament stability
Imaging Studies
- X-rays: Bone fractures, arthritis changes
- MRI: Soft tissue injuries, cartilage damage
- Ultrasound: Real-time assessment of inflammation
- CT Scans: Complex fracture patterns
Laboratory Tests
- Synovial fluid analysis: Infection, crystal arthropathy
- Blood tests: Inflammatory markers, autoimmune conditions
Non-Surgical Treatment Options
The majority of knee pain conditions respond well to conservative treatment approaches. Here’s a comprehensive overview of proven knee pain relief methods:
RICE Protocol (Enhanced Version)
The traditional RICE method has evolved into a more comprehensive approach:
R – Rest (Relative)
- Avoid aggravating activities
- Maintain pain-free movement
- Use assistive devices when necessary
I – Ice Therapy
- Apply for 15-20 minutes every 2-3 hours
- Use during first 48-72 hours post-injury
- Consider contrast therapy (ice/heat alternation)
C – Compression
- Elastic bandage or knee sleeve
- Pneumatic compression devices
- Graduated compression for circulation
E – Elevation
- Raise knee above heart level when possible
- Use pillows for comfortable positioning
- Combine with ice therapy for maximum benefit
Physical Therapy Protocols
Evidence-based knee injury rehabilitation incorporates multiple therapeutic approaches:
Phase 1: Acute Management (0-2 weeks)
- Pain and swelling control
- Gentle range of motion exercises
- Muscle activation techniques
- Gait training with assistive devices
Phase 2: Recovery (2-6 weeks)
- Progressive strengthening exercises
- Flexibility and mobility work
- Balance and proprioception training
- Functional movement patterns
Phase 3: Return to Activity (6-12 weeks)
- Sport-specific movements
- Plyometric exercises
- Advanced strengthening protocols
- Injury prevention strategies
Injection Therapies
Modern injection treatments offer targeted swollen knee treatment options:
Corticosteroid Injections
- Rapid inflammation reduction
- 3-6 month pain relief duration
- Limited to 3-4 injections per year
- Best for acute inflammatory conditions
Hyaluronic Acid (Viscosupplementation)
- Joint lubrication enhancement
- 6-12 month symptom relief
- Particularly effective for mild-moderate osteoarthritis
- Series of 3-5 injections typically required
Platelet-Rich Plasma (PRP)
- Uses patient’s own healing factors
- Promotes tissue regeneration
- Emerging evidence for cartilage repair
- Minimal side effects
Stem Cell Therapy
- Regenerative medicine approach
- Shows promise for cartilage restoration
- Still investigational for most conditions
- Requires specialized centers

ACL/Meniscus Recovery Timeline
ACL recovery and meniscus rehabilitation follow predictable phases, though individual timelines may vary based on injury severity, surgical intervention, and patient factors.
Pre-Surgery Phase (If Applicable)
Duration: 2-6 weeks
- Reduce swelling and pain
- Restore range of motion
- Strengthen surrounding muscles
- Prepare for surgical intervention
Post-Surgery Recovery Phases
Phase 1: Protection and Healing (Weeks 1-6)
Goals:
- Wound healing and infection prevention
- Swelling management
- Range of motion restoration
- Muscle activation
Activities:
- Gentle passive range of motion
- Quadriceps setting exercises
- Straight leg raises
- Ankle pumps and circles
- Walking with crutches/walker
Phase 2: Strength and Mobility (Months 2-4)
Goals:
- Progressive strengthening
- Full range of motion achievement
- Normal gait pattern restoration
- Basic functional activities
Activities:
- Closed-chain strengthening exercises
- Stationary cycling
- Swimming (if cleared by physician)
- Balance and proprioception training
- Functional movement patterns
Phase 3: Advanced Rehabilitation (Months 4-6)
Goals:
- Sport-specific movement preparation
- Plyometric exercise introduction
- Advanced strengthening protocols
- Psychological readiness assessment
Activities:
- Running progression
- Agility drills
- Jump training
- Sport-specific skill practice
- Return-to-play testing
Phase 4: Return to Sport (Month 6+)
Goals:
- Full sport participation
- Injury prevention strategies
- Long-term maintenance programs
- Performance optimization
Criteria for Return:
- 90% strength compared to uninjured leg
- Full range of motion
- Successful completion of sport-specific tests
- Psychological readiness
- Physician clearance

ACL Recovery Milestones Timeline
| Recovery Phase | Timeframe | Primary Goals | Key Activities & Milestones |
|---|---|---|---|
| Phase 1: Immediate Post-Op | Days 1-14 | • Control swelling & pain • Restore full extension • Prevent blood clots | • Weight-bearing: Partial with crutches • Therapy: Cryotherapy 5x/day, quad sets, ankle pumps • Milestone: Achieve 0° extension by Day 7 |
| Phase 2: Early Mobility | Weeks 2-6 | • Restore 90°+ flexion • Normalize gait • Activate quadriceps | • Weight-bearing: Full without crutches (Week 4) • Therapy: Straight leg raises, heel slides, stationary bike • Milestone: Walk without limp by Week 6 |
| Phase 3: Strength Building | Weeks 6-12 | • Regain 80% quad strength • Achieve 120°+ flexion • Improve proprioception | • Exercises: Mini-squats, step-ups, resistance band walks • Cardio: Pool walking, elliptical • Milestone: Single-leg balance >30 sec by Week 10 |
| Phase 4: Functional Training | Months 3-6 | • Develop explosive power • Restore agility • Build endurance | • Plyometrics: Box jumps (6″), lateral hops • Agility: Ladder drills, cone shuffles • Milestone: Hop test >90% symmetry by Month 5 |
| Phase 5: Sport-Specific | Months 6-9 | • Return to sport drills • Build confidence • Prevent re-injury | • Sport Training: Cutting drills, jumping sequences • Cognitive Load: Decision-making during movements • Milestone: Pass 5+ return-to-sport tests by Month 8 |
| Functional Test | Passing Standard | Timeline | Purpose |
|---|---|---|---|
| Quadriceps Strength Test | ≥85% vs. healthy leg | Month 3-4 | Measures muscle recovery |
| Single-Leg Hop Test | ≥90% symmetry | Month 5 | Assesses power & stability |
| Agility T-Test | ≤11 seconds | Month 6 | Evaluates change-of-direction speed |
| IKDC Subjective Score | ≥90/100 | Month 7 | Patient-reported function |
| ACL-RSI Psychological Test | ≥75/100 | Month 8 | Assesses return-to-sport readiness |
Top 10 Strengthening Exercises
Targeted strengthening forms the cornerstone of effective knee pain relief and injury prevention. These evidence-based exercises address the most common muscle imbalances and weaknesses:
1. Straight-Leg Raises (Quadriceps Focus)
Target Muscles: Quadriceps, hip flexors Execution:
- Lie flat on back, one leg bent
- Keep affected leg straight, lift 6-8 inches
- Hold for 5 seconds, lower slowly
- Perform 3 sets of 10-15 repetitions
2. Hamstring Curls (Posterior Chain)
Target Muscles: Hamstrings, glutes Variations:
- Prone hamstring curls
- Standing hamstring curls
- Resistance band curls
- Stability ball curls
3. Wall Sits (Endurance Building)
Target Muscles: Quadriceps, glutes, calves Progression:
- Start with 30-second holds
- Progress to 2-minute holds
- Add single-leg variations
- Include heel raises
4. Step-Ups (Functional Mobility)
Target Muscles: Quadriceps, glutes, calves Key Points:
- Use 6-8 inch platform initially
- Focus on controlled movements
- Step up and down with same leg
- Progress to higher platforms
5. Resistance Band Walks
Target Muscles: Hip abductors, glutes Variations:
- Lateral band walks
- Monster walks
- Clamshells with resistance
- Standing hip abduction
6. Glute Bridges
Target Muscles: Glutes, hamstrings, core Progressions:
- Double-leg bridges
- Single-leg bridges
- Bridge with marching
- Weighted bridges
7. Calf Raises
Target Muscles: Gastrocnemius, soleus Variations:
- Double-leg calf raises
- Single-leg calf raises
- Seated calf raises
- Eccentric-focused training
8. Mini Squats
Target Muscles: Quadriceps, glutes, hamstrings Progression:
- Quarter squats
- Half squats
- Full squats (pain-free range)
- Single-leg squats
9. Leg Press (Machine-Based)
Target Muscles: Quadriceps, glutes, hamstrings Benefits:
- Controlled resistance
- Bilateral and unilateral options
- Progressive overload capability
- Reduced joint stress
10. Balance and Proprioception Training
Target: Neuromuscular control, stability Exercises:
- Single-leg standing
- BOSU ball training
- Wobble board exercises
- Eyes-closed balance challenges

Advanced Treatment Modalities
When conservative treatments prove insufficient, advanced therapeutic options provide additional knee pain relief possibilities:
Minimally Invasive Procedures
- Arthroscopic surgery: Joint cleaning, meniscus repair
- Osteotomy: Realignment procedures for arthritis
- Cartilage restoration: Microfracture, OATS procedures
- Ligament reconstruction: ACL, PCL repair/replacement
Emerging Technologies
- Radiofrequency ablation: Nerve pain treatment
- Shockwave therapy: Tendinopathy management
- Laser therapy: Inflammation reduction
- Electromagnetic field therapy: Healing acceleration
Alternative Medicine Approaches
- Acupuncture: Pain modulation, inflammation reduction
- Massage therapy: Muscle tension relief, circulation
- Chiropractic care: Joint mobility, alignment
- Herbal supplements: Natural anti-inflammatory compounds
Prevention Strategies
Preventing knee injuries proves far more effective than treating them after they occur. Implement these evidence-based strategies:
Weight Management
Every pound of body weight creates 3-4 pounds of pressure on knee joints during walking. Key strategies include:
- Maintain healthy BMI (18.5-24.9)
- Combine cardiovascular exercise with strength training
- Focus on sustainable dietary changes
- Consider professional nutritional counseling
Proper Footwear Selection
Your shoes significantly impact knee joint stress:
- Replace running shoes every 300-500 miles
- Choose activity-appropriate footwear
- Consider custom orthotics for biomechanical issues
- Avoid high heels for extended periods
Cross-Training for Athletes
Diversifying physical activities reduces overuse injury risk:
- Incorporate swimming or cycling
- Include flexibility and mobility work
- Practice sport-specific injury prevention
- Schedule adequate recovery periods
Workplace Ergonomics
Occupational factors contribute to knee pain:
- Use proper lifting techniques
- Take regular movement breaks
- Adjust workstation height appropriately
- Wear supportive footwear for standing jobs
Environmental Modifications
Simple home and workplace changes reduce injury risk:
- Install handrails on stairs
- Use non-slip mats in bathrooms
- Ensure adequate lighting
- Remove tripping hazards

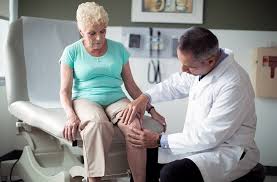
When to See a Doctor
Recognizing when professional medical evaluation becomes necessary ensures appropriate and timely knee pain relief:
Immediate Medical Attention Required
- Severe pain following trauma
- Obvious deformity or instability
- Complete inability to bear weight
- Signs of infection (fever, warmth, redness)
- Numbness or circulation problems
Schedule Appointment Within 1-2 Days
- Moderate pain persisting >48 hours
- Significant swelling not responding to RICE
- Limited range of motion
- Recurring episodes of knee giving way
- Pain interfering with sleep or daily activities
Routine Consultation Appropriate
- Mild pain persisting >2 weeks
- Gradual onset of stiffness
- Preventive evaluation for high-risk activities
- Optimization of existing treatment plans
Recovery Success Stories
Real patient experiences provide hope and practical insights for your knee injury rehabilitation journey:
Case Study 1: Marathon Runner with IT Band Syndrome
Background: 35-year-old recreational marathoner developed lateral knee pain Treatment: Physical therapy, gait analysis, strength training Outcome: Return to pain-free running within 8 weeks Key Factors: Consistent home exercise program, addressing hip weakness
Case Study 2: Weekend Warrior ACL Tear
Background: 42-year-old soccer player suffered non-contact ACL injury Treatment: ACL reconstruction followed by 6-month rehabilitation Outcome: Successful return to recreational soccer Key Factors: Pre-surgery conditioning, dedicated post-op compliance
Case Study 3: Osteoarthritis Management
Background: 58-year-old with bilateral knee osteoarthritis Treatment: Weight loss, exercise therapy, hyaluronic acid injections Outcome: 70% pain reduction, improved function Key Factors: Multimodal approach, lifestyle modifications
Frequently Asked Questions
Q: How long does knee pain typically last?
A: Duration varies significantly based on the underlying cause. Acute injuries may resolve in 2-6 weeks with proper treatment, while chronic conditions like arthritis require ongoing management.
Q: Is it safe to exercise with knee pain?
A: Low-impact, pain-free exercises are generally beneficial. Avoid activities that increase pain or swelling. Consult a healthcare provider for personalized recommendations.
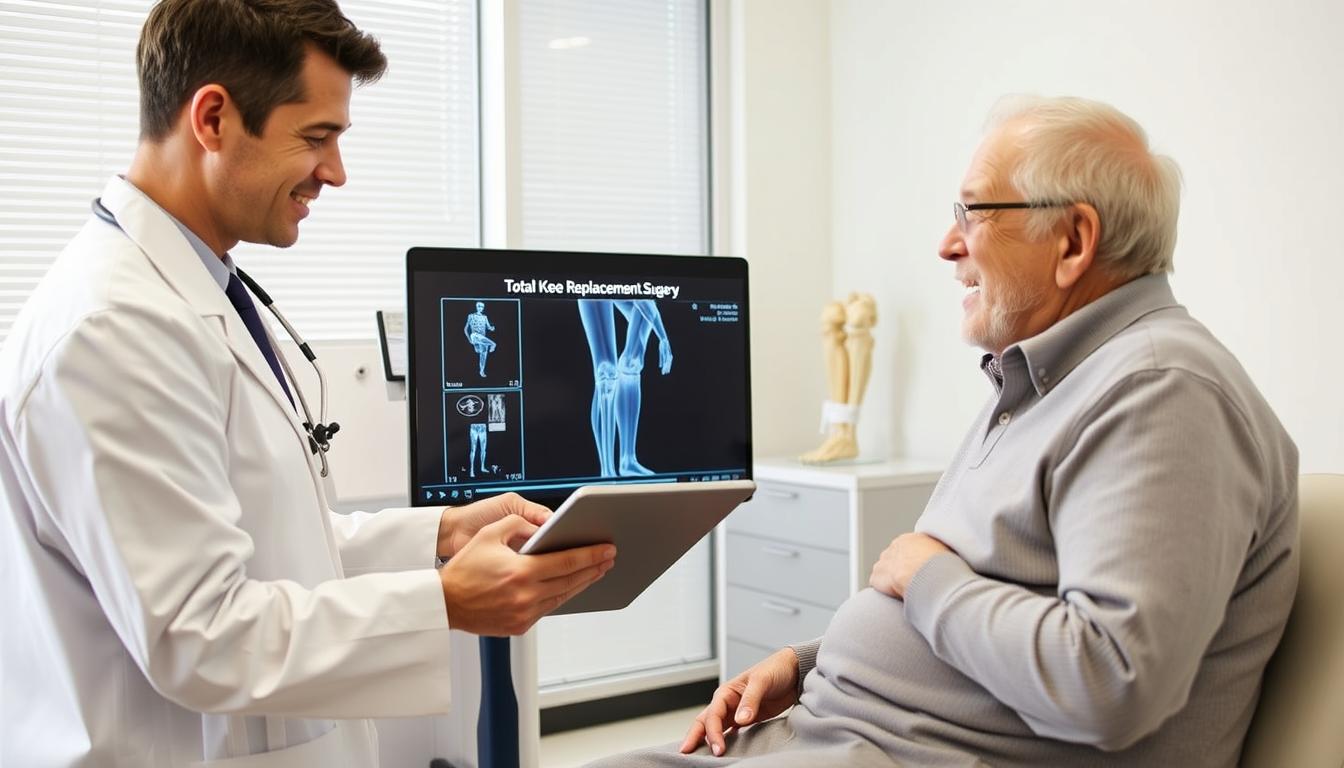
Q: When should I consider knee replacement surgery?
A: Knee replacement typically becomes an option when conservative treatments fail to provide adequate knee pain relief and quality of life is significantly impacted.
Q: Can diet affect knee pain?
A: Yes, anti-inflammatory foods may help reduce knee pain, while excess weight increases joint stress. Maintaining a healthy weight is crucial for joint health.
Q: Are there any supplements that help with knee pain?
A: Glucosamine, chondroitin, and omega-3 fatty acids show modest benefits in some studies. Consult your healthcare provider before starting any supplements.
Conclusion
Achieving lasting knee pain relief requires a comprehensive understanding of your condition, commitment to evidence-based treatments, and patience with the recovery process. Whether you’re dealing with arthritis in knee joints, navigating ACL recovery, or implementing swollen knee treatment strategies, the key lies in early intervention and consistent application of proven therapeutic approaches.
Remember that successful knee injury rehabilitation is rarely a solo journey. Work closely with healthcare professionals, stay committed to your exercise program, and don’t hesitate to seek help when needed. With the right approach and dedication, most people can achieve significant improvement in their knee pain and return to the activities they love.
Take Action Today: Start with the exercises outlined in this guide, implement the prevention strategies that apply to your situation, and schedule a consultation with a healthcare provider if your pain persists or worsens.
Pro Tip: Consistent rehabilitation beats chronic pain every time. Start your knee pain relief journey today with small, manageable steps that build toward long-term success.
External Resources
- Mayo Clinic: Knee Pain Causes and Treatment
- Arthritis Foundation: Osteoarthritis Management
- American Academy of Orthopaedic Surgeons: Knee Conditions
- American Physical Therapy Association: Knee Pain Resources
For more comprehensive injury prevention tips and advanced rehabilitation techniques, explore our Ultimate Knee Health Hub.
Disclaimer: This content is for educational purposes only and should not replace professional medical advice. Always consult with a healthcare provider before starting any new treatment program.